Introduction: When is the Best Time to Rotavate a Garden?
Timing is everything when deciding the best time to rotavate your garden.. If you start too early, you risk disrupting the soil structure. But if you wait too long, your plants may struggle to establish. So, how do you strike the perfect balance?
The ideal time to rotavate depends on your soil type, the season, and what you plan to grow. Rotavating at the right time ensures loose, well-aerated soil that promotes strong plant growth.. However, poor timing can leave you with compacted, waterlogged soil that’s difficult to manage..
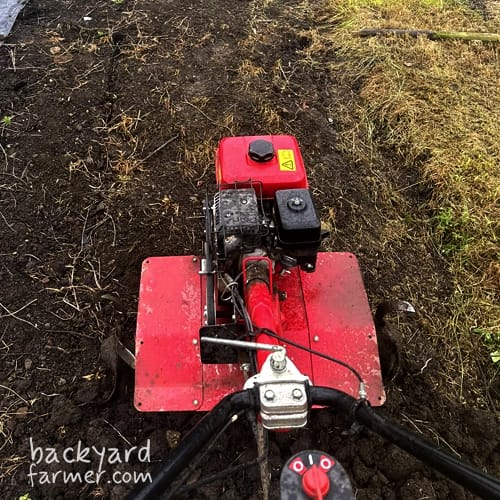
In this guide, we’ll break down:
- The best time to rotavate for different soil types
- Why rotavating wet soil is a big mistake
- Step-by-step tips for successful rotavating
By the end of this guide, you’ll understand exactly when and how to rotavate for the best results. to set your garden up for success. Let’s dig into the best time to rotavate your garden!
Continue your garden preparation & planning journey
- Spring vegetable planting guide (UK) – Learn what to sow and when in the UK, helping you plan your beds right after soil prep
- UK vegetable planting calendar (interactive tool) – Use this living calendar to know the best sowing and transplanting dates for your climate and crops
- How to build raised garden beds from pallets – Once the soil is prepped, this guide shows how to set up tidy, efficient beds using reclaimed materials
What is Rotavating?
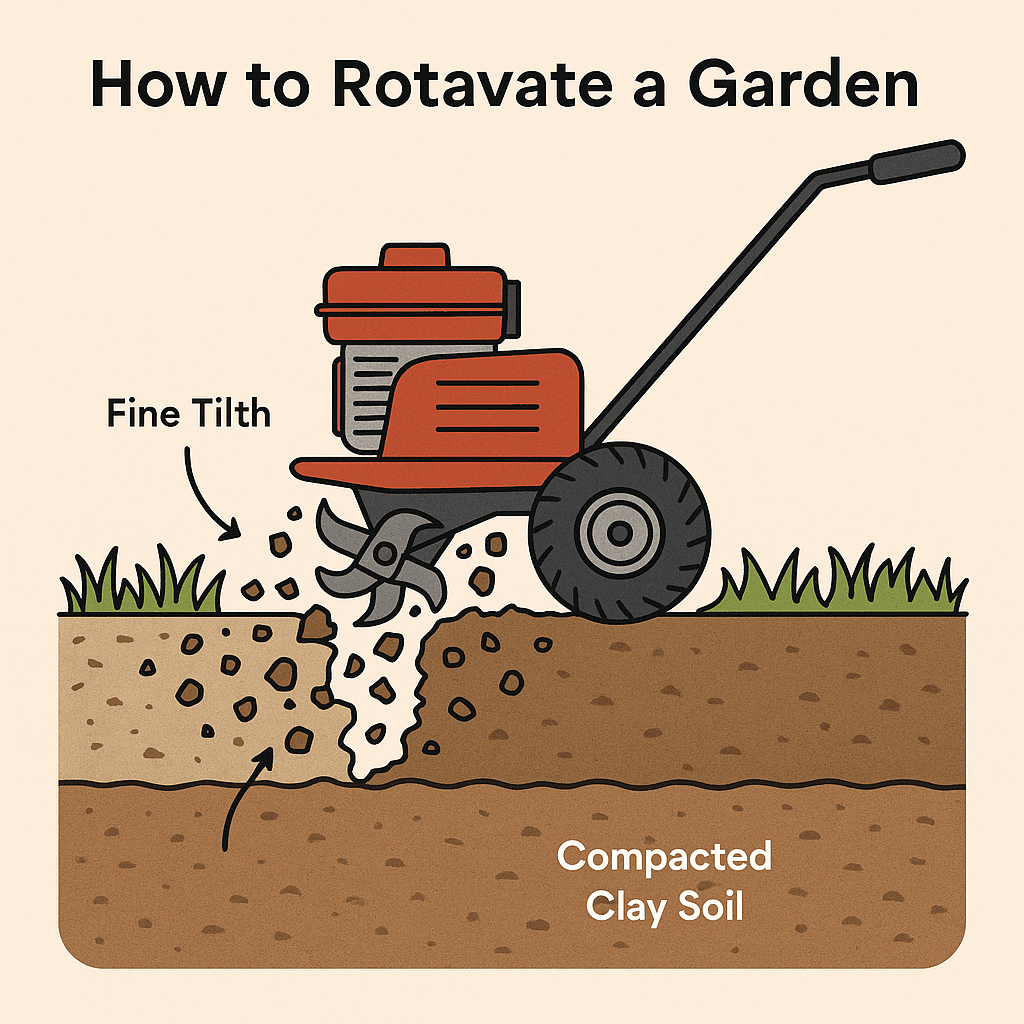
Giving your plants the best start begins with properly preparing your garden soil. Rotavating, also called soil tilling or garden cultivation, works by turning over and aerating the soil using a rotavator, a powerful machine designed to break up compacted ground. This technique enhances soil structure and drainage, making it particularly useful for garden beds, allotments, and lawns.
Why is Rotavating Important?
- Breaks up compacted soil, allowing roots to grow more easily.
- Enhances drainage, reducing waterlogging issues.
- Mixes in organic matter like compost or manure, enriching the soil.
- Prepares the ground for planting by creating a fine tilth.
Rotavating vs. Tilling: What’s the
| Method | Best For | Depth | Equipment |
|---|---|---|---|
| Rotavating | Breaking up compacted soil | Deeper (6-12 inches) | Rotavator (heavy-duty machine) |
| Tilling | Mixing in compost and nutrients | Shallower (3-6 inches) | Garden tiller (lighter tool) |
When Should You Rotavate?
- Before planting vegetables or new lawns.
- After removing old turf or overgrown weeds.
- When the soil is dry enough to break apart properly.
Understanding when to rotavate is just as crucial as knowing how to do it. Rotavating at the right time ensures maximum soil aeration and prevents compacting issues. Although rotavating boosts soil health, it’s not always the best option. Excessive rotavating can disrupt soil balance, so it’s best to use this method only when necessary.
Getting the timing right is essential—rotavating at the wrong time can harm soil health instead of improving it. In the next section, we’ll cover exactly when to rotavate your garden based on soil type and seasonal conditions.
What Does It Mean to Rotavate a Garden?
To rotavate a garden means using a rotavator — a powered tool with rotating blades — to break up and loosen compacted soil. It’s a great way to prep your ground for planting, especially if you’re starting a new vegetable bed or lawn from scratch.
Rotavating helps:
- Improve soil aeration and drainage
- Mix in compost, manure, or other amendments
- Create a fine texture for seed sowing or turfing
💬 Tip: The best time to rotavate is when your soil is damp and crumbly — not dry, not soggy.
When is the Best Time to Rotavate a Garden?
The best time to rotavate a garden depends on soil type: clay soil in autumn, sandy soil in spring, and wet soil should never be rotavated. Have you ever rotavated your garden only to find the soil turned into a compacted mess? This is why selecting the best time to rotavate is essential for preventing compaction and maintaining healthy soil structure.
Best Time to Rotavate Your Garden: Clay, Sandy, and Wet Soil
Rotavating at the wrong time can compact the soil, disrupt natural soil organisms, and make it harder for plants to take root. Your soil type and local weather conditions play a key role in determining the ideal time to rotavate. For more detail about soil types, check out this article from the RHS website here.
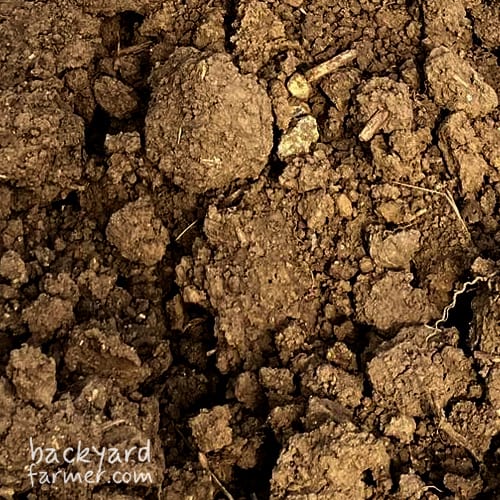
Clay Soils
- Best time: Autumn (before winter sets in).
- Why? Rotavating in autumn allows the soil to settle over winter, breaking down naturally through frost action.
- Avoid spring rotavating, as wet clay compacts easily, reducing aeration.
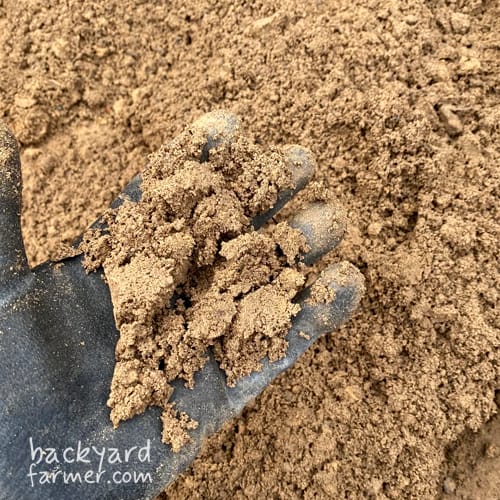
Light (Sandy) Soils
- Best time: Spring (after winter rains have drained).
- Why? Since sandy soils drain quickly, they must be dry enough to break up without losing too many nutrients. Rotavating in spring gets the soil ready for planting while minimizing nutrient loss.
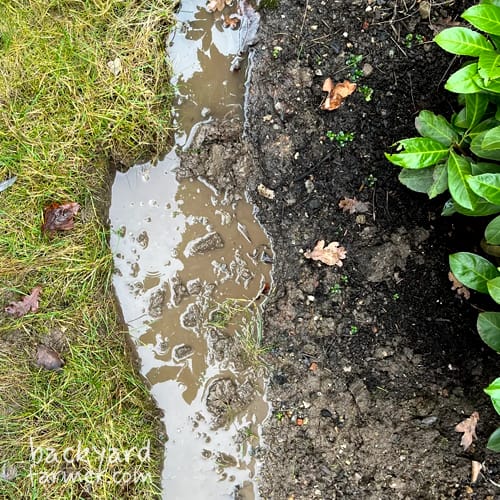
Wet or Waterlogged Soil
- Best time: Never.
- Why? Rotavating wet soil creates dense clumps and compacts the ground, making it harder for roots to penetrate. To check if the soil is ready, grab a handful—if it crumbles easily, it’s in the right condition for rotavating. Proper moisture levels are just as important as timing.
Quick Reference Table
| Soil Type | Best Time to Rotavate | Why? |
|---|---|---|
| Clay Soil | Autumn | Prevents compaction, improves structure |
| Light Soil | Spring | Ensures dryness for proper breakup |
| Wet Soil | Never | Prevents clumping and soil damage |
Key Takeaways
- Always check soil moisture before rotavating. If it sticks together when squeezed, wait until it dries out.
- Clay soils benefit from winter frost breakdown, while light soils thrive when rotavated in spring.
- Avoid rotavating just before heavy rain—too much water can undo your efforts and leave the soil overly soggy, making planting difficult. In areas with unpredictable weather, it’s best to check the forecast and choose a dry window.
In the next section, we’ll cover how to properly rotavate your garden step by step.
How to Rotavate a Garden (Step-by-Step Guide)
To rotavate a garden, first clear debris, check soil moisture, choose the right rotavator, set the depth, and rotavate in overlapping rows for even soil texture. Properly rotavating your garden can mean the difference between healthy, productive soil and a garden that struggles to grow. When done correctly, it boosts aeration and structure, but if done poorly, it can leave you with compacted or uneven soil.
For successful soil preparation, it’s essential to understand how to rotavate a garden properly while steering clear of common mistakes. Follow these steps carefully to get the best results.
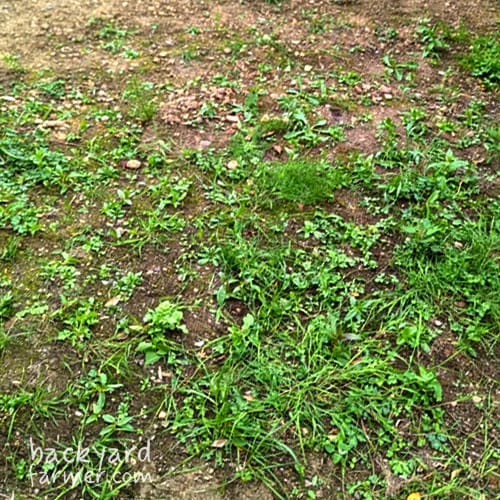
1: Clear the Area
- Remove all weeds, rocks, and debris before starting.
- If weeds are persistent, consider using a hoe or weed suppressant fabric.
2: Check Soil Moisture
Grab a handful of soil and squeeze it:
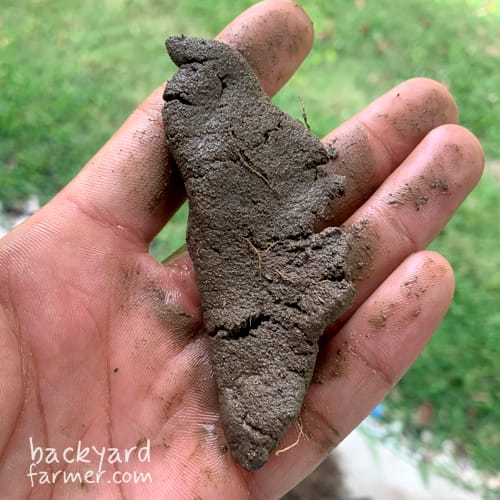
- If it crumbles, it’s ready to rotavate.
- If it sticks together like the example, it’s too wet—wait for drier conditions. However, if it’s extremely dry and dusty, lightly water the area a day before rotavating to prevent excessive soil displacement.
3: Choose the Right Rotavator
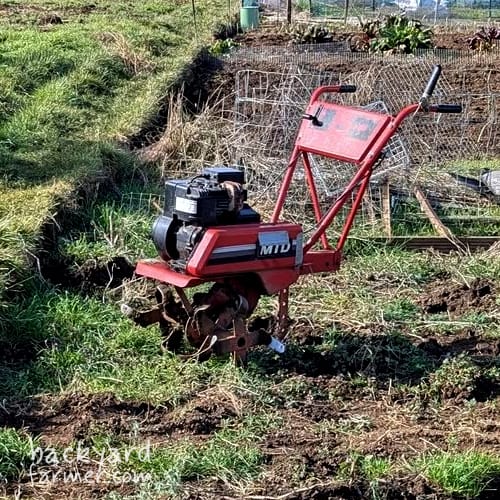
- Light-duty rotavator: Best for small gardens with loose soil.
- Heavy-duty rotavator: Ideal for compacted or large areas.
- Make sure the rotavator’s blades are sharp and free of debris for maximum efficiency.
4: Set the Correct Depth
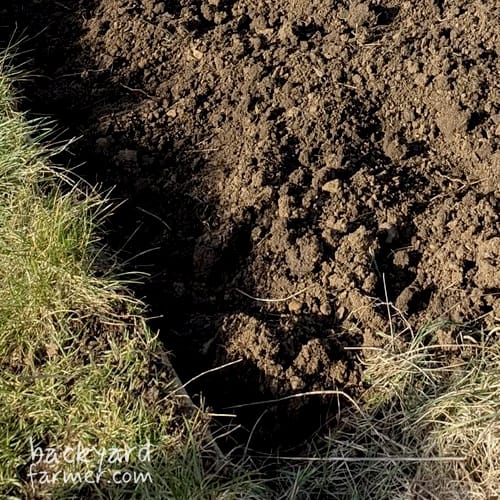
- Vegetable beds & flower gardens: 6-8 inches deep.
- Lawns & turf preparation: 3-5 inches deep.
- Avoid over-rotavating, as it can disrupt soil structure.

5: How to Use a Rotavator: Step-by-Step
- Work in straight, overlapping rows to ensure even coverage—this prevents patchy soil and helps maintain an even texture for planting.
- Maintain a steady, controlled pace and allow the rotavator to do the work efficiently.
- If soil is too compacted, go over it in multiple passes.

6: Add Organic Matter
- After rotavating, mix in compost, manure, or soil amendments.
- This improves nutrient availability and soil health.
7: Level and Rake the Soil
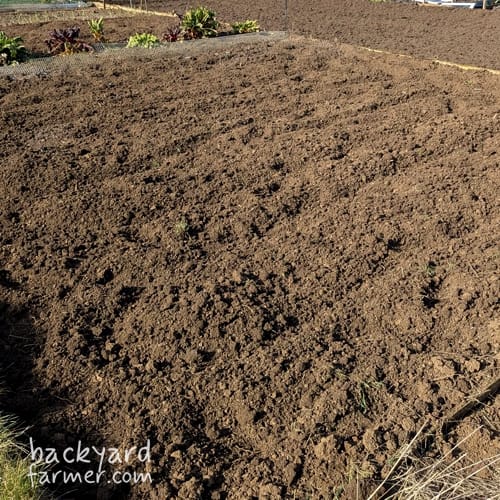
- Use a rake to smooth the surface, breaking up any large clumps.
- Allow the soil to settle and stabilize for a few days before planting.
Key Takeaways
- Always clear debris and weeds before rotavating.
- Check soil moisture—never rotavate wet soil.
- Use the right rotavator for your soil type and depth needs.
- Incorporate organic matter after rotavating for improved soil health.
In the next section, we’ll cover common mistakes to avoid when rotavating your garden.
Common Mistakes to Avoid When Rotavating
Rotavating can improve soil structure and boost plant growth—but if done incorrectly, it can lead to compacted, lifeless ground that’s difficult to recover from. Many beginners unknowingly make mistakes that can undo their efforts. Steering clear of these common mistakes when rotavating will help preserve soil health and prevent avoidable damage. Here are the top mistakes to avoid when rotavating your garden, along with simple fixes to keep your soil in top condition.
1. Rotavating Wet Soil
- Why it’s a problem: Wet soil clumps together, leading to compaction rather than aeration.
- How to avoid it: Squeeze a handful of soil—if it sticks together, it’s too wet to rotavate. Give it time to dry before proceeding.
2. Rotavating Too Deeply
- Why it’s a problem: Digging too deep can disturb beneficial soil organisms and lead to poor soil structure.
- How to avoid it:
- For vegetable beds & planting areas: 6-8 inches deep.
- For lawn preparation: 3-5 inches deep.
3. Using a Rotavator to Remove Weeds
- Why it’s a problem: Some weeds, like bindweed and couch grass, can regrow from cut roots, making the problem worse.
- How to avoid it: Remove weeds before rotavating using a hoe, hand-pulling, or organic weed control methods.
How Often Should You Rotavate? Avoid Overdoing It
- Why it’s a problem: Excessive rotavating disrupts soil balance, depletes nutrients, and increases the risk of erosion. Over-aeration can dry out the soil, making it harder for plants to establish roots.
- How to avoid it: Only rotavate when necessary—before planting new crops or when soil is compacted.
5. Not Adding Organic Matter After Rotavating
- Why it’s a problem: Rotavating breaks up the soil, but in the process, it can disturb and deplete essential nutrients. If you don’t replace these nutrients, plants may struggle to grow, and soil fertility will steadily decline.
- How to avoid it: Mix in compost, well-rotted manure, or organic fertilizers to replenish the soil.
6. Ignoring Safety Precautions
- Why it’s a problem: Rotavators are powerful tools that require careful handling to prevent injury.
- How to avoid it: Always wear safety gear:
- Steel-toe boots
- Gloves
- Eye protection
- Ear protection (for petrol models)
Key Takeaways
- Never rotavate wet soil—it leads to compaction.
- Avoid going too deep—stick to recommended depths.
- Remove weeds before rotavating to prevent regrowth.
- Always add organic matter after rotavating.
- Always take safety precautions—rotavators are powerful machines that require careful handling.
In the next section, we’ll explore whether you should rotavate a lawn and when it’s necessary.
Can You Rotavate a Lawn?
Can you rotavate a lawn? Yes, but it’s not always the best approach. Before you start, consider whether rotavating is truly necessary—it can be beneficial in some cases but may cause more harm than good in others. Before deciding if you should rotavate a lawn, evaluate its current condition and long-term health to determine the best approach.
When Should You Rotavate a Lawn?
Rotavating a lawn can be beneficial if:
- You are removing an old, neglected lawn to replace it with fresh turf or new plants.
- The soil is heavily compacted and needs aeration before reseeding.
- You are creating new garden beds where the lawn currently exists.
When Should You NOT Rotavate a Lawn?
Avoid rotavating if:
- The lawn is in good health—disturbing the soil can expose buried weed seeds, leading to unwanted growth and future maintenance issues. If it only needs minor improvements, aerating or topdressing may be better options.
- You have persistent weeds such as couch grass or bindweed—rotavating can spread their root fragments, making the problem worse.
- The soil is too wet—this can lead to compaction and drainage issues.
How to Rotavate a Lawn: Step-by-Step Guide
If you decide to rotavate your lawn, follow these steps to avoid common pitfalls:
- Mow the lawn short – Cut the grass as low as possible to reduce debris.
- Remove large weeds and stones – This prevents the rotavator from spreading weed roots or getting damaged.
- Choose the right rotavator – A heavy-duty rotavator is best for compacted lawns.
- Set the depth properly – Aim for 3-5 inches to break up the surface without disturbing deeper soil layers.
- Move methodically in straight lines – Overlapping rows help ensure even soil distribution.
- Allow the soil to settle naturally – Wait a few days before reseeding or laying new turf to allow the ground to stabilize.
Alternatives to Rotavating a Lawn (Better Options for Lawn Health)
If you want to improve your lawn without rotavating, consider these options:
- Aeration – Using a spike aerator or hollow tine aerator to improve drainage and root growth.
- Topdressing – Adding a thin layer of compost or sand to level the lawn and improve soil structure.
- Overseeding – Spreading new grass seed over an existing lawn to thicken weak areas. In most situations, overseeding is a more effective and less disruptive option than rotavating.
Key Takeaways
- Rotavating a lawn is useful when replacing it or fixing severe compaction.
- Avoid rotavating if your lawn only needs minor improvements.
- Remove weeds before rotavating to prevent them from spreading.
- Consider aeration or topdressing as gentler alternatives.
In the next section, we’ll discuss whether rotavating is an effective way to remove weeds.
Will Rotavating Kill Weeds?
While rotavating can bury annual weeds, it often spreads perennial weeds by breaking up their roots, which allows them to regrow. Think rotavating will solve your weed problem? It might actually make it worse! So, will rotavating kill weeds? The answer depends on the type of weeds and the methods used before and after rotavating.
A common misconception about rotavating is that it automatically eliminates weeds. Although rotavating disturbs the soil and weeds, it doesn’t always eliminate them entirely. In fact, in some cases, it can make the problem worse by spreading weed roots and seeds.
How Rotavating Affects Weeds
- Can help with annual weeds – Rotavating can bury shallow-rooted annual weeds like chickweed, preventing regrowth.
- Can spread perennial weeds – Weeds like couch grass, bindweed, and ground elder have deep root systems, and when rotavated, their roots can be chopped into smaller pieces—each capable of sprouting a new plant.
- Breaks up compacted soil – This can make it easier to remove weeds manually after rotavating.
Best Practices for Weed Control Before Rotavating
To avoid spreading invasive weeds, follow these steps before using a rotavator:
- Manually remove deep-rooted weeds – Dig out weeds like bindweed and dandelions before rotavating.
- Use a hoe or weed suppressants – Cut down and remove surface weeds to prevent them from being tilled back into the soil.
- Avoid rotavating when weeds are seeding – Disturbing weeds during their seeding phase can spread them across your garden.
- Consider a pre-rotavation weed treatment – Organic or chemical weed killers can help weaken invasive weeds before you break up the soil.
If you need a good Garden Incinerator to help get rid of the organic waste read our review of this large 180L garden incinerator.
How to Stop Weeds from Regrowing After Rotavating
- Rake the soil after rotavating to remove any exposed weed roots.
- Apply mulch or cover crops to suppress new weed growth.
- Monitor regrowth closely—some weeds can begin sprouting within days of rotavating. Monitor the area for at least a few weeks and remove any weeds before they establish deep roots.
Key Takeaways
- Rotavating can help with annual weeds but often spreads perennial weeds.
- Always remove invasive weeds before rotavating.
- Avoid rotavating when weeds are going to seed.
- Use mulch or ground cover plants to prevent regrowth.
In the next section, we’ll go over essential safety tips for rotavating your garden.
Safety Tips for Rotavating
To operate a rotavator safely, wear protective gear, inspect the machine, and follow best practices to prevent accidents. Rotavators make garden work more efficient, but incorrect use can lead to serious injury. These machines are powerful, and improper use can result in accidents, soil damage, or even harm to the rotavator itself. By following these safety tips for rotavating, you can work efficiently while minimizing risks.
Essential Safety Gear
Before using a rotavator, make sure to wear:
- Steel-toe boots – Protects feet from accidental contact with the blades.
- Gloves – Prevents blisters and improves grip.
- Eye protection – Shields eyes from flying debris.
- Ear protection – Recommended for petrol-powered rotavators to reduce noise exposure.
- Long sleeves & trousers – Protects skin from debris and moving parts.
Pre-Use Safety Checks
Before starting your rotavator, always:
- Inspect the machine for damaged or loose parts.
- Check that the blades are clean and sharp.
- Ensure the soil is free from large stones, sticks, and debris.
- Read the manufacturer’s instructions for proper handling.
How to Operate a Rotavator Safely: Best Practices
- Start the rotavator on stable ground – Never engage the machine on a slope or uneven terrain.
- Maintain a firm grip on the handles – Rotavators can kick back when hitting hard soil or obstacles.
- Be cautious of rocky or overly dry soil – Sudden jolts can make the machine harder to control.
- Keep children and pets away – Ensure no one is near the working area.
- Never adjust the machine while it’s running – Always turn it off before making changes.
- Use slow, steady passes – Let the machine do the work instead of forcing it forward.
Post-Use Safety Measures
- Turn off the rotavator before clearing jammed debris.
- Clean the blades and remove any soil build-up after use.
- If storing a petrol-powered rotavator long-term, drain the fuel to prevent engine problems.
- Store the machine in a dry and secure place away from children.
Key Takeaways
- Wear protective gear to prevent injuries.
- Inspect the rotavator before each use.
- Operate on stable ground and maintain a firm grip.
- Be mindful of rocky or dry soil, which can make operation more difficult.
- Never adjust the machine while running.
- Store the rotavator properly to prevent long-term damage.
In the next section, we’ll summarize the key points to ensure you get the most out of your rotavating experience.
Garden Rotavating FAQs
Early spring and late autumn are ideal. Avoid rotavating when the ground is too wet — clay gets sticky and compacts easily. Aim for slightly moist, crumbly soil.
Both have advantages. Spring is perfect if you’re prepping beds for immediate planting. Autumn works well for breaking up soil and adding compost before winter frosts improve structure.
Summary & Key Takeaways
Want to achieve the best results from rotavating? For successful rotavating, choose the right time, prepare the soil, and apply the correct technique to prevent compaction and nutrient loss. Follow this checklist to get your garden ready for planting while steering clear of common mistakes. Here’s a recap of everything you need to know:
Best Time to Rotavate
- Clay Soil: Autumn – allows winter frost to break down the soil naturally.
- Light Soil: Spring – ensures the soil is dry enough for proper aeration.
- Wet Soil: Never – prevents compaction and drainage issues.
How to Rotavate Correctly
- Clear debris and weeds before rotavating.
- Check soil moisture – it should crumble in your hand, not stick together.
- Use the right rotavator for your soil type.
- Set the correct depth – 6-8 inches for planting, 3-5 inches for lawns.
- Move in straight, overlapping rows for even coverage.
- Add organic matter after rotavating to improve soil fertility.
Common Mistakes to Avoid
- Rotavating wet soil: Causes compaction.
- Rotavating too deeply: Disrupts soil structure.
- Using a rotavator to remove weeds: Spreads root fragments.
- Over-rotavating: Can deplete soil nutrients and lead to increased erosion over time, making it harder for plants to establish.
Additional Considerations
- Rotavating Lawns: Only if replacing turf or fixing extreme compaction.
- Weed Management: Remove invasive weeds before rotavating to prevent regrowth.
- Safety First: Wear protective gear, inspect the machine, and operate carefully.
Next Steps: What to Do After Rotavating
When done correctly, rotavating improves soil structure, boosts aeration, and prepares your garden for a successful growing season. By applying these techniques, you now understand how to rotavate a garden correctly and sidestep common mistakes. Follow these best practices, and your soil will stay rich, well-aerated, and primed for planting year after year.
Happy gardening! 🌱🚜

