Introduction
Drying fruit in an oven (often called oven dehydrating fruit) is one of the easiest and most accessible ways to preserve seasonal produce. If you want to learn Drying fruit in the oven is one of the easiest ways to preserve seasonal produce at home. If you’ve ever wondered how to dry fruit in the oven or how to make homemade oven‑dried fruit, this method offers a simple, accessible starting point. You don’t need specialist gear—just your oven, a sharp knife, and a bit of patience.

Oven‑dried fruit is ideal for:
- Healthy, grab‑and‑go snacks
- DIY trail mixes
- Naturally sweet additions to baking, porridge, and yoghurt
As the fruit dehydrates, the natural sugars concentrate, giving you richer flavour, a chewier texture, and a completely preservative‑free result. It’s also an excellent way to cut food waste and make the most of fruit that’s nearly past its best.
Continue your home preservation & foraging journey
- 10 edible backyard plants you can forage in Britain — a helpful illustrated guide – Learn about common edible plants you can find and harvest before drying or preserving
- How to dry your own fruit in the oven UK – (Main article) Techniques to safely and effectively dry fruits at home — perfect for long-term storage
- Low-energy food preservation & zero waste pantry – Broaden your preservation skills with eco-friendly methods for all kinds of produce
Why Dry Fruit in the Oven?
Drying fruit in the oven is a reliable, beginner-friendly method that helps preserve flavour, nutrients, and freshness for months. It’s also one of the most accessible ways to start dehydrating fruit at home.

Drying fruit in the oven:
- Retains fibre, antioxidants, and flavour
- Extends the shelf life of fresh fruit
- Helps reduce food waste
- Provides a healthier alternative to processed snacks
Because most kitchens already have an oven, it’s the easiest way to start with home fruit dehydration.
Benefits of Oven‑Dried Fruit
Oven drying suits both beginners and experienced cooks. It’s flexible, budget‑friendly, and ideal for small batches.
- Easy and accessible – nearly every kitchen already has an oven.
- No additives – just fruit, nothing extra.
- Naturally sweeter – low‑and‑slow drying boosts flavour.
- Cheaper than shop‑bought – dried fruit is surprisingly pricey.
- Works with loads of fruits – apples, berries, bananas, citrus, mango, grapes, and more.
Oven Drying vs. Using a Dehydrator
If you’re wondering whether a dehydrator is worth it, here’s a quick comparison to help you decide:
| Feature | Oven Drying | Dehydrator |
|---|---|---|
| Equipment Needed | Standard oven | Purpose‑built appliance |
| Drying Time | 5–24 hours | 8–48 hours |
| Energy Usage | Higher | Lower (more efficient) |
| Batch Size | Small–medium | Large |
| Cost | No extra cost | Requires purchase |
Oven drying is ideal for occasional use or small batches. A dehydrator is great if you’re drying regularly or want bigger batches, but most home cooks get perfectly good results with the oven alone.
Best Fruits to Dry in the Oven
Once you understand the basics, choosing the right fruit makes a huge difference. Some fruits simply dry better thanks to their texture and moisture levels.
Beginner‑friendly fruits:
| Fruit | Best Preparation | Typical Drying Time |
|---|---|---|
| Apples | Thin slices | 6–8 hours |
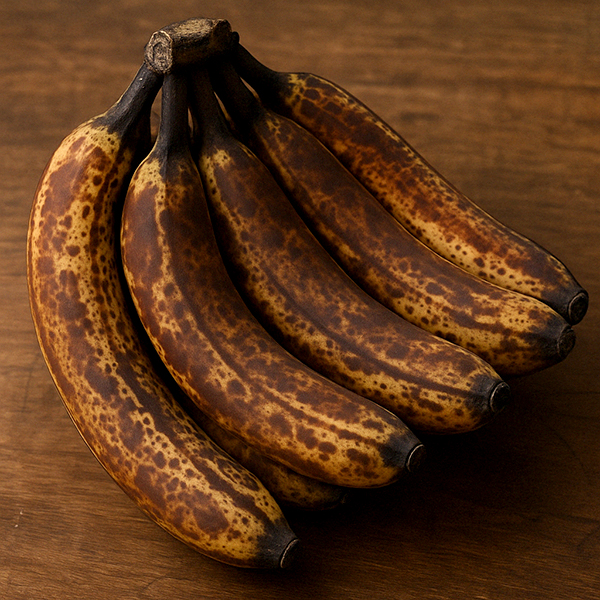
| Bananas | ¼‑inch rounds | 6–12 hours |
| Strawberries | Halved or sliced | 6–10 hours |
| Oranges | Thin slices | 4–8 hours |
| Grapes (raisins) | Whole or halved | 12–24 hours |
| Pineapple | Thin rings/chunks | 8–12 hours |
| Mango | Thin strips | 8–14 hours |
| Peaches | Thin slices/halves | 10–16 hours |

Fruits That Are Difficult to Oven‑Dry
Some fruits just aren’t worth the effort because they hold too much water. They’ll either stay soggy or turn rubbery.
- Watermelon – turns sticky
- Melons (cantaloupe, honeydew) – often rubbery
- Citrus segments – pulp doesn’t dry evenly
Key Temperatures & Drying Times
Once you’ve chosen your fruit, these temperatures help keep things consistent. Use this as your main reference when planning your drying session.
| Fruit | Temp (°C) | Drying Time | Notes |
|---|---|---|---|
| Apples | 60–70 | 6–10 hrs | Slice evenly |
| Bananas | 50–60 | 8–10 hrs | Dip in lemon water |
| Strawberries | 50–60 | 6–12 hrs | Slice thin |
| Plums | 60–70 | 10–16 hrs | Halve & pit |
| Grapes | 50–60 | 12–18 hrs | Turn regularly |
| Lemons | 60 | 4–6 hrs | Use wire rack |
How to Dehydrate Fruit in the Oven (Step-by-Step)
You can dry fruit in your oven easily using a low-temperature setting and good airflow. Drying fruit in the oven is a straightforward process, but following the right steps ensures consistent and high-quality results. Below is a comprehensive, step-by-step guide to help you achieve evenly dried fruit with the best texture and flavor.

What You’ll Need
- Baking tray or wire rack
- Parchment paper
- Sharp knife or mandolin
- Lemon juice (optional)
- Bowl of water
Preparation Steps
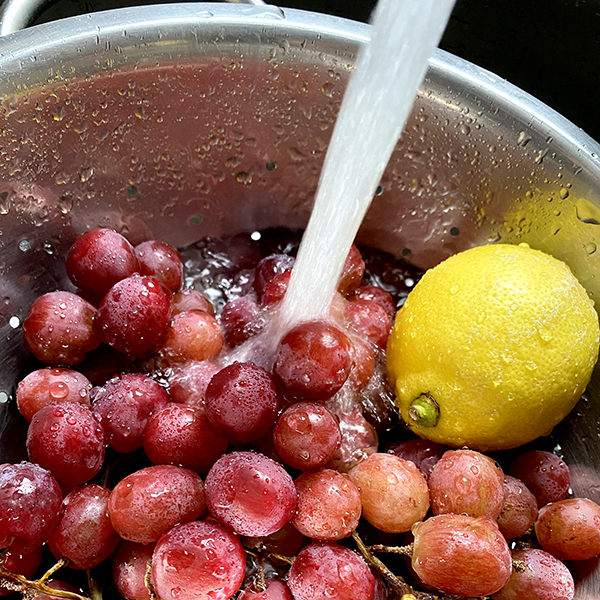
- Wash and dry the fruit.
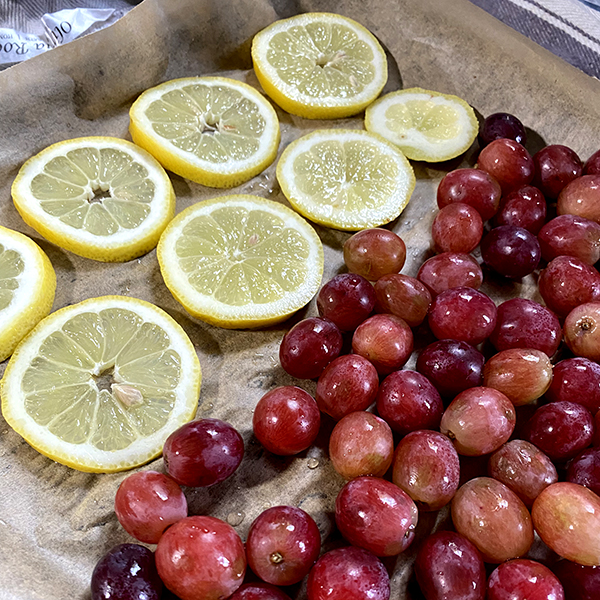
- Slice evenly (around 5mm thick).
- Pre‑treat (optional) – dip apples and bananas in lemon water.
- Arrange slices in a single layer with space between them.
Drying Process
- Preheat oven to 50–70°C.
- Prop the door open slightly.
- Place trays on the lower rack.
- Flip slices halfway (skip this step if using a wire rack).
- Check doneness: fruit should be leathery, not sticky.
- Cool for 24 hours to release any remaining moisture.
Oven‑Drying Grapes into Raisins
If you’re looking for a fun extra project, raisins are incredibly rewarding to dry at home. They take a little longer but the flavour is brilliant. If you’re planning to grow your own grapes for drying, check out our guide to the best seedless grapevines for the UK for reliable, high-yield varieties.
Why Use the Oven?
- Works in any season
- More reliable than sun‑drying
- Perfect for smaller batches
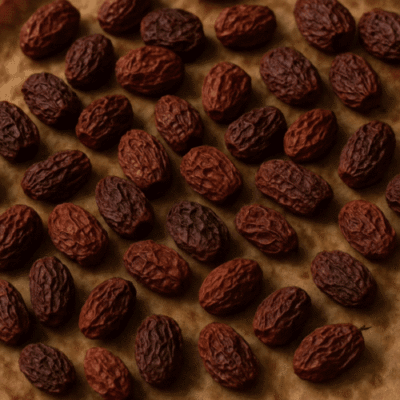
Signs Your Raisins Are Ready
- Leathery rather than sticky
- Deeply wrinkled
- Bends without snapping
Steps
- Wash and dry grapes.
- Optional: dip in lemon water.
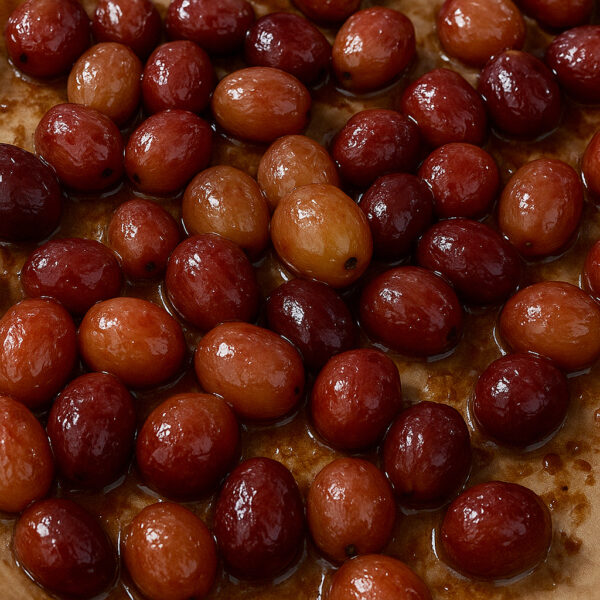
- Spread in a single layer.
- Set oven to 60–90°C and leave the door slightly open.
- Turn grapes every hour or two.
- Dry for 6–12 hours depending on size.
Tips for Better Drying
A few simple habits make a big difference when drying fruit at home:
- Check the fruit regularly to avoid over‑drying
- Use the lowest temperature your oven allows
- Keep the door slightly open to release moisture
- Don’t overcrowd trays
Troubleshooting
Drying fruit in the oven is straightforward, but common mistakes can result in fruit that is under-dried, burnt, or overly chewy. Here are the most frequent issues and effective solutions to ensure perfectly dried fruit.

1. Fruit Turned Too Dark or Burnt
- Temperature was too high
- Slices were too thin
2. Fruit Sticky or Underdried
- Needs more time
- Fruit naturally contains more moisture
3. Fruit is Too Hard or Brittle
- Oven was too hot
- Over‑dried during cooking
4: Off‑Flavour
- Fruit was overripe or underripe
- No pre‑treatment in lemon water
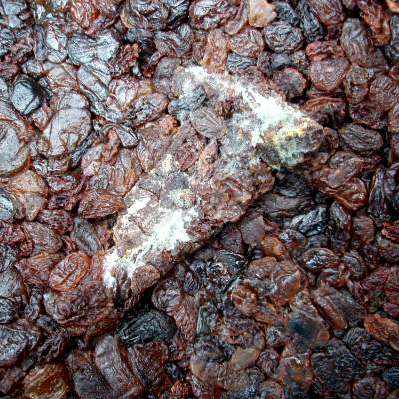
5: Mould During Storage
- Fruit wasn’t fully dried
- Container wasn’t airtight
Storing & Using Dried Fruit
| Method | Shelf Life | Best For |
|---|---|---|
| Airtight container | 4–12 months | Everyday snacking |
| Refrigerator | Up to 18 months | Humid climates |
| Freezer | 2+ years | Long-term storage |
Check Freshness
- Should feel leathery and flexible.
- No sour or musty smell.
- No visible mould.
Ways to Use Dried Fruit
- Baking
- Trail mixes
- Oatmeal toppings
- Tea infusions
- Fruit powders
How Long Does It Take to Dry Fruit?
Most fruits dry within 4–24 hours depending on type and thickness.
| Fruit | Drying Time |
|---|---|
| Apples | 6–8 hours |
| Bananas | 6–12 hours |
| Strawberries | 6–10 hours |
| Oranges | 4–8 hours |
| Grapes | 12–24 hours |
FAQs: Answering Common Questions
Drying fruit in the oven is a straightforward process, but many people have questions about optimizing techniques, proper storage, and troubleshooting common issues. Here are answers to some of the most frequently asked questions.
The ideal temperature for drying fruit in the oven is 60°C (140°F). Using an oven thermometer can help maintain consistent temperature accuracy, ensuring even drying. If your oven doesn’t go that low, set it to the lowest possible temperature and keep the door slightly open to allow moisture to escape.
Yes! Drying fruit in the oven is a practical and accessible alternative to using a food dehydrator, making it a great option for those who don’t own specialized equipment. While dehydrators are designed for this process, an oven works well for small batches and occasional drying.
If your fruit is still sticky after drying, it may contain too much residual moisture. Try these fixes:
– Return it to the oven for 30-60 minutes at the lowest temperature.
– Let it cool completely, as some moisture evaporates after drying.
– Store dried fruit with a paper towel in an airtight container to absorb any excess moisture.
Yes, but frozen fruit contains more moisture and will take longer to dry. For best results:
Thaw the fruit first and pat it dry with a paper towel.
Spread in a single layer to allow even air circulation.
Expect longer drying times due to the additional moisture.
Yes! A convection oven can speed up the drying process because it circulates air more efficiently. However, ensure fruit slices are spaced evenly to prevent uneven drying. Reduce the drying time by about 25% and check fruit regularly to avoid over-drying.
Between 50°C and 70°C works best, depending on the fruit type. Lower temps preserve colour and nutrients, while higher temps reduce drying time.
Yes. In a fan oven, reduce the temp by 10°C and check more often. In a gas oven, use the lowest setting and rotate trays regularly for even results.
In a standard oven, grapes usually take 6–12 hours to turn into raisins, depending on size and heat settings. Check them regularly so they don’t end up under‑ or over‑dried.
Using a lemon juice dip is optional. It isn’t required for safety, but it does help preserve colour and reduce browning, especially if you’re drying lighter grapes.
You can, but it takes more work. Slice the grapes in half and remove the seeds first. Keep in mind that halved grapes may take a little longer to dry evenly.
If raisins turn out hard, you can soften them by sealing them in a container with a damp paper towel for a few hours. This helps them regain a bit of moisture without spoiling.
Absolutely. Mixing red, green, and black grapes not only looks colourful but also gives you a blend of flavours and textures in the same batch.
The best way to dehydrate fruit in an oven is to use a low temperature (around 60°C/140°F), keep the door slightly open for airflow, and flip slices halfway through.
Absolutely. You can create delicious oven-dehydrated fruit that tastes just as good as dehydrator-made snacks — perfect for small batches.
To dry fruit in the oven evenly, use low heat, allow airflow by leaving the door slightly open, and rotate or flip slices halfway through.
Final Thoughts
Drying fruit in the oven is a practical, cost‑effective, and natural way to preserve fruit for the long term. Unlike canning or freezing, it requires very little equipment and keeps the fruit’s natural flavours intact without any added liquids or preservatives. Whether you’re making healthy snacks, prepping ingredients for baking, or simply reducing food waste, oven drying makes it easy to create delicious, preservative‑free dried fruit at home.
Key Takeaways
- Easy & accessible – No dehydrator needed; your oven does the job.
- Healthier alternative – No added sugars, oils, or preservatives.
- Customisable – Dry your favourite fruits or experiment with flavourings.
- Long shelf life – With proper storage, dried fruit keeps for months.
- Room temperature (airtight container): 4–12 months
- Refrigerator: up to 18 months
- Freezer: 2+ years
Try It Yourself!
With these tips and techniques, you’re ready to dry fruit in the oven with confidence. Start with the fruits you enjoy most, adjust the drying times as needed, and have fun experimenting with different textures and flavours. Once you get the hang of it, homemade dried fruit quickly becomes a kitchen staple.
If you found this guide helpful, feel free to share it or explore our related articles for more ideas on food preservation, homemade recipes, and sustainable living. For more expert guidance on safe and effective fruit drying methods, check out the National Center for Home Food Preservation’s guide on drying fruits.