Introduction
Growing vegetables indoors is a rewarding experience, but it comes with its own set of challenges—pollination being one of the most critical. Without natural pollinators like bees, your indoor garden may struggle to produce the fruits and vegetables you’re aiming for. This is where hand pollination becomes an essential technique.
Why Hand Pollination Matters:
- Boosts Productivity: Indoor environments lack the natural pollinators needed for many vegetables to bear fruit. Hand pollination bridges this gap.
- Ensures Fruit Development: Proper pollination is crucial for fruit set. Without it, flowers may wither and fall off without producing any yield.
- Empowers Gardeners: Mastering hand pollination puts you in control, allowing you to directly influence the success of your indoor garden.
What You’ll Learn:
In this guide, we’ll walk you through everything you need to know about hand pollinating indoor vegetables:
- Tools of the Trade: Discover the essential tools for effective hand pollination.
- Step-by-Step Techniques: Learn how to hand-pollinate various types of vegetables, from tomatoes to squash.
- Common Pitfalls: Avoid the most common mistakes that can hinder your pollination efforts.
- Maximizing Success: Explore tips for creating the perfect environment for pollination and maintaining plant health.
- Alternative Methods: Get to know other pollination techniques, including mechanical and natural options.
Ready to Get Started?
Whether you’re a seasoned indoor gardener or just beginning your journey, this guide will equip you with the knowledge and confidence to ensure a thriving indoor vegetable garden. Let’s dive in and make sure your plants get the pollination they need to produce a bountiful harvest!
Continue your indoor growing journey
If you’re hand-pollinating indoor vegetables, these guides will help you choose suitable crops, optimise light, and expand your indoor garden skills.
- Best indoor vegetable garden kits for small spaces – Practical options for indoor grow systems that make it easier to manage crops needing hand pollination.
- Top 10 easy indoor vegetables to grow – A great companion guide listing beginner-friendly vegetables that perform well in indoor setups.
- Growing vegetables under artificial light — the ultimate guide – Complete advice on indoor lighting, which supports flowering and fruiting in many vegetables you might pollinate by hand.
Understanding Indoor Vegetable Pollination
Why Pollination is Necessary for Vegetable Production
Pollination is the process by which pollen is transferred from the male part of a flower (anther) to the female part (stigma), leading to fertilization and the production of seeds. For many vegetables, this process is crucial for fruit formation. Without successful pollination, flowers may wither and fall off without bearing fruit, resulting in a poor or nonexistent harvest. In an indoor environment, the absence of natural pollinators like bees makes it necessary to manually assist in this process.
While outdoor gardens benefit from natural pollinators like bees and butterflies, indoor gardens require alternative methods to achieve successful pollination. Learn more about the role of pollinators in gardening from this comprehensive guide by the Royal Horticultural Society.
Differences Between Self-Pollinating and Cross-Pollinating Plants
There are two main types of pollination mechanisms in vegetables: self-pollination and cross-pollination.
- Self-Pollinating Plants: These plants have both male and female reproductive parts within the same flower, allowing them to fertilize themselves. Examples include tomatoes, peppers, and peas. These plants generally require less intervention, but in an indoor setting, a gentle shake of the plant can help the pollen reach the stigma.
- Cross-Pollinating Plants: These plants require pollen from another flower, either on the same plant or a different plant of the same species, to produce fruit. Vegetables like cucumbers, squash, and pumpkins fall into this category. Hand pollination is particularly important for these plants in indoor gardens to ensure that the pollen reaches the female flowers.
Common Indoor Vegetables That Require Hand Pollination
When growing vegetables indoors, understanding which plants need hand pollination is key to achieving a successful harvest. Below is a table summarizing the pollination requirements and techniques for common indoor vegetables:
| Vegetable | Pollination Type | Pollination Requirement | Hand Pollination Technique |
|---|---|---|---|
| Tomatoes | Self-Pollinating | Generally self-sufficient, but benefits from assistance | Gently shake the plant or use a small brush to transfer pollen |
| Peppers | Self-Pollinating | Self-pollinating, though indoor conditions may reduce natural pollination | Gently shake flowers or use a small brush to aid pollen movement |
| Cucumbers | Cross-Pollinating | Requires pollen transfer from male to female flowers | Use a small brush or cotton swab to transfer pollen between flowers |
| Zucchinis | Cross-Pollinating | Male and female flowers on the same plant need to be manually pollinated | Transfer pollen with a brush or direct contact between flowers |
| Squash | Cross-Pollinating | Requires manual pollination indoors due to absence of insects | Use a small brush or direct finger contact to transfer pollen |
| Pumpkins | Cross-Pollinating | Needs manual intervention to ensure successful pollination | Similar to squash, use a brush or fingers to transfer pollen |
By understanding the specific pollination needs of your indoor vegetables, you can take the necessary steps to ensure a successful and bountiful harvest.
Tools You Need for Hand Pollination
Overview of Basic Tools Needed: Paintbrushes, Cotton Swabs, etc.
To successfully hand-pollinate indoor vegetables, having the right tools is essential. The following are some of the most commonly used tools for this task:
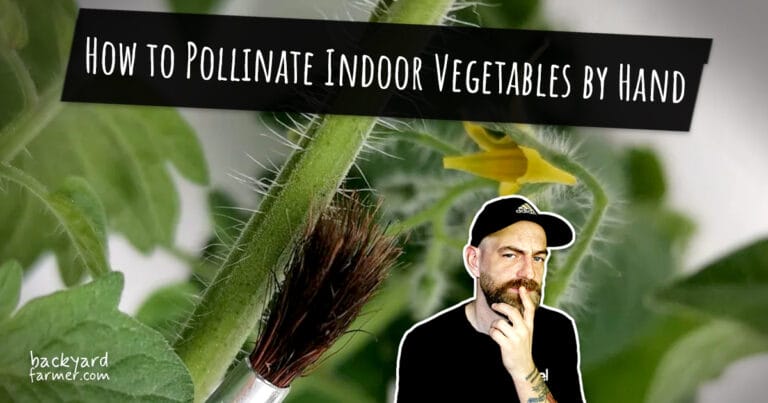
- Paintbrushes: A small, soft-bristled paintbrush is one of the most effective tools for hand pollination. It allows you to gently transfer pollen from the male parts of the flower (anthers) to the female parts (stigma) without damaging the delicate structures. Brushes with fine, flexible bristles are particularly useful for working with small flowers like those of tomatoes and peppers.
- Cotton Swabs: Cotton swabs, often referred to as Q-tips, are another popular option for hand pollination. They are readily available and can effectively pick up and transfer pollen between flowers. However, care must be taken not to lose pollen in the fibers of the swab, which can happen if too much pressure is applied.
- Tweezers: Tweezers can be handy for more precise work, particularly when working with small or intricate flowers. They can be used to gently pick up and place pollen, though they require a steady hand.
- Soft Brush: Similar to a paintbrush but often a bit larger and softer, a soft brush is ideal for larger flowers such as those on cucumbers, squash, and pumpkins. The larger surface area can help in covering more of the flower’s stigma with pollen.
How to Choose the Right Tools for Different Types of Flowers
Choosing the right tool for hand pollination depends on the type of vegetable and the size of the flowers:
- Small Flowers (e.g., Tomatoes, Peppers): For these, a small, fine-bristled paintbrush or a cotton swab is usually the best option. These tools allow for precise application without overwhelming the small flowers.
- Medium Flowers (e.g., Zucchinis, Cucumbers): A slightly larger soft brush works well for medium-sized flowers. It ensures adequate pollen coverage without damaging the flower.
- Large Flowers (e.g., Squash, Pumpkins): For large flowers, a larger, soft-bristled brush or even direct finger transfer can be most effective. The larger tools ensure that enough pollen is transferred to cover the stigma properly.
When choosing tools, consider the size and delicacy of the flowers you’re working with to ensure the most effective pollination.
Sterilization and Maintenance of Your Pollination Tools
To avoid cross-contamination and the spread of diseases between plants, it’s important to keep your pollination tools clean and well-maintained:
- Sterilization: Before and after each use, sterilize your tools by dipping them in a solution of water and rubbing alcohol or a mild bleach solution (1 part bleach to 9 parts water). This will kill any pathogens that might be present on the tools.
- Cleaning: After each pollination session, rinse your tools with clean water to remove any residual pollen or plant material. This prevents the buildup of organic matter, which can harbor bacteria and fungi.
- Storage: Store your tools in a clean, dry place. Make sure they are fully dry before storing to prevent rusting or the growth of mold. For brushes and cotton swabs, keeping them in a sealed plastic bag or container can help maintain cleanliness.
Recommended Tools for Hand Pollination Based on Flower Type
| Flower Type | Recommended Tool | Usage Tips | Sterilization Method |
|---|---|---|---|
| Small Flowers | Small, fine-bristled paintbrush | Gently brush pollen from anthers to stigma | Dip in rubbing alcohol or bleach solution, rinse with water |
| (e.g., Tomatoes, Peppers) | Cotton swab | Use light pressure to avoid losing pollen in fibers | Use a new swab for each plant or flower, dispose after use |
| Medium Flowers | Soft brush | Ensure full coverage of the stigma with gentle strokes | Sterilize with alcohol or bleach solution, dry thoroughly |
| (e.g., Zucchinis, Cucumbers) | Tweezers | For precise pollen placement on delicate structures | Wipe with alcohol wipes, allow to air dry |
| Large Flowers | Large, soft-bristled brush | Cover the entire stigma area with pollen | Clean thoroughly after each use, soak in sterilizing solution |
| (e.g., Squash, Pumpkins) | Direct finger transfer | Use fingers to directly transfer pollen | Wash hands thoroughly before and after pollination |
By regularly cleaning and sterilizing your pollination tools, you can ensure that your indoor garden remains healthy and productive.
Step-by-Step Guide to Hand Pollination
Detailed Steps on How to Hand-Pollinate Different Vegetables
Hand pollination involves manually transferring pollen from the male parts of a flower (anther) to the female parts (stigma) to facilitate fertilization. Here’s how to do it for different indoor vegetables:
- Tomatoes:
- Identify the flowers that are fully open; these are ready for pollination.
- Use a small, fine-bristled paintbrush to gently brush against the anthers to collect pollen.
- Gently apply the collected pollen onto the stigma in the center of the same or another flower.
- Repeat daily during the flowering period to ensure full pollination.
- Peppers:
- Select open flowers and gently shake the plant to encourage pollen to fall onto the stigma naturally.
- Alternatively, use a cotton swab or small brush to transfer pollen directly from the anther to the stigma.
- Cucumbers:
- Identify male and female flowers. Male flowers have slender stems, while female flowers have a small bulb at the base, which will develop into the fruit.
- Use a small brush or your fingers to collect pollen from the male flower.
- Transfer the pollen to the stigma of the female flower by brushing it gently across the surface.
- Zucchinis:
- As with cucumbers, distinguish between male and female flowers.
- Use a larger soft brush or direct finger transfer to move pollen from the male to the female flower.
- Ensure that the stigma is fully coated with pollen for effective fertilization.
- Squash and Pumpkins:
- Follow the same steps as for zucchinis and cucumbers.
- These larger flowers can be hand-pollinated using a large, soft-bristled brush or even by rubbing the male flower directly onto the stigma of the female flower.
Best Times of the Day to Pollinate
Timing is crucial for successful hand pollination. Most flowers are more receptive to pollination in the morning when the humidity is moderate, and the flowers are fully open. Aim to pollinate between 8 AM and 11 AM, as this is typically when pollen is most viable and the stigma is most receptive.
Tips for Identifying Male and Female Flowers
Correctly identifying male and female flowers is essential for successful hand pollination, especially in plants like cucumbers, squash, and pumpkins, where both flower types are present on the same plant.
- Male Flowers: Usually appear first on the plant. They have a thin stem and contain the anther, which produces pollen.
- Female Flowers: Have a small, immature fruit at the base of the flower. This is the ovary, which will develop into the fruit after successful pollination.
Here’s a quick comparison to help you identify male and female flowers:
| Characteristic | Male Flower | Female Flower |
|---|---|---|
| Stem | Thin, straight | Thick, with a small fruit-like bulb at the base |
| Structure | Contains anther (pollen-producing) | Contains stigma (pollen-receiving) |
| Appearance Timing | Usually appears first | Appears after male flowers |
| Function | Provides pollen | Develops into fruit after pollination |
Hand Pollination Techniques for Common Indoor Vegetables
| Vegetable | Pollination Method | Best Tool | Best Time to Pollinate | Special Tips |
|---|---|---|---|---|
| Tomatoes | Gently transfer pollen from anther to stigma | Small paintbrush | Morning (8-11 AM) | Shake the plant lightly to assist natural pollen distribution |
| Peppers | Shake plant or manually transfer pollen | Cotton swab or paintbrush | Morning (8-11 AM) | Ensure consistent pollination over several days |
| Cucumbers | Transfer pollen from male to female flowers | Soft brush or fingers | Morning (8-11 AM) | Ensure female flower’s stigma is fully coated with pollen |
| Zucchinis | Manually transfer pollen from male to female flowers | Large soft brush or fingers | Morning (8-11 AM) | Avoid over-pollination which can lead to misshapen fruits |
| Squash | Rub male flower onto female flower or use brush | Large soft brush or direct contact | Morning (8-11 AM) | Pollinate multiple flowers to increase yield |
| Pumpkins | Use a brush or direct contact to transfer pollen | Large soft brush or fingers | Morning (8-11 AM) | Ensure full coverage of the stigma to maximize fruit size |
Common Mistakes in Hand Pollination
Over-Pollination and Under-Pollination
One of the most frequent mistakes in hand pollination is either over-pollinating or under-pollinating the flowers.
- Over-Pollination: This occurs when too much pollen is applied to the stigma, which can overwhelm the flower and lead to misshapen or overly large fruits that may not ripen properly. Additionally, excessive pollen can sometimes cause the stigma to become clogged, preventing successful fertilization.
- Under-Pollination: On the other hand, applying too little pollen can result in incomplete fertilization. This may lead to the development of small, deformed fruits or the flowers simply dropping off without producing any fruit at all. It’s crucial to find a balance, ensuring enough pollen is transferred to achieve proper fertilization without overwhelming the flower.
How to Avoid Damaging Delicate Flowers
When hand-pollinating, it’s easy to accidentally damage the delicate structures of flowers, which can affect their ability to produce fruit.
- Use Gentle Tools: Always use soft, fine-bristled tools like paintbrushes or cotton swabs that won’t harm the flower’s sensitive parts. Avoid using tools with rough or stiff bristles, which can tear the flower’s tissues.
- Light Touch: Apply pollen with a light touch, gently brushing the anther to collect pollen and then just as gently brushing it onto the stigma. Heavy-handedness can bruise the flower or dislodge petals and other essential parts.
- Timing: Pollinate when the flowers are fully open, typically in the morning. Flowers are more receptive and less likely to be damaged during this time.
Signs That Your Pollination Efforts Are Successful
It’s important to recognize the signs of successful pollination so that you know your efforts are paying off.
- Fruit Development: The most obvious sign is the beginning of fruit development. If pollination is successful, the ovary (the small bulb at the base of the female flower) will start to swell and grow into fruit.
- Flower Longevity: Successfully pollinated flowers often remain on the plant longer, as they transition from flower to fruit. Flowers that are not pollinated tend to wither and drop off prematurely.
- Healthy Fruit Growth: Observe the fruit as it develops. It should grow uniformly without deformities or signs of poor development. If the fruit starts to grow but then stops or becomes misshapen, it may indicate incomplete pollination.
Common Hand Pollination Mistakes and How to Avoid Them
| Mistake | Description | How to Avoid |
|---|---|---|
| Over-Pollination | Applying too much pollen, leading to misshapen or poor-quality fruits | Use a light hand, ensuring only a thin layer of pollen on the stigma |
| Under-Pollination | Not enough pollen applied, resulting in small or no fruit | Ensure that the stigma is fully coated with pollen from multiple anthers |
| Damaging Flowers | Bruising or tearing the delicate flower parts during pollination | Use soft, fine-bristled tools and apply pollen gently |
| Pollinating at Wrong Time | Attempting to pollinate when flowers are not fully open or receptive | Pollinate in the morning when flowers are fully open and receptive |
| Ignoring Pollination Signs | Failing to check for signs of successful pollination, leading to missed opportunities for improvement | Regularly inspect flowers and early fruit for signs of successful pollinatio |
Maximizing Pollination Success
Environmental Factors That Affect Pollination Success (Humidity, Temperature, etc.)
Environmental conditions play a crucial role in the success of hand pollination. Ensuring the right conditions can significantly enhance the effectiveness of your efforts.
- Humidity: Optimal humidity levels are important for pollen viability and successful fertilization. Too much humidity can cause pollen to clump and become less effective, while too little can cause it to dry out and lose its potency. Aim for a humidity level of around 40-60% for most indoor vegetables.
- Temperature: Temperature affects both the viability of the pollen and the receptivity of the stigma. Most vegetables prefer temperatures between 70°F and 85°F (21°C to 29°C) during pollination. Temperatures outside this range can reduce the effectiveness of pollination or even prevent it altogether.
- Light: Adequate light is essential for the overall health of the plant, which directly impacts its ability to produce viable pollen and receptive stigmas. Ensure your indoor garden receives sufficient light, either through natural sunlight or grow lights, especially during the flowering period.
For optimal indoor vegetable growth, using the right lighting is crucial. Check out our guide on the best LED grow lights for indoor gardens in 2024 to ensure your plants get the light they need to thrive.
How to Ensure Consistent Pollination Throughout the Growing Season
Consistency is key to maximizing pollination success. Regular and diligent hand pollination will ensure a steady production of fruits throughout the growing season.
- Routine Pollination: Make hand pollination a part of your daily gardening routine during the flowering period. This ensures that all flowers receive adequate attention and increases the chances of successful fertilization.
- Monitor Flowering Cycles: Keep track of your plants’ flowering cycles. Some vegetables, like tomatoes, may produce flowers continuously, while others may have distinct flowering periods. Adjust your pollination efforts accordingly to match these cycles.
- Rotate Techniques: Experiment with different hand pollination techniques, such as using a brush, cotton swab, or direct contact, to see which method works best for your plants. Rotating techniques can also help prevent any one method from becoming less effective over time.
Best Practices for Maintaining Plant Health During Pollination
Healthy plants are more likely to produce viable flowers and respond positively to pollination efforts. Follow these best practices to maintain plant health during the pollination process:
- Proper Nutrition: Ensure your plants receive adequate nutrients, particularly during the flowering period. A balanced fertilizer that is high in phosphorus and potassium can promote strong flower and fruit development.
- Watering: Maintain consistent moisture levels in the soil, but avoid overwatering, which can lead to root rot and other issues. Watering in the morning allows the soil to dry out during the day, reducing the risk of fungal diseases.
- Pest and Disease Control: Regularly inspect your plants for signs of pests or diseases, which can weaken the plants and reduce their ability to produce viable flowers. Implement integrated pest management (IPM) practices to keep your garden healthy.
Key Factors for Maximizing Pollination Success
| Factor | Ideal Condition | Impact on Pollination | Best Practices |
|---|---|---|---|
| Humidity | 40-60% | Maintains pollen viability and stigma receptivity | Use a humidifier or dehumidifier to regulate indoor humidity |
| Temperature | 70°F to 85°F (21°C to 29°C) | Ensures pollen viability and flower receptivity | Monitor and adjust indoor temperatures with fans or heaters |
| Light | Adequate sunlight or grow lights | Promotes overall plant health and flower production | Ensure plants receive 12-16 hours of light per day |
| Routine Pollination | Daily or regular intervals during flowering | Increases chances of successful fertilization | Incorporate hand pollination into your daily gardening routine |
| Nutrient Supply | Balanced fertilizer high in phosphorus and potassium | Supports strong flower and fruit development | Apply fertilizers according to plant needs, especially during flowering |
| Watering | Consistent, moderate watering | Prevents stress and maintains plant health | Water in the morning, ensure good drainage |
| Pest/Disease Control | Regular monitoring and prompt treatment | Prevents plant stress and damage that can affect pollination | Use IPM practices and treat issues early |
Alternative Pollination Methods
Using Fans or Vibrating Devices as Alternative Methods
In addition to hand pollination, there are mechanical methods that can help simulate the natural pollination process in an indoor environment. These methods can be particularly useful for self-pollinating plants or in situations where manual pollination is challenging.
- Fans: A gentle breeze can mimic the wind’s role in natural pollination, helping to dislodge pollen and spread it between flowers. Small, oscillating fans can be strategically placed in your indoor garden to create air movement. This method is especially useful for plants like tomatoes and peppers, which are self-pollinating and only need a slight nudge to move pollen from the anthers to the stigma.
- Vibrating Devices: Vibrating devices, such as electric toothbrushes or purpose-built pollination tools, can also be effective. By gently vibrating the flower clusters, these tools help release pollen from the anthers and increase the chances of it landing on the stigma. This method works well for plants like tomatoes, where the vibration helps ensure that pollen is properly distributed.
Comparing the Effectiveness of Different Hand Pollination Techniques
Not all hand pollination techniques are created equal. Depending on the plant type and the specific conditions of your indoor garden, some methods may be more effective than others.
- Paintbrushes vs. Cotton Swabs: For small flowers, paintbrushes generally offer more precision and less risk of losing pollen compared to cotton swabs. However, cotton swabs can be more effective for larger flowers where precision is less critical.
- Direct Contact vs. Tools: Using fingers or directly rubbing male and female flowers together can be effective for large flowers like squash and pumpkins, where the direct transfer of pollen is necessary. However, this method might be too rough for smaller, delicate flowers, where tools like brushes or swabs are preferable.
Pros and Cons of Using Natural Insect Pollinators Indoors
In some cases, introducing natural pollinators into your indoor garden can be a viable option. However, this method comes with its own set of advantages and challenges.
- Pros:
- Efficiency: Natural pollinators like bees can be incredibly efficient, often pollinating multiple flowers in a single visit.
- Reduced Manual Effort: Once introduced, natural pollinators can reduce the need for manual or mechanical pollination, saving time and effort.
- Cons:
- Control Issues: It can be difficult to control natural pollinators in an indoor environment. They may not always visit the flowers you want them to, or they may be less active in an indoor setting.
- Maintenance: Maintaining a healthy population of pollinators indoors requires additional effort, such as providing food sources and managing their habitat.
Comparison of Alternative Pollination Methods
| Method | How It Works | Best For | Pros | Cons |
|---|---|---|---|---|
| Fans | Creates air movement to simulate wind pollination | Self-pollinating plants (e.g., tomatoes) | Low maintenance, can cover large areas | May not be effective for cross-pollinating plants |
| Vibrating Devices | Vibrates flowers to release and distribute pollen | Self-pollinating plants (e.g., tomatoes) | High precision, effective for small flowers | Requires manual operation for each flower cluster |
| Paintbrushes | Manually transfers pollen from anther to stigma | Small and delicate flowers | High precision, gentle on flowers | Requires careful handling and sterilization |
| Cotton Swabs | Manually transfers pollen with a cotton tip | Medium to large flowers | Easy to use, readily available | Pollen may get trapped in the swab fibers |
| Direct Contact | Rubbing male and female flowers together | Large flowers (e.g., squash, pumpkins) | Effective for large flowers, no tools needed | Can damage delicate flowers, less precise |
| Natural Pollinators | Introduces bees or other insects into the garden | Variety of flowering plants | Efficient, reduces manual effort | Difficult to control, requires habitat management |
Conclusion
Hand pollinating your indoor vegetables is a crucial skill for maximizing your harvest. Whether you’re working with:
- Self-pollinating plants like tomatoes and peppers
- Cross-pollinating varieties such as cucumbers and squash
Mastering manual pollination can significantly boost your garden’s productivity.
Key Takeaways:
- Understand Your Plants’ Needs: Knowing whether your plants are self-pollinating or cross-pollinating helps you apply the right technique.
- Choose the Right Tools: Use soft-bristled brushes, cotton swabs, or even gentle vibrating devices to transfer pollen effectively.
- Maintain Optimal Conditions: Ensure your garden’s humidity, temperature, and light levels are conducive to successful pollination.
- Explore Alternatives: Fans, vibrating devices, and even natural pollinators can complement your hand pollination efforts.
Why It Matters:
- Consistency is Key: Regular, careful pollination ensures that each flower gets the attention it needs to produce fruit.
- Observation is Essential: Keep an eye on your plants’ progress, adjusting your methods as needed to improve results.
- Patience Pays Off: Hand pollination may take time, but the reward is a bountiful and healthy indoor garden.
Final Thought: By incorporating the strategies outlined in this guide, you’ll be well on your way to a flourishing indoor garden. Whether you’re a seasoned gardener or just starting, these tips will help you enjoy a bountiful harvest.
Happy gardening!