Introduction
Every gardener and forager knows the feeling when everything ripens at once. Bowls of tomatoes, baskets of apples, and piles of courgettes are a gift of abundance — yet without a plan, they quickly turn into waste. With energy costs climbing, finding simple, low energy food preservation methods to stretch that harvest makes more sense than ever.
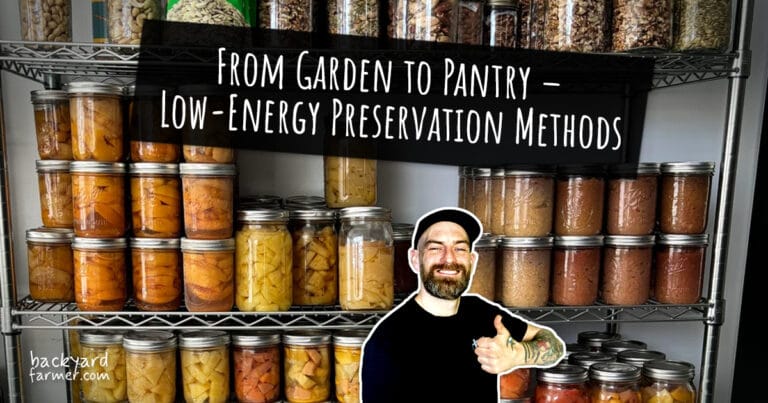
This guide shows you how to take what you grow — or gather — and preserve your harvest sustainably. From solar drying and fermenting to freezing and jam, you’ll learn practical ways to build a zero waste pantry that lasts well beyond the season.
What You’ll Learn
- Straightforward preservation techniques that don’t need specialist equipment.
- Sustainable food preservation methods like solar drying, quick ferments, and freezing.
- A one‑jar jam recipe that gives you a fast, fuss‑free win.
Who It’s For
- Allotment growers facing seasonal gluts.
- Weekend foragers returning with berries, apples, or wild greens.
- Zero‑waste homemakers keen to stock the pantry without racking up bills.
By choosing these low‑energy preservation methods, you’ll cut food waste, save money, and create a kitchen that works in step with the seasons.
Choosing the Right Preservation Method
Not every crop responds well to every technique. Soft berries won’t ferment like firm cabbages, and tomatoes behave differently when dried than when frozen. To get the most out of your harvest, match each food with the sustainable food preservation method that suits it best.
Quick Reference Preservation Matrix
Use this matrix as a handy guide when you’re faced with a glut and want to practise low energy food preservation.
| Crop | Drying (Solar/Oven/Dehydrator) | Fermenting | Pickling | Freezing | Jam | Energy & Effort Notes |
|---|---|---|---|---|---|---|
| Tomatoes | Good (intense flavour, needs patience) | Limited (can go soft) | Good (with vinegar) | Best (raw or blanched) | Possible (sauce/jam) | Freezing = quick win / Drying = weekend project |
| Berries | Good (tangy, chewy snacks) | Not ideal | Limited | Best (smoothies, desserts) | Best (classic jams) | Freezing = quick win / Jam = weekend project |
| Apples | Excellent (crisps, rings) | Rare | Good (chutneys/pickles) | Good (slices/purée) | Excellent | Drying = low energy if solar / Jam/chutney = weekend project |
| Courgettes | Fair (chips, powder) | Good (with brine) | Good (zucchini pickles) | Best (sliced or grated) | Rare | Ferment = needs monitoring / Freezing = quick win |
| Leafy herbs | Excellent (dry for teas/spices) | Not ideal | Limited | Good (chopped in oil/butter) | Not common | Drying = low effort / Freezing = quick win |
| Mushrooms* | Excellent (classic dried mushrooms) | Unsafe | Limited | Good (cooked then frozen) | Not suitable | Drying = low energy / Freezing = safe if cooked |
Note: Only preserve mushrooms you can positively identify and know are safe. Never preserve wild fungi unless you’re fully confident they’re edible.
How to Use This Guide
This preservation matrix isn’t a strict rulebook. Think of it as a quick-start guide to help you act fast when faced with seasonal gluts. Once you know which home preservation method suits your crop, dive into the next sections for detailed, step-by-step instructions.
Drying
Drying is one of the oldest and most reliable low energy food preservation methods. By removing moisture, you stop bacteria and mould from thriving. The result is lightweight, flavour-packed food that can last for months. As part of a sustainable food preservation routine, drying is perfect for gardeners and foragers who want to build a practical, zero waste pantry.
Drying Methods
- Solar drying: The most sustainable choice, powered by free sunshine. Best during warm, dry spells with plenty of airflow. Works well for apples, herbs, and mushrooms.
- Dehydrator: A plug-in tool with steady, low heat and built-in fans. Uses less energy than an oven and gives consistent results for fruit, veg, and herbs.
- Oven drying: Handy if you don’t own a dehydrator, though more energy-intensive. Keep the oven at its lowest setting and the door slightly ajar so moisture escapes.
Pros and Cons
Pros:
- A very sustainable preservation method with minimal or no energy use (especially solar or dehydrator).
- Long shelf life when stored in sealed jars or tubs.
- Concentrates flavour — think chewy apple rings or rich dried tomatoes.
Cons:
- Time-intensive (hours to days).
- Some crops lose colour or nutrients.
- Needs airtight storage to stay dry.
Shelf Life
- Dried fruit: up to 12 months if stored cool and dark.
- Dried veg: around 6–8 months.
- Herbs: 6–12 months when sealed tightly.
Energy & Effort Notes
- Solar drying = zero energy, weather dependent, very low effort once set up.
- Dehydrator = low energy, set-and-forget, moderate upfront cost.
- Oven drying = higher energy, needs more attention.
- For detailed steps, see our Oven Fruit Drying Guide.
- Want to stay off-grid? Try our DIY Solar Food Dehydrator Project.
Fermenting
Fermentation is one of the easiest and most traditional sustainable food preservation methods. By giving the right bacteria a head start, you let them protect your veg while creating tangy, nutritious flavours. With just vegetables, salt, and water, you can preserve your harvest sustainably and stock a zero waste pantry with jars that last for months.
How Fermentation Works
- Salt pulls water from the veg and forms a natural brine.
- Lactic acid bacteria multiply, lowering the pH and blocking harmful microbes.
- Once the pH drops below 4.6, your ferment is considered safe.
Recommended Salt Ratios
- Shredded cabbage (sauerkraut): 2–2.5% salt by weight.
- Firm vegetables (cucumbers, carrots, beans): 3–5% salt by weight.
- Always weigh your veg and salt with a digital scale — accurate ratios are key for safe home preservation methods.
Basic Equipment
- Glass jars, food-grade tubs, or stoneware crocks.
- A weight (stone, small jar, or fermenting weight) to keep veg submerged.
- A loose lid or airlock so gases can escape while keeping oxygen out.
Pros and Cons
Pros:
- No heat or electricity required — a true low energy food preservation method.
- Adds probiotics and boosts nutrition.
- Builds bold, complex flavours.
Cons:
- Needs daily checks during the first week.
- Can feel intimidating for beginners.
- Temperature sensitive — too hot or too cold slows the process.
Shelf Life
- Most ferments are ready in 1–4 weeks, depending on temperature and taste.
- Once sour enough, transfer to the fridge or a cool cellar.
- Best quality lasts a few months, but safe as long as food stays acidic and submerged.
Energy & Effort Notes
- Energy use: none.
- Effort: moderate at first, then nearly hands-off.
Want more ways to reduce food waste and live sustainably? Explore our Zero-Waste Journey.
Pickling
Pickling is one of the fastest and most reliable sustainable food preservation methods. By soaking food in vinegar — often with salt, sugar, and spices — you create tangy jars that stay safe for months. The acidity keeps harmful microbes out, giving you a quick, low-effort way to preserve your harvest sustainably and stock a zero waste pantry.
How Pickling Works
- Vinegar or another acid lowers the pH below 4.6, making the food safe from botulism.
- Garlic, dill, peppercorns, and sugar add extra flavour.
- Most recipes involve briefly heating the vinegar mix before pouring it over vegetables.
Best Crops for Pickling
- Cucumbers (classic crunchy pickles)
- Courgettes (zucchini-style pickles)
- Onions
- Beetroot
- Carrots
- Apples and pears (great in chutneys and spiced pickles)
Pros and Cons
Pros:
- Shelf-stable for months without refrigeration (if sealed correctly).
- Quicker than fermentation.
- Endless flavour options.
Cons:
- Vinegar can overpower delicate flavours.
- Some recipes use a lot of salt or sugar.
- Needs tested recipes to guarantee safe acidity levels.
Shelf Life
- Sealed jars: up to 12 months in a cool, dark cupboard.
- Opened jars: 4–6 weeks in the fridge.
Energy & Effort Notes
- Energy use: very low (just heating the vinegar mix).
- Effort: minimal — you can pickle a batch in less than an hour, making it one of the easiest home preservation methods.
Quick Tip
Always follow tested pickling recipes. Guesswork doesn’t always deliver the right acidity, and that can lead to unsafe preserves.
Freezing
Freezing is hands-down the easiest home preservation method for gardeners and foragers. It locks in flavour, retains nutrients, and requires almost no prep compared to other techniques. If you’ve got freezer space, it’s a quick win that helps you preserve your harvest sustainably and cut down on food waste.
How Freezing Works
- Slows enzymes and microbial growth, keeping food safe for months.
- Softens most fruit and veg once thawed, making them best for sauces, soups, or smoothies rather than raw eating.
Best Crops for Freezing
- Tomatoes: whole, chopped, or puréed. Blanching helps slip skins, but raw freezing works too.
- Berries: freeze on trays first to stop them clumping.
- Herbs: chop and freeze in oil or butter using ice cube trays.
- Courgettes: grate and freeze in portions for fritters, soups, or baking.
- Apples & Pears: freeze as slices or stewed purée.
Pros and Cons
Pros:
- Very little effort required.
- Retains most nutrients and flavour.
- Works with a wide range of crops.
Cons:
- Relies on freezer space and steady electricity.
- Some foods lose texture after thawing.
- Doesn’t last as long as dried or fermented foods.
Shelf Life
- Fruits and vegetables: 8–12 months at best quality.
- Herbs in oil: around 6 months.
Energy & Effort Notes
- Energy use: ongoing freezer cost, but no cooking time — making it a practical low energy food preservation method compared to ovens or boiling.
- Effort: very low — most produce is freezer-ready in minutes.
Want the full step-by-step? Read our detailed guide on Freezing Tomatoes.
Jam (1-Jar Quick Win)
Jam is a classic home preservation method, but traditional recipes often make huge batches and require long boiling or even water-bath canning. The one-jar approach keeps things simple, making it a perfect choice if you want to preserve your harvest sustainably without fuss. It’s quick, energy-light, and ideal for small harvests or leftover fruit — a true fit for a zero waste pantry.
How Jam Works
- Simmer fruit with sugar and lemon juice until it thickens.
- Sugar and acid act as natural preservatives.
- Instead of long-term storage, this small batch goes into the fridge or freezer.
Quick Recipe (Makes 1 Jar)
Ingredients:
- 250g fruit (berries, plums, or chopped apples all work well)
- 150g sugar
- Juice of ½ lemon
Method:
- Add fruit, sugar, and lemon juice to a small pan.
- Simmer gently, stirring often, until it thickens (20–30 minutes).
- Spoon into a clean jar while hot, allow to cool, then refrigerate.
Shelf Life
- Fridge: up to 2 weeks.
- Freezer: up to 3 months.
Pros and Cons
Pros:
- Needs no specialist equipment.
- Quick — done in under an hour.
- Perfect for small harvests or leftover fruit.
Cons:
- Shorter shelf life than traditional canning.
- Not practical for larger gluts.
Energy & Effort Notes
- Energy use: low (just a short simmer).
- Effort: very low — simple enough for beginners.
Want more ideas? Explore our dedicated One-Jar Jam Recipe guide.
Storage Containers & Labelling
The container you choose can make or break your preserves. The right option keeps food safe, extends shelf life, and helps build a zero waste pantry. By choosing carefully, you’ll also support your wider goal of sustainable food preservation at home.
Container Options
- Glass jars and bottles: Reusable, durable, and easy to sterilise. Ideal for ferments, jams, and dried goods since they don’t absorb odours or stains. A staple for any home preservation method.
- Food-grade plastic tubs: Lightweight and affordable. Great for freezing or short-term storage, though they can pick up smells and wear out faster than glass.
- Metal tins: Perfect for dried herbs and teas. Always check they’re food-safe and lined to prevent rust.
- Reusable silicone bags: Excellent for freezer storage. Flexible, space-saving, and washable, making them a smart choice for a sustainable kitchen.
Labelling
Always label your jars and tubs with:
- Contents (what it is)
- Method (dried, pickled, fermented, frozen, jam)
- Date (when it was preserved)
Clear labelling makes it easier to rotate stock, track shelf life, and avoid hidden waste at the back of cupboards.
Zero-Waste Pantry Tips
- Reuse glass jars from shop-bought foods (sterilise before use).
- Source jars and bottles second-hand or through swaps.
- Replace only the lids when they wear out instead of buying new jars.
- Buy dry goods in bulk to reduce packaging and refill containers.
A well-labelled pantry with the right containers not only saves money but also reduces food waste. It’s a small step that supports low energy food preservation and keeps your harvest useful for months to come.
Safety Basics & Good-Enough Kit List
Preserving food at home is rewarding, but safety should always come first. Following a few simple rules will keep your jars safe to eat, support sustainable food preservation methods, and help you build a reliable zero waste pantry.
Safety Basics
- Mind the pH: Foods above pH 4.6 (most vegetables) aren’t safe for long-term storage unless pressure-canned. Safer options include fermenting, pickling, freezing, or drying — all excellent low energy food preservation techniques.
- Salt matters: Use 2–5% salt by weight in ferments. Too little risks spoilage, while too much affects taste. Accurate ratios are key for any home preservation method.
- Keep it airtight: Store dried goods in sealed jars or tubs to stop moisture sneaking back in.
- Spot the signs: Throw away anything with mould (except the harmless white yeast sometimes found on ferments), foul odours, or unexpected fizz.
- Don’t wing it with canning: Bottling low-acid foods without tested recipes or proper pressure canning is unsafe.
Good-Enough Kit List
You don’t need pricey gear to get started. These basics will cover almost every preservation technique:
- Sharp knife and sturdy chopping board
- Large mixing bowl
- Digital kitchen scale (for weighing salt accurately)
- Clean glass jars with lids (reuse whenever possible)
- A weight (small jar, stone, or fermenting weight)
- Wooden spoon or spatula
- Permanent marker and labels
- Optional: a dehydrator for consistent drying and efficient results
With these tools and safe practices, you can confidently preserve seasonal gluts and foraged finds. It’s a straightforward way to cut waste, save money, and practise sustainable food preservation at home.
Seasonal Preservation Calendar
A well-stocked zero waste pantry follows the rhythm of the seasons. Every crop has its glut, and choosing the right sustainable food preservation method at the right time means you’ll enjoy homegrown and foraged flavours long after harvest. This calendar makes it easier to practise low energy food preservation throughout the year.
Month-by-Month Preservation Guide
Here’s a simple breakdown of common UK crops and the best ways to preserve them:
| Month | Crop Highlights | Best Preservation Methods |
|---|---|---|
| March–April | Wild garlic, spring greens | Ferment (pestos, kraut), Freeze (chopped) |
| May–June | Strawberries, early herbs | Jam (1-jar), Dry (herbs), Freeze (berries) |
| July–August | Courgettes, cucumbers, soft fruit | Pickle (courgettes, cucumbers), Freeze (berries, courgettes), Jam (plums, berries) |
| September–October | Apples, pears, tomatoes, mushrooms | Dry (apples, mushrooms, herbs), Jam/Chutney (apples, plums), Freeze (tomatoes, pears) |
| November–December | Root veg, brassicas | Ferment (cabbage into sauerkraut/kimchi), Pickle (beetroot, carrots), Freeze (roots, blanched greens) |
Tips for Using the Calendar
- Stick to one preservation project per season to stay on top of gluts.
- Match harvests with sustainable preservation methods: dry herbs, freeze berries, and turn apples into chutneys.
- Keep notes on what worked well each year so you can refine your approach next season.
Looking for more ways to make the most of wild harvests? Check out our Foraging for Beginners guide.
Conclusion
Preserving your harvest doesn’t need to be complicated or energy-heavy. By using low energy food preservation techniques like drying, fermenting, pickling, freezing, and small-batch jam, you can turn seasonal gluts and foraged finds into a pantry that lasts all year. These sustainable food preservation methods not only cut waste but also help build a more resilient household.
Start Small
The best way to begin is to start with one crop and one method. As the seasons roll by, add more techniques at your own pace. Before long, you’ll find a rhythm that keeps shelves stocked, reduces food waste, and supports a zero waste pantry.
Sustainable Benefits
By reusing containers and choosing sustainable options, you’re not only saving money but also reducing your footprint and living more lightly on the planet.
Next Steps
- Freeze your next batch of tomatoes or berries using our home preservation methods.
- Ferment a jar of sauerkraut or make quick pickles for an easy win.
- Try our simple 1-jar jam recipe to enjoy summer fruit in the colder months.
For more detail on each sustainable preservation method, check out the related guides linked throughout this article. Together, they form a practical toolkit for sustainable food preservation that connects your garden, your pantry, and the seasons.


