Introduction to Growing your own Chillies
Learning how to grow chillies indoors is easier than you might think—and it’s one of the best small‑space gardening projects for UK homes. Whether you’re using a sunny windowsill or setting up a simple LED grow light, you can raise compact chilli plants that flower, fruit, and keep your kitchen stocked with fresh heat all year long.
What You’ll Learn in This Guide
- Step‑by‑step instructions – from sowing chilli seeds to harvesting ripe pods.
- Indoor growing conditions – the right temperatures, compost mix, and light levels.
- Best chilli varieties for pots – compact types perfect for windowsills, balconies, or grow tents.
- Care routines – how to water, feed, and prune chillies indoors.
- Pest and disease fixes – simple solutions for common indoor chilli problems.
- Overwintering tips – how to keep your chilli plants alive and producing next year.
Who This Is For
- Beginners who want to grow chillies from seed for the first time.
- Urban gardeners making use of balconies, flats, or conservatories.
- Anyone after easy, reliable results without expensive gear.
Struggling with low winter daylight? Don’t worry—I’ll share practical lighting solutions, including a beginner‑friendly Spider Farmer SF2000 LED grow light, to keep your indoor chilli plants strong and productive.
Continue your indoor growing & seed-starting journey
- How to grow tomatoes indoors — a complete guide – Detailed tips on growing another popular crop inside, including light, watering, and support strategies
- Top-10 easy indoor vegetables to grow – Find other beginner-friendly veg that are ideal for indoor gardening setups alongside chillies
- Best indoor vegetable garden kits for small spaces – Discover kits and tools that make starting seeds and growing indoors easier and more productive
Best Chilli Varieties for Indoor Growing in the UK
Not every type of chilli will thrive indoors. For the best results when you grow chillies indoors, stick with compact, heavy-cropping varieties suited to windowsills, hanging baskets, or containers. These smaller plants are easier to manage and still produce plenty of pods.
Compact & Patio Chilli Varieties
| Variety | Habit / Height | Days to Fruit | Heat (SHU) | Best Pot Size | Notes |
|---|---|---|---|---|---|
| Apache F1 (AGM) | Bushy, 45 cm | ~75–80 days | 70k–80k | 20–25 cm | Reliable, RHS AGM winner |
| Basket of Fire F1 | Trailing, 30 cm | ~80 days | 80k+ | Hanging basket / 20 cm | Excellent basket variety |
| Thai Hot | Compact, 20–30 cm | ~65–70 days | 100k+ | 15–20 cm | Small but fiery, perfect windowsill chilli |
| Pretty Purple | Compact, 30 cm | ~70 days | Mild–Medium | 15–20 cm | Colourful ornamental and edible pods |
| Hungarian Hot Wax | Upright, 45–60 cm | ~70–80 days | 5k–15k | 25–30 cm | Early and dependable cropper |
| Cayennetta F1 (AGM) | Upright, 50 cm | ~85 days | 30k–50k | 25–30 cm | Performs well in UK conditions |
Where to Buy Chilli Seeds in the UK

Suttons Seeds
Great for compact indoor chilli varieties such as Apache F1, Basket of Fire, Jalapeño, and more.

D.T. Brown Seeds
Offers both plug plants and seed packs, including Quickfire and Apache chillies
How to Germinate Chilli Seeds Indoors (UK Guide)
Getting chilli seeds off to the right start is key if you want healthy indoor plants that crop well. In the UK, that means keeping them warm, giving them enough light, and using the right compost mix from day one.
When to Start Chilli Seeds (UK)
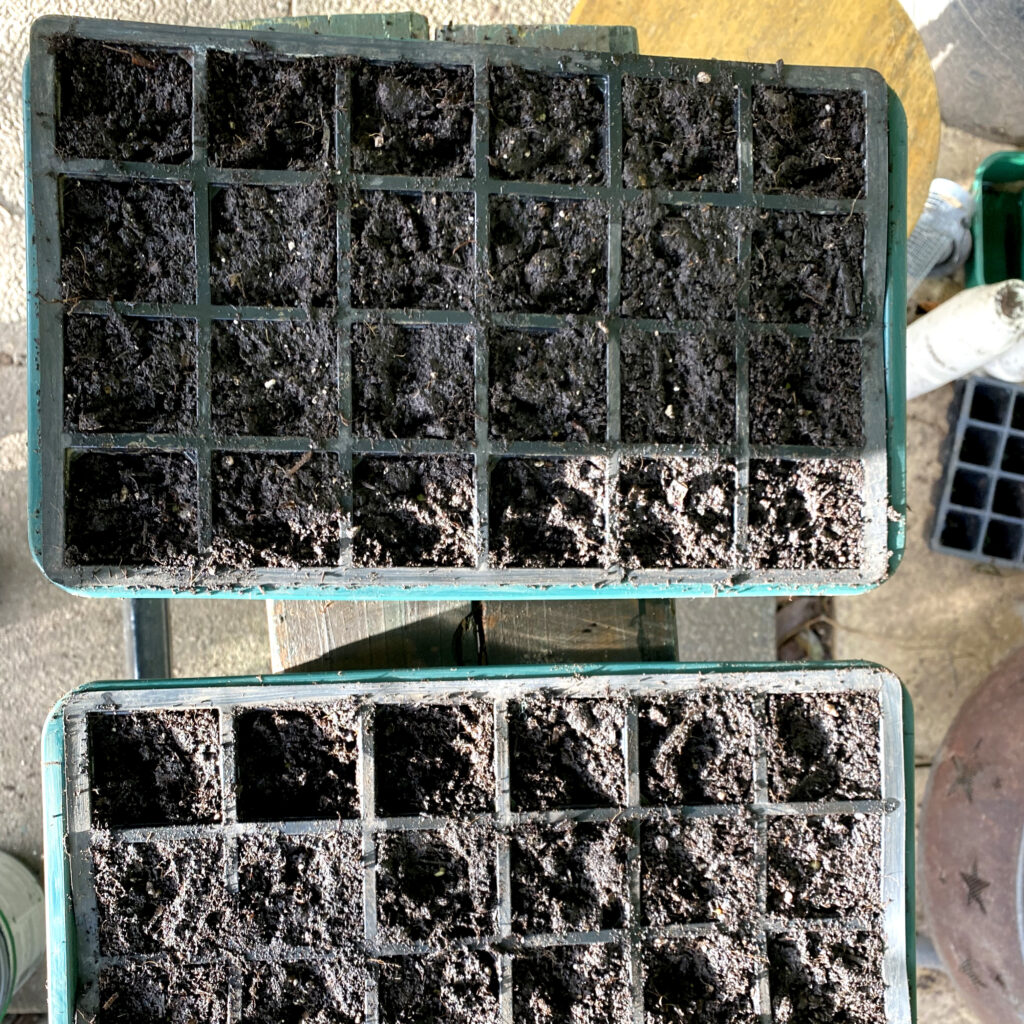
- Best months: Sow chilli seeds indoors between January and March for the strongest plants and an earlier harvest.
- Later sowings: April or May sowings still work for compact, quick-growing varieties, but expect fruiting later in summer.
- Year-round option: With a grow light setup, you can start chillies from seed any month of the year.
Germination Temperature & Method
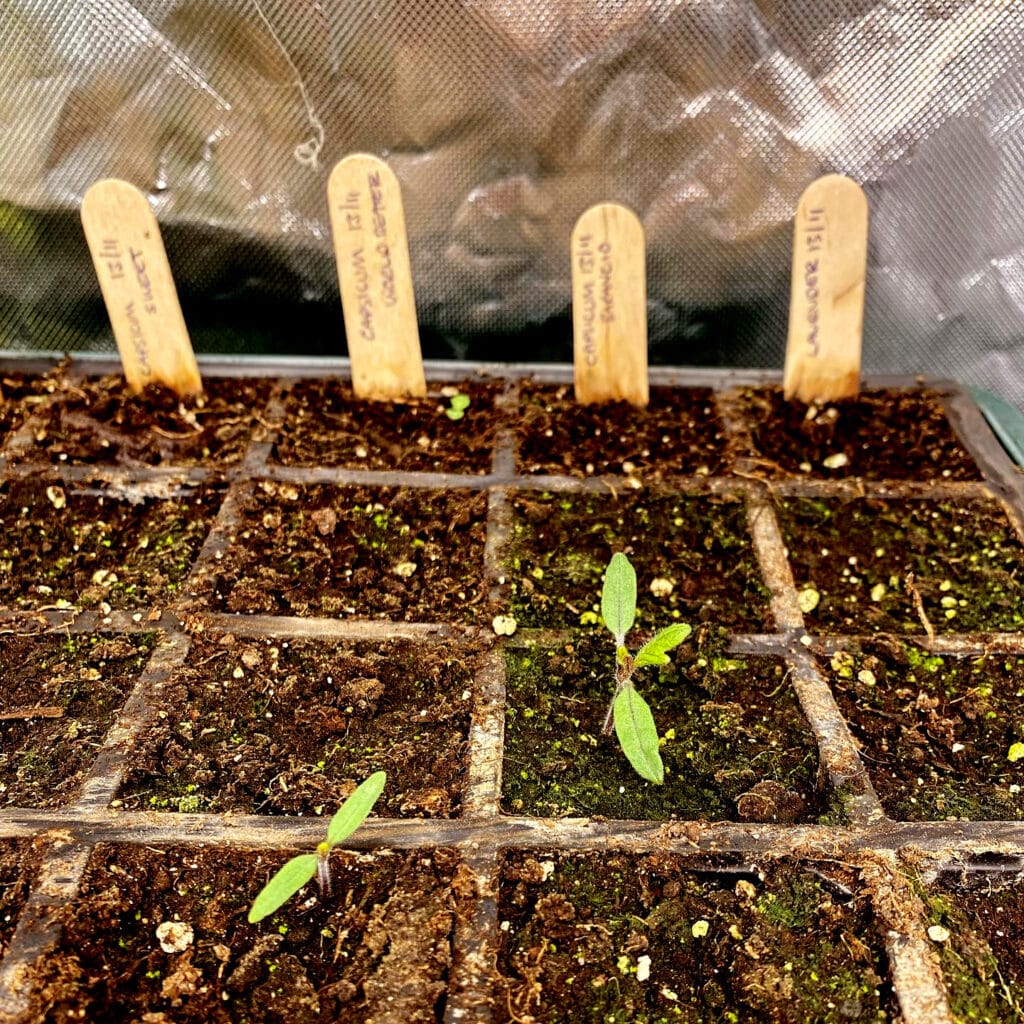
- Ideal range: Keep soil between 21–27°C (25°C is the sweet spot for chilli germination).
- Heat source: Use a heated propagator or heat mat with thermostat to maintain steady warmth.
- Sowing depth: Sow seeds 5 mm deep in moist, free-draining compost and top with a light layer of vermiculite.
- Humidity: Cover trays with a clear lid or cling film until seedlings appear to lock in moisture.
- Germination time: Most chilli seeds sprout within 7–14 days, though super-hot varieties can take up to 4–5 weeks.
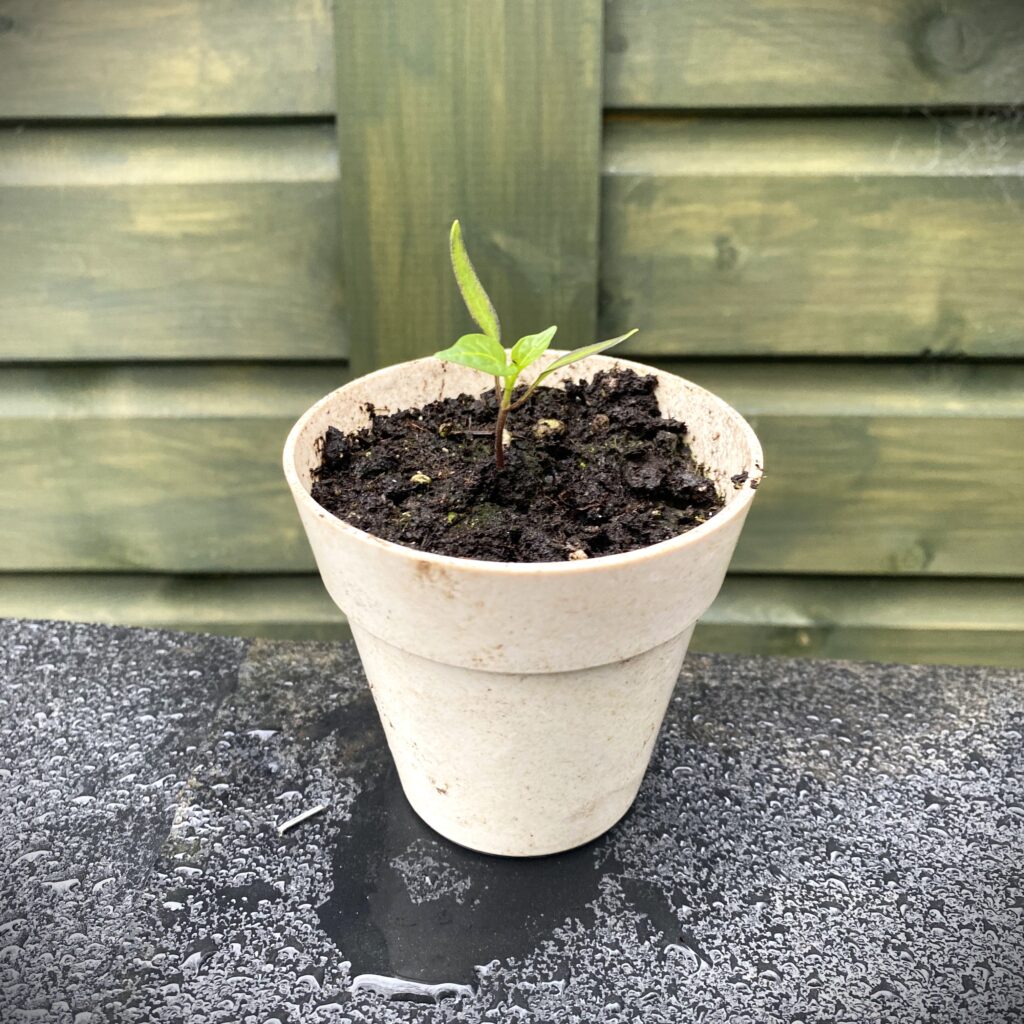
Preventing Leggy Chilli Seedlings
Low UK winter light often makes seedlings stretch. To stop this:
- Move seedlings into bright light as soon as they emerge.
- Run full-spectrum LED grow lights for 12–16 hours daily if windowsill light isn’t enough.
- Position lights close to seedlings (but not touching) to keep growth compact.
- Use a small oscillating fan for airflow—this strengthens stems and prevents damping-off.
- Potting on: Once true leaves appear, transplant seedlings into 7 cm pots. If they’re leggy, bury the stems a little deeper.
✅ Tip: Always sow more chilli seeds than you think you’ll need. Germination can be slow and patchy, so having extras gives you a better chance of raising strong indoor chilli plants.
Best Potting Mix & Containers for Growing Chillies Indoors (UK)
Getting your compost and container choices right is essential for strong root growth and healthy indoor chilli plants. With the correct potting mix and a steady pot-up routine, your plants will establish faster and crop more reliably.

Ideal Compost Mix for Chillies
- Base compost: Choose a good-quality peat-free multi-purpose compost for a sustainable option.
- Improve drainage: Mix in 20–30% perlite or horticultural grit to keep the soil airy and prevent waterlogging.
- Alternative option: John Innes No.2 (loam-based) is a reliable chilli compost for potting on, as it holds nutrients and moisture well.
- Avoid garden soil: It compacts easily indoors and can carry pests or diseases.

Best Pot Sizes for Indoor Chillies
- Seedling stage: Start chilli seedlings in 7 cm (3″) pots.
- First transplant: Move up to 13 cm (5″) pots once roots fill the starter pot.
- Intermediate size: Shift into 1–3 litre pots as the chilli plants grow bigger.
- Final container: Compact chilli varieties thrive in 7–12 litre pots (20–30 cm wide). Larger types, such as Hungarian Hot Wax, will need 12–15 litres.
⚠️ Always pot up gradually—jumping from small to very large pots often leaves compost too wet, which can damage roots.
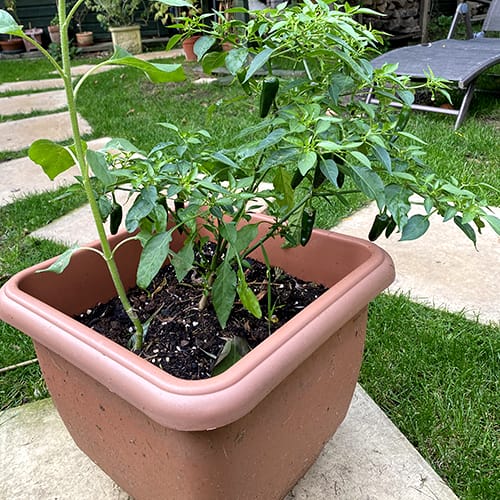
Choosing the Right Container
- Drainage holes: Essential—chilli roots should never sit in water.
- Terracotta pots: Dry out quicker, making them a good choice if you tend to overwater.
- Plastic pots: Retain more moisture, handy if you sometimes forget to water.
- Fabric pots: A breathable option that helps prevent root rot and supports strong root systems.
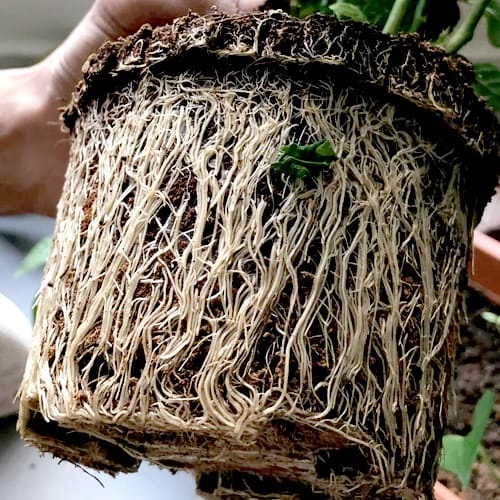
Root Health & Repotting Signs
- Watering: Always water until it drains freely, then empty saucers within 30–60 minutes.
- When to repot: Look for roots circling inside the pot, pushing through drainage holes, or compost drying out very quickly. These are clear signs it’s time to pot on.
✅ Tip: Each time you pot on your indoor chillies, add a little slow-release fertiliser. It keeps plants fed and growing steadily without extra effort.
Light & Heat for Indoor Chilli Growing (Windowsill vs LED)
Chilli plants thrive on warmth and strong light—two things often in short supply in a UK home. The good news is you can still grow chillies indoors successfully with either a sunny windowsill or a reliable LED grow light setup.
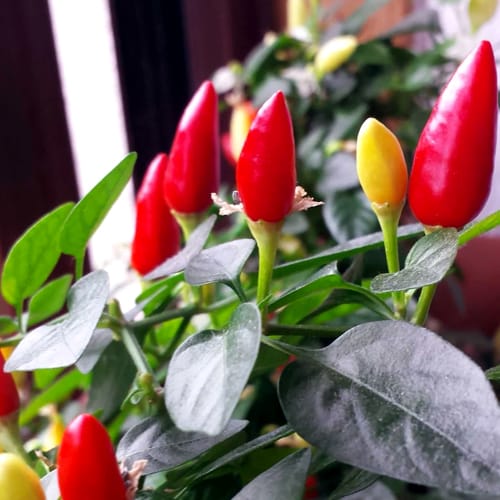
Growing Chillies on a Windowsill
- Best spot: A south-facing windowsill with at least 5–6 hours of direct sun daily.
- East/West-facing windows: These can work too, though you’ll likely need a small LED grow light boost.
- Reflectors: Place foil, white card, or reflective film behind plants to bounce light back onto leaves.
- Rotate pots: Turn pots every few days to prevent leaning or stretching toward the glass.
- Seasonal care: In winter, insulate against cold draughts; in summer, add light shade to protect from scorching midday sun.

Using LED Grow Lights for Chillies
- Light hours: Provide 12–16 hours of full-spectrum LED lighting to mimic summer conditions.
- Light height: Hang LEDs 30–45 cm above the chilli canopy. Adjust height and dim settings as plants grow.
- Photoperiod: Chillies tolerate long days, but giving them 8 hours of darkness supports healthier growth.
- Airflow: Pair lights with a small oscillating fan for better air circulation. This reduces hotspots and strengthens stems.
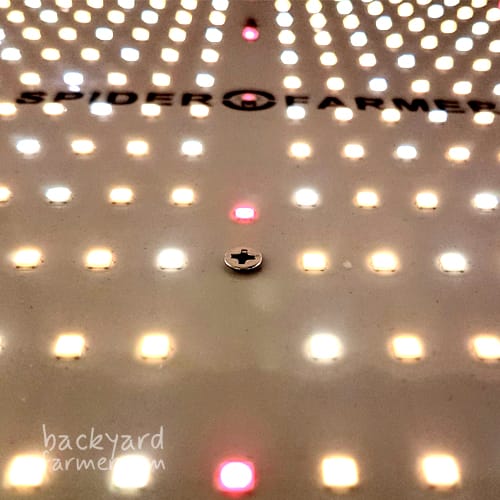
Recommended Grow Light (Editor’s Pick)
Spider Farmer SF2000 LED Grow Light
- Provides full-spectrum light for chilli seedlings and mature fruiting plants.
- Energy-efficient and dimmable—perfect for home use.
- Covers roughly 2′ × 4′—ideal for multiple pots or a small grow tent.
- Read the full review here to see why it’s my top pick for indoor chilli growing.
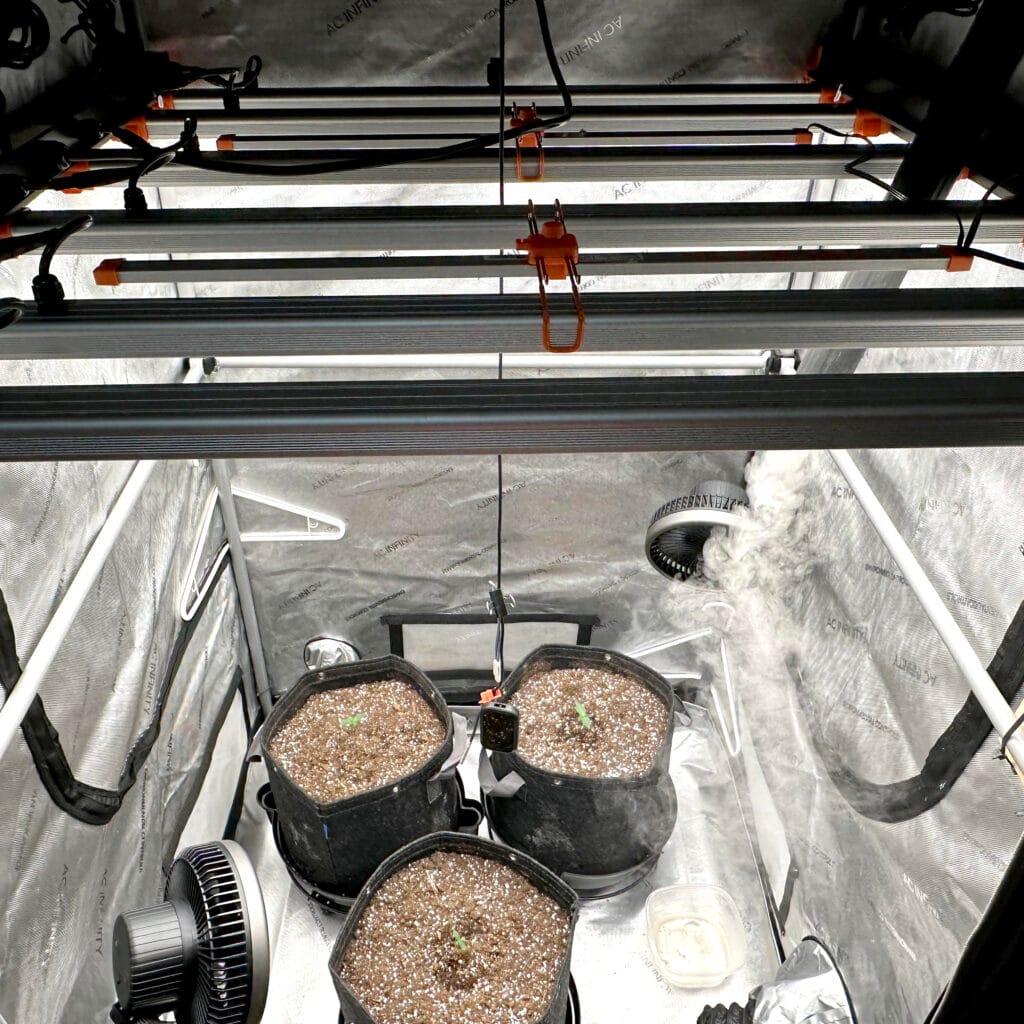
Grow Tent & Shelf Options
- Grow tents: Help stabilise light, heat, and humidity. A compact 60 × 60 cm tent is perfect for a handful of chilli plants.
- Wire shelving + LEDs: A space-saving option that works well for compact chilli varieties indoors.
- Plan spacing: Match your LED coverage to plant numbers—avoid cramming too many chillies under one light.
✅ Tip: Light is the number one limiting factor when you grow chillies indoors. Spindly or weak plants almost always mean they need more light.
Watering & Feeding Chilli Plants Indoors (UK Guide)
Nailing your watering and feeding routine is crucial for strong, fruiting indoor chilli plants. Too much or too little water—or the wrong fertiliser—can quickly cause problems, especially when growing chillies in pots.
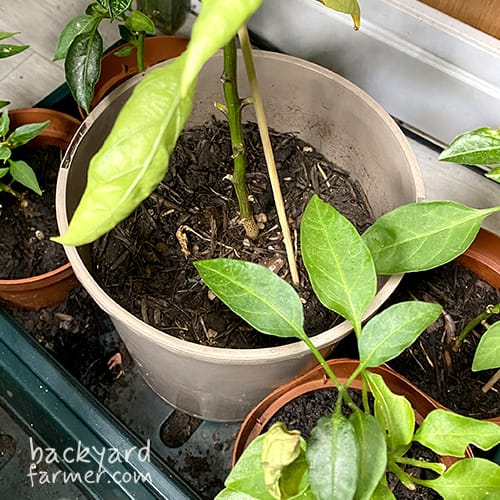
Watering Schedule for Chillies
- Soak and dry method: Water deeply until it drains from the bottom, then let the top 2–3 cm of compost dry out before watering again.
- Frequency: In cooler spring conditions, water every 3–5 days. During hot summer spells, indoor chillies may need daily watering.
- Drainage check: Always empty saucers within an hour to stop roots sitting in stagnant water. This prevents root rot.

Feeding Chilli Plants Indoors
BioBizz.com are my go to Fertiliser for any indoor plants!
- Seedlings (first 6 weeks): Fresh compost already has nutrients—no fertiliser needed.
- Early growth: Once chilli seedlings reach 10–15 cm tall, use a light liquid feed every 2–3 weeks.
- Flowering & fruiting stage: Switch to a high-potassium chilli fertiliser (such as tomato feed or Chilli Focus) once a week. This boosts flower set and helps pods ripen.
- Nitrogen caution: Too much nitrogen leads to leafy growth but fewer chillies.
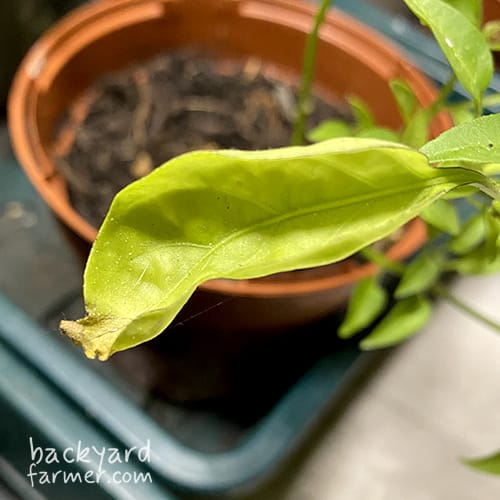
Troubleshooting Common Issues
- Yellowing leaves: Usually a nutrient deficiency—start a feeding routine.
- Drooping plants: Could be under- or over-watering. Always check compost before reacting.
- Blossom end rot: Caused by uneven watering or calcium deficiency. Keep moisture consistent and consider a calcium boost.
- Slow growth: Often down to low light or lack of nutrients. Increase LED grow light hours and feed regularly.
✅ Tip: Combine watering, feeding, rotating, and pest checks into one simple weekly routine. A steady rhythm keeps your indoor chilli plants healthy and productive.
Training, Pruning & Pollination of Indoor Chilli Plants
Indoor chilli plants benefit from shaping and a little pollination support. With the right training and pruning, you’ll boost yields, save space, and keep plants healthier in small indoor setups.
Pinching Chilli Plants for Bushier Growth
- When to pinch: Once chilli plants reach 15–20 cm tall or develop 5–6 true leaves.
- How to do it: Pinch out the growing tip with clean fingers or scissors.
- Why it helps: Pinching encourages side shoots, creating a bushier chilli plant with more branches and more flowering sites. This leads to bigger harvests when growing chillies indoors.
Supporting & Managing Space Indoors
- Staking: Taller varieties such as Cayennetta or Hungarian Hot Wax may need a cane or support ring to stay upright.
- Low-Stress Training (LST): Gently bend and tie branches outward to allow more light and airflow. This is especially useful in grow tents or on shelving units with limited headroom.
- Plant spacing: Leave at least 20–30 cm between pots so chilli plants don’t compete for light, water, or airflow. Overcrowded plants are more prone to pests and disease.
How to Hand-Pollinate Chilli Plants Indoors
Chillies often self-pollinate outdoors with help from wind and insects, but indoor plants need a boost.
- Tap method: Gently tap or shake plants to release pollen.
- Brush method: Use a small paintbrush or cotton bud to transfer pollen between flowers.
- Best timing: Pollinate around midday, when flowers are fully open and receptive.
- Airflow support: A small oscillating fan mimics natural wind, helping pollen move and strengthening stems.
✅ By pinching, supporting, and hand-pollinating your indoor chilli plants, you can often double your yields and keep plants compact, tidy, and productive.
Common Indoor Chilli Plant Problems (Quick Fix Table)
Even with the best care, indoor chilli plants can run into issues. Use this quick reference guide to spot common chilli problems and fix them fast, keeping your plants healthy and productive.
Quick Fix Table for Growing Chillies Indoors
| Problem | Symptom | Likely Cause | Indoor Fix |
|---|---|---|---|
| Aphids on chillies | Sticky leaves, clusters on stems | Sap-sucking insects | Blast with water, treat with neem oil, or use yellow sticky traps |
| Spider mites | Fine webbing, speckled leaves | Dry indoor air | Increase humidity, wipe leaves, spray with insecticidal soap |
| Fungus gnats | Tiny black flies near compost | Overwatering, damp soil | Let surface dry, add sticky traps, or top dress with grit |
| Whitefly | Small white insects flying up | Warm, still air | Use sticky traps, insecticidal soap, and improve airflow |
| Powdery mildew | White powdery coating on leaves | Poor ventilation, high humidity | Remove affected leaves, improve air movement, spray with bicarbonate solution |
| Botrytis (grey mould) | Grey fuzzy mould on leaves/fruit | Excess humidity, poor airflow | Cut out infected parts, improve circulation, reduce watering |
| Leggy seedlings | Tall, thin, weak stems | Low light | Move under LED grow lights, brighten windowsill, or transplant deeper |
| Flower drop | Flowers fall without fruit set | Stress, uneven watering, poor pollination | Keep watering consistent, hand-pollinate, and add airflow |
✅ Most indoor chilli plant problems come down to light, watering, and airflow. Get those three right and you’ll avoid most chilli growing issues indoors.
Overwintering Chilli Plants Indoors (UK Guide)
Chilli plants are perennials in their native climate, but UK winters are far too harsh for them outdoors. The good news is you can overwinter chillies indoors to save time, protect your strongest plants, and enjoy an earlier harvest the following year.
When to Bring Chillies Indoors
- Move plants inside before night-time temperatures drop below 10°C.
- Inspect each plant for pests and remove any damaged or diseased leaves before bringing them indoors.
How to Cut Back & Prepare Chilli Plants
- Prune back: Cut stems down to a short framework (10–15 cm) to reduce energy needs and encourage new spring growth.
- Tidy up: Remove any leftover chillies, old fruit, or yellowing leaves.
- Where to keep them: Place plants in a frost-free location such as a heated greenhouse, conservatory, or bright windowsill. Keep the temperature around 10–15°C.
Watering & Care Over Winter
- Light watering: Only water when the compost is nearly dry—about every 2–3 weeks.
- No feeding: Chilli plants slow down in winter and don’t need fertiliser until fresh spring growth begins.
- Pest control: Check regularly for aphids and spider mites. Use neem oil or insecticidal soap at the first sign of trouble.
Waking Up Chilli Plants in Spring
- From February onwards, as days lengthen, move plants into brighter light.
- Repot into fresh compost and gradually increase watering.
- Resume feeding once new green shoots appear.
✅ Overwintering chillies indoors produces stronger, established plants that flower earlier—often giving you pods weeks before seedlings started the same year.
Year-Round Chilli Growing Indoors (UK Guide)
Yes—you can grow chillies indoors year-round in the UK, but it takes the right equipment and a bit of dedication. Here’s what you’ll need and what to expect if you want a steady indoor chilli harvest.
Essential Setup for Year-Round Indoor Chillies
- Strong LED grow lights: Run full-spectrum LEDs for 14–16 hours daily to mimic long summer days. The Spider Farmer SF2000 is one of the best grow lights for indoor chillies.
- Consistent warmth: Keep temperatures steady at 20–25°C for strong, healthy growth.
- Airflow: Use a small oscillating fan to improve circulation, prevent mildew, and strengthen stems.
- Pollination help: Indoor chilli flowers often need assistance. Hand-pollinate with a brush or use a gentle fan to move pollen.
Expected Yields from Indoor Chillies
- Winter crops: Chillies will still fruit, but pods ripen more slowly and yields are usually smaller due to reduced daylight.
- Compact varieties: Best suited to year-round indoor growing, producing regular flushes of small pods.
- Larger varieties: Can grow indoors too, but they’ll need stronger lighting and bigger pots to stay productive.
Is Year-Round Growing Worth It?
- Yes if: You enjoy the challenge, want a steady supply of fresh chillies, and already own a good LED grow light like the Spider Farmer SF2000.
- Maybe not if: You prefer a low-effort approach. Overwintering established plants and sowing fresh chilli seeds each spring is simpler and usually just as productive.
✅ Year-round indoor chilli growing is possible, but it’s an advanced project. For most UK growers, the best balance is sowing in early spring and overwintering a few favourites for an earlier, heavier harvest the following year.
Indoor Chilli Growing FAQs (UK Guide)
These are the most common questions UK gardeners ask about growing chillies indoors—answered clearly to help you get better results.
Water deeply, then wait until the top 2–3 cm of compost dries before watering again. In summer, that could be every 1–2 days, while in cooler months it’s usually every 3–5 days.
Yes. Aim for at least 5–6 hours of direct sun on a south-facing windowsill. If natural light is limited, use a full-spectrum LED grow light for 12–16 hours daily.
Yes. Once plants start flowering, tomato feed works well as a high-potassium chilli fertiliser. A weekly feed encourages more pods and better ripening.
Usually stress—caused by uneven watering, low light, or too much heat. Keep moisture consistent, add extra light if needed, and hand-pollinate to set fruit.
Not always, but pinching out the growing tip when plants reach 15–20 cm encourages bushier growth and more fruiting branches indoors.
Sometimes, but results vary. For reliable germination and flavour, buy named chilli seed varieties from trusted UK suppliers like Suttons or D.T. Brown.
Compact indoor chillies thrive in 7–12 litre pots. Smaller dwarf types like Thai Hot or Pretty Purple grow well in 3–5 litre pots.
Sow chilli seeds indoors between January and March. Use steady heat (around 25°C) and strong light to give seedlings the best start before spring.
✅ These chilli growing FAQs cover the essentials of watering, feeding, light, and pruning—giving you the confidence to grow productive indoor chilli plants in the UK.
Best Tools & Gear for Growing Chillies Indoors (UK Guide)
The right tools and equipment make a huge difference when you grow chillies indoors. With the proper lights, pots, and plant care gear, your chilli plants will grow faster, stay healthier, and produce more fruit. Here are the essentials I recommend for UK indoor growers.
Best Grow Lights for Chillies
- Spider Farmer SF2000 LED Grow Light – Full-spectrum, dimmable, and energy-efficient. One of the best LED grow lights for chillies indoors, perfect for running multiple plants. 🔗 Read the full review here
- Clip-on LED lights – A budget option if you’re growing a single chilli plant on a windowsill and just need a light boost.
Propagation Equipment
- Heated propagator – Keeps chilli seeds at a steady warm temperature (21–27°C) for reliable germination.
- Heat mat with thermostat – A cost-effective way to maintain the right soil temperature for starting chilli seeds indoors.
- Seed trays with clear lids – Traps humidity to speed up chilli seed germination.
Pots & Compost for Indoor Chillies
- 7–12 litre pots – The best final pot size for compact indoor chilli varieties.
- Perlite or grit – Improves drainage and prevents waterlogged roots.
- Peat-free compost or John Innes No.2 – Both are reliable, nutrient-rich growing mediums for chillies.
- Fabric pots – Breathable containers that reduce the risk of root rot and promote stronger root systems.
Indoor Plant Care Tools
- Sticky traps – Essential for monitoring and controlling common chilli pests like fungus gnats and whitefly.
- Neem oil or insecticidal soap – Safe treatments for chilli plants grown indoors.
- Small clip-on fan – Improves airflow, strengthens stems, and helps prevent fungal issues like powdery mildew.
- Timer switch – Automates light cycles for consistent indoor chilli growth.
✅ With just a reliable LED grow light, a heated propagator, and some basic pest control tools, you’ll make growing chillies indoors in the UK much smoother and far more productive.
Best Chilli Seeds & Starter Plants in the UK
The supplier you choose for your chilli seeds makes a huge difference when growing chillies indoors. Strong genetics and reliable germination give you healthier plants and bigger harvests. Here are some of the best UK sources for chilli seeds and plug plants.
Suttons Chilli Seeds
- Apache F1 – A compact chilli plant and RHS Award of Garden Merit winner. Perfect for pots and small indoor spaces.
- Basket of Fire F1 – A heavy-cropping chilli ideal for hanging baskets and containers. Fruits ripen through cream → purple → red.
- Jalapeño – A kitchen staple with medium heat. A must-have for everyday cooking.
- Cayennetta F1 – Bushy, high-yielding, and tolerant of cooler UK homes and greenhouses.
🔗 Shop Suttons Chilli Seeds
D.T. Brown Chilli Seeds & Plug Plants
- Quickfire – Fast-growing, compact chilli variety that’s perfect for beginners.
- Apache – A reliable patio chilli available as both seeds and plug plants.
- Thai Hot – Dwarf plants packed with fiery pods, ideal for sunny windowsills indoors.
- Pretty Purple – Ornamental and edible, with colourful pods that change from purple → red as they ripen.
🔗 Shop D.T. Brown Chillies
✅ If you’re new to growing chillies indoors, plug plants from D.T. Brown are a great shortcut. They skip the germination stage and get you cropping faster.
Final Tips & Harvest for Indoor Chillies
Once your indoor chilli plants are thriving, the best part is harvesting and making the most of your home-grown crop. Here’s how to finish strong and keep the harvest coming for longer.
How to Harvest Chillies Indoors
- Best timing: Pick pods once they’ve reached their full size and final colour—whether red, yellow, purple, or green, depending on the variety.
- How to pick: Use scissors or gently pinch off pods. Avoid pulling, as this can damage stems.
- Encourage more pods: The more regularly you harvest chillies, the more your plants will produce.
Harvesting Patterns by Variety
- Compact indoor chillies such as Thai Hot or Basket of Fire ripen in waves—so pick little and often for a steady supply.
- Larger chillies like Hungarian Hot Wax produce fewer but chunkier fruits. Harvest when they feel firm, glossy, and plump.
Preserving Your Chilli Harvest
- Freezing chillies: Wash, dry, and freeze whole pods in bags for year-round use.
- Drying chillies: String into a traditional ristra or use a dehydrator, then grind into chilli flakes or powder.
- Pickling chillies: Slice into jars and cover with vinegar for a tangy, long-lasting preserve.
Final Chilli Growing Tips
- Keep watering and feeding consistent during fruiting to avoid stress.
- After a big harvest, lightly prune plants to encourage new flower growth.
- Save seeds from open-pollinated chilli varieties for next year’s sowing—it’s the cheapest way to keep growing chillies indoors.
✅ Harvest often, preserve smart, and your indoor chilli crop will keep adding flavour and heat to your meals well beyond the main growing season.

