Introduction
Vegetable gardening hacks can make growing vegetables at home both rewarding and cost-effective. By using simple gardening hacks, you can Increase productivity and save time and money! Why would you not want to do that? These hacks are from my hands on experience as a time served gardener and grower of food.
These practical tips are perfect for:
- Beginners
- Experienced gardeners
- Anyone wanting a thriving vegetable garden without spending a fortune
From efficient planting techniques to DIY garden projects, these vegetable gardening shortcuts will help you:
- Streamline your growing process
- Maximize space, even in small gardens
- Use eco-friendly methods to boost plant health
By incorporating these sustainable gardening solutions, you can grow healthier plants while:
- Reducing waste
- Minimizing environmental impact
Start applying these strategies today, and watch your vegetable garden flourish!
Hack 1: DIY Plant Labels
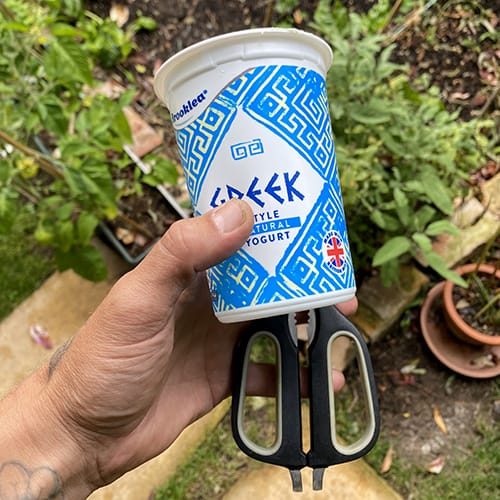
Staying organized in your garden is essential for knowing which plants are growing where. Instead of buying plant labels, you can easily make them yourself with materials you likely already have at home.
Materials Needed:
- Old ice cream tubs or yogurt pots
- Scissors
- Permanent marker
Steps:
- Take your empty ice cream tubs or yogurt pots and thoroughly clean them.
- Using scissors, cut the containers into strips about 1–2 cm wide. These will serve as your plant labels.
- Write the names of your plants on the strips with a permanent marker to ensure they remain visible and weatherproof.
- Place the labels in your garden or seed trays.
This DIY method is cost-effective and eco-friendly. Instead of throwing away plastic containers, you give them a second life. Plus, the labels are durable, waterproof, and won’t fade easily, ensuring your garden remains well-organized.
Hack 2: Weeding Efficiency
Weeding is an essential task in maintaining a healthy vegetable garden, but it can be time-consuming. Using the right technique can make it much easier and more efficient.
Why It Works:
Weeding during the midday sun causes weeds to wilt faster after pulling. The intense heat dries them out, preventing them from regrowing and reducing the time needed to deal with them.

Steps:
- Identify a sunny day with clear skies and a hot midday forecast.
- Head to your garden during the hottest part of the day, typically around noon.
- Pull weeds by the roots to prevent regrowth.
- Leave the pulled weeds on the soil surface in the sun, where they will wilt and dry out quickly.
- Once they have dried, compost them or use them as mulch.
This method saves time because you don’t need to make multiple trips to the compost bin. The weeds will wilt on the spot and die off faster, allowing you to focus on other gardening tasks. By weeding efficiently, you maintain better control over invasive plants without excessive effort.
Hack 3: Multi-Sowing for Space-Saving
If you’re short on space or want to maximize the efficiency of your garden, multi-sowing is the perfect technique. By sowing multiple seeds in a single module, you can save both space and compost while ensuring healthy plant growth.
Why It Works:
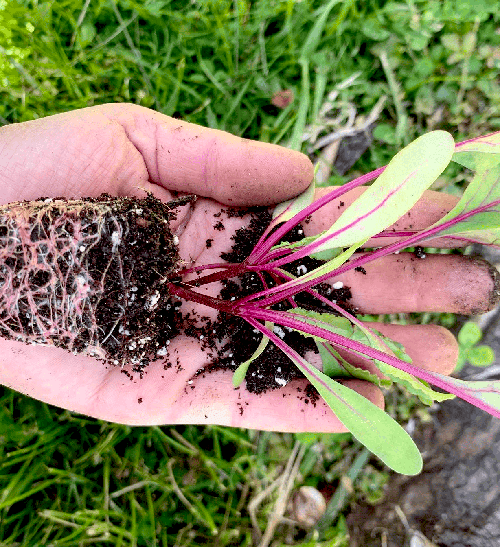
Seeds like beetroot, radish, and onions can be sown together in clusters. As they grow, the seedlings naturally push away from each other, allowing multiple plants to thrive in a smaller area.
Steps:
- Choose seeds that are suitable for multi-sowing, such as radishes, beetroot, or onions.
- Fill your seed tray or module with compost, leaving a little space at the top.
- Sow 3–5 seeds per module, placing them evenly across the compost surface.
- Cover the seeds lightly with more compost and water gently.
- Once the seedlings emerge, they will push away from each other as they grow. This creates healthy, spaced-out plants without needing to thin them out.
By using this technique, you’ll save valuable space in your garden or seed trays, which is especially useful if you’re growing in containers or raised beds. Additionally, multi-sowing reduces the amount of compost needed and optimizes your planting process.
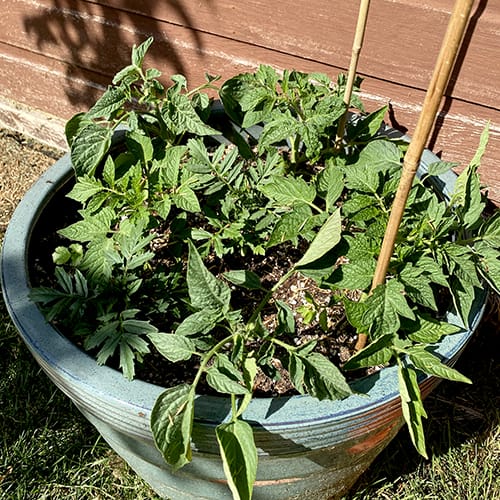
Hack 4: Tomato Root Encouragement
For strong, productive tomato plants, it’s essential to encourage deep root growth. A simple watering strategy after transplanting can help your tomatoes develop a robust root system, leading to healthier plants and better yields.
Why It Works:
By withholding water for a short period after transplanting, tomato plants are forced to grow deeper roots as they search for moisture. This results in stronger, more resilient plants that can better access water and nutrients in the soil.
Steps:
- Transplant your tomatoes: Once your tomato seedlings are ready, plant them in their final position, whether in the ground, a raised bed, or a container.
- Hold off on watering: For the first seven days after transplanting, avoid watering your tomatoes. This temporary drought encourages the roots to grow deeper as they search for water.
- Resume regular watering: After the initial week, begin watering your tomatoes regularly, ensuring the soil remains consistently moist but not waterlogged.
This technique promotes a stronger root system, which not only makes the plants more drought-tolerant but also boosts their ability to absorb nutrients. Stronger roots lead to healthier plants and a more productive harvest. If you’re looking to grow tomatoes successfully, check out our complete guide on how to grow tomatoes for more detailed tips.
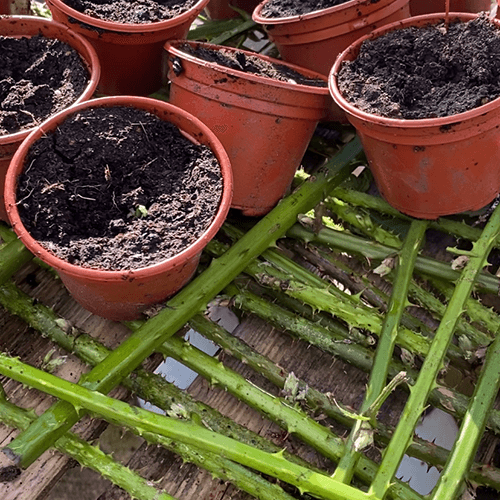
Hack 5: Use Bramble Canes to Repel Slugs
Slugs can quickly destroy tender seedlings, but you can protect your plants without using harmful chemicals by creating a natural barrier with bramble canes.
Why It Works:
Slugs have soft bodies that make it difficult for them to crawl over thorny surfaces. Bramble canes, with their sharp thorns, act as an effective physical barrier that deters slugs from reaching your plants.
Steps:
- Collect some thorny bramble canes, preferably ones that are dried out and easy to handle.
- Cut the bramble canes into manageable lengths (about 10–15 cm long).
- Create a fence-like structure by stacking the bramble canes around your seedlings in a circular pattern, leaving a small gap for the plants to grow.
- Ensure the canes cover the entire perimeter, forming a continuous barrier around the plants.
This natural barrier keeps slugs away from your seedlings without the need for slug pellets or chemicals. It’s an eco-friendly solution that helps protect your plants while benefiting wildlife by avoiding toxins in the soil.
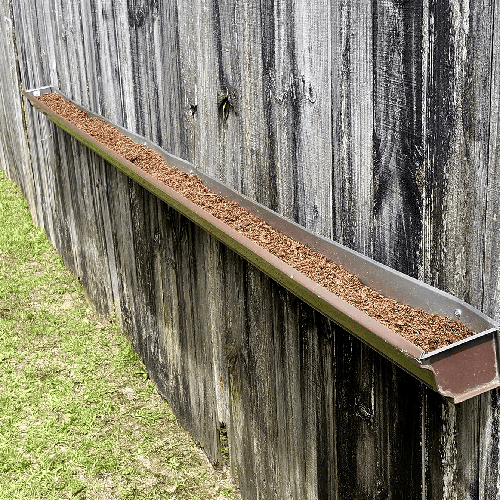
Hack 6: Rain Gutter Seedling Planting
Transplanting seedlings can sometimes disturb their delicate roots, but by using old rain gutters, you can make the process much smoother and less stressful for your plants.
Why It Works:
Rain gutters allow you to grow seedlings in a long, narrow tray, making it easy to slide the entire row of seedlings into the soil without disturbing their roots. This minimizes transplant shock and gives your plants a better start.
Steps:
- Find an old rain gutter and clean it thoroughly to remove any debris.
- Drill small holes along the bottom for drainage.
- Fill the gutter with compost, leaving a bit of space at the top.
- Sow seeds, such as peas or lettuce, evenly across the length of the gutter.
- Water the seeds regularly until they sprout and develop into small seedlings.
- When the seedlings are ready to be transplanted, dig a trench in your garden the same length and width as the gutter.
- Gently slide the seedlings out of the gutter and into the trench, ensuring the root systems stay intact.
This method ensures an easy and seamless transplant, reducing stress on the plants and making it a highly efficient way to plant rows of seedlings.
Hack 7: Wood Chip Mulching
Mulching is a great way to conserve moisture, suppress weeds, and improve the soil in your garden. Using free wood chips from local arborists is an eco-friendly and cost-effective solution for mulching your garden paths and beds.
Why It Works:
Wood chips create a barrier that helps retain soil moisture, suppress weeds, and, over time, enrich the soil as they decompose. They’re ideal for garden paths or around vegetable beds to keep the area neat and functional.

Steps:
- Contact local arborists or tree care companies and ask if they have free wood chips available. Many are happy to give them away to avoid disposal costs.
- Once you have your wood chips, spread a 2-3 inch layer over garden paths or around your vegetable beds.
- For best results, use wood chips on garden paths to create a clean, walkable surface, and then let them decompose naturally over time.
- As the chips break down, they release nutrients into the soil, which can later be worked into garden beds to improve soil structure.
This mulch will not only tidy up your garden but also improve the health of your soil without spending a penny. It’s a sustainable and practical way to maintain a productive vegetable garden.
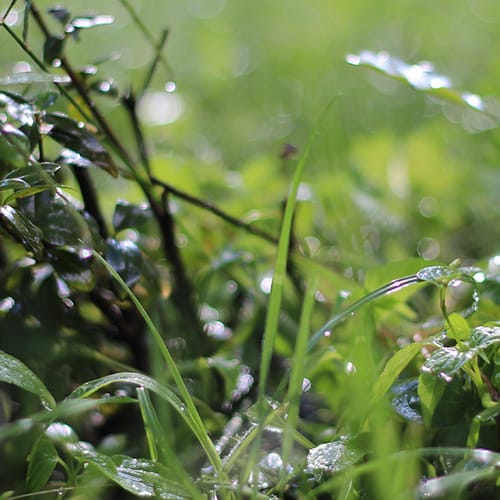
Hack 8: Plant Seeds Before Rain
Timing your seed planting with natural rainfall can save water, time, and effort. By taking advantage of forecasted rain, you let nature do the watering for you, ensuring optimal seed germination.
Why It Works:
Seeds need consistent moisture to germinate properly. Planting seeds right before a rainstorm means they get thoroughly watered without you needing to break out the hose or watering can. This technique is especially helpful during dry spells.
Steps:
- Check the weather forecast and look for upcoming rain, preferably a steady rain rather than a heavy downpour.
- Prepare your garden bed or containers by loosening the soil and adding compost if needed.
- Sow your seeds according to the instructions on the packet.
- Lightly cover the seeds with soil and gently firm it down.
- As the rain comes, it will water your seeds naturally, ensuring they get a deep soaking right from the start.
By timing your planting with natural rainfall, you save both water and time. This simple trick also helps ensure your seeds are off to a strong start with the moisture they need for successful germination.
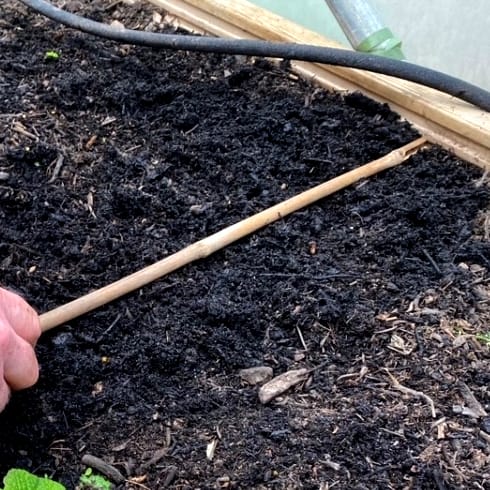
Hack 9: DIY Seed Trenches with Bamboo
Creating straight, uniform seed trenches ensures even planting and easier management of your garden. Using a simple bamboo stick is an effective way to create neat trenches without fancy tools.
Why It Works:
A bamboo stick (or similar object) allows you to create straight and consistent seed trenches quickly. This method is simple, requires no special tools, and helps ensure your seeds are evenly spaced for optimal growth.
Steps:
- Find a sturdy bamboo stick, broom handle, or wooden dowel—anything long, thin, and straight will work.
- Prepare your garden bed by loosening the soil and removing any debris.
- Press the bamboo stick firmly into the soil to create a trench for your seeds. You can adjust the depth by pressing harder or softer, depending on your seed type.
- Sow your seeds into the trench, spacing them according to the instructions on the seed packet.
- Cover the seeds lightly with soil and gently firm down.
This method creates a perfect trench for sowing seeds, ensuring your rows are neat and evenly spaced. It’s a quick, efficient way to prepare your garden for planting without investing in expensive tools.
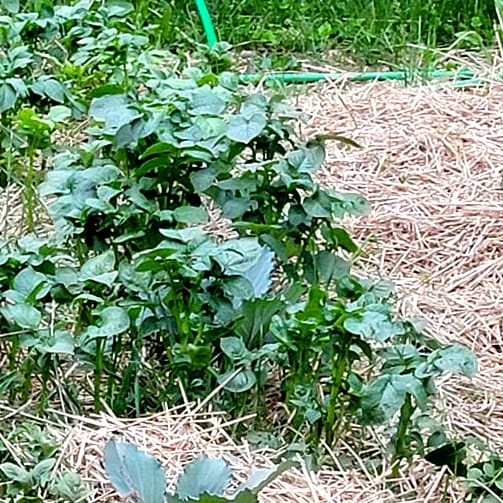
Hack 10: Growing Potatoes with Mulch
Growing potatoes in mulch is a no-dig method that saves time, reduces soil compaction, and improves yields. It’s a simple technique that allows your potatoes to grow in loose, nutrient-rich material without the need for heavy digging.
Why It Works:
Mulching creates a loose, breathable environment for potato tubers to grow. The mulch retains moisture, suppresses weeds, and makes it easier to harvest potatoes when they’re ready.
Steps:
- Choose a spot in your garden where you want to grow potatoes. Loosen the soil slightly if needed but avoid deep digging.
- Place seed potatoes directly on the soil surface, spacing them about 30 cm (12 inches) apart.
- Cover the potatoes with a thick layer of mulch—straw, leaves, or grass clippings work well. The layer should be about 10-15 cm (4-6 inches) thick.
- As the potato plants grow, continue adding more mulch to cover the stems, leaving the tops exposed. This encourages more tubers to form along the stem.
- When it’s time to harvest, simply remove the mulch, and your potatoes will be easily accessible without digging.
This method saves labor, improves soil health, and makes harvesting a breeze. Plus, the organic matter from the mulch breaks down over time, enriching your soil for future plantings.
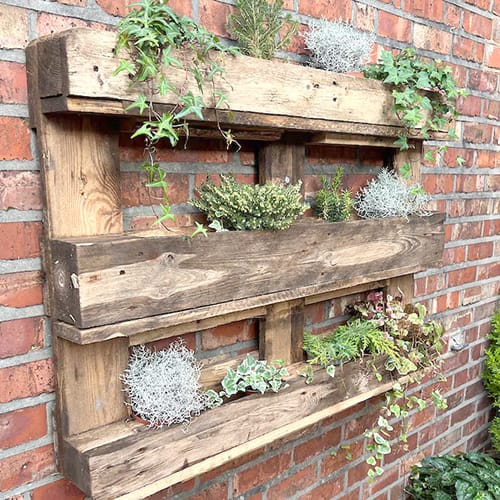
Hack 11: Repurposed Pallets for Seed Trays
Old pallets can be transformed into durable and cost-effective seed trays, providing an eco-friendly alternative to store-bought options. This DIY project is perfect for gardeners looking to save money while reducing waste.
Why It Works:
Pallets are made of sturdy wood that, when heat-treated (not chemically treated), can be repurposed to create long-lasting seed trays. This method is both budget-friendly and sustainable, giving new life to discarded materials.
Steps:
- Find a discarded pallet. Make sure it’s heat-treated (look for “HT” stamps) and not chemically treated, as you don’t want chemicals leaching into your soil.
- Disassemble the pallet using a crowbar or hammer to separate the wooden slats.
- Cut the slats into equal lengths, depending on how large you want your seed trays.
- Assemble the seed tray by attaching the slats together using nails or screws. Ensure you leave gaps for drainage.
- Line the tray with newspaper or cardboard to prevent soil from falling through, and then fill it with compost.
This method provides you with sturdy seed trays that can be reused year after year. It’s a sustainable way to start your seeds while keeping pallets out of landfills. If you want help finding free pallets, check out this handy online tool I made to do just that!
Hack 12: Monthly Planting Plan
Planning your vegetable garden month by month ensures that you make the most of your growing space and time. This approach allows for multiple harvests and keeps your garden productive all year round.
Why It Works:
Instead of creating a rigid annual planting plan, breaking it down by month helps you stay flexible and adapt to changing conditions. You can sow, plant, and harvest in succession, optimizing your garden’s output throughout the seasons.

Steps:
- Create a calendar: Use a simple calendar or garden planner to map out each month.
- List your crops: Research which crops grow best in each month and list them under their appropriate planting times.
- Succession planting: After harvesting an early crop, plan to replace it with a different crop immediately, keeping your garden productive.
- Adjust for climate: Modify your monthly plan based on your local climate and growing zone, making sure to account for frost dates and weather patterns.
- Monitor and adapt: Regularly update your plan as the season progresses, adjusting for unexpected weather or changes in garden conditions.
This method ensures that you’re always using your garden space efficiently, whether you’re growing fast-maturing crops or planning ahead for next season’s harvest. A monthly approach keeps your garden dynamic and productive.
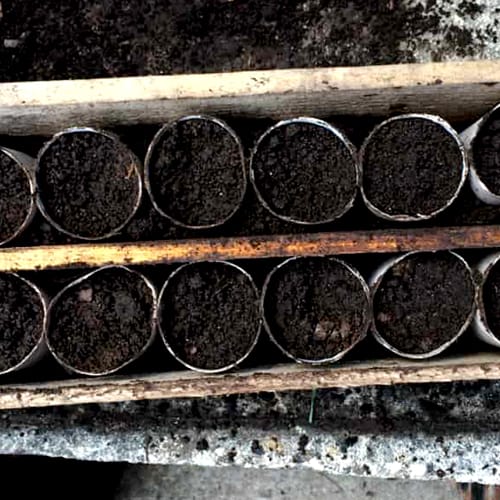
Hack 13: Cardboard Tube Plant Pots
Reusing cardboard tubes from toilet paper rolls or paper towels as biodegradable plant pots is an eco-friendly way to start your seeds. These pots can be planted directly in the soil, reducing transplant shock and waste.
Why It Works:
Cardboard tubes are biodegradable, so when you plant them directly in the garden, they break down naturally. This eliminates the need for plastic pots and helps seedlings establish their roots without disturbance during transplanting.
Steps:
- Collect cardboard tubes from toilet paper rolls or paper towels.
- Cut the tubes into shorter lengths if necessary, making them about 5–8 cm (2–3 inches) tall.
- Stand the tubes upright in a shallow tray or container to keep them stable.
- Fill each tube with seed compost, leaving a little space at the top.
- Plant seeds according to the instructions on the seed packet.
- Once the seedlings are ready to transplant, plant the entire tube in the ground. The cardboard will decompose, allowing the roots to grow through.
Using cardboard tubes is a simple and sustainable way to start seeds. It reduces waste, saves money, and helps minimize transplant shock for your seedlings.
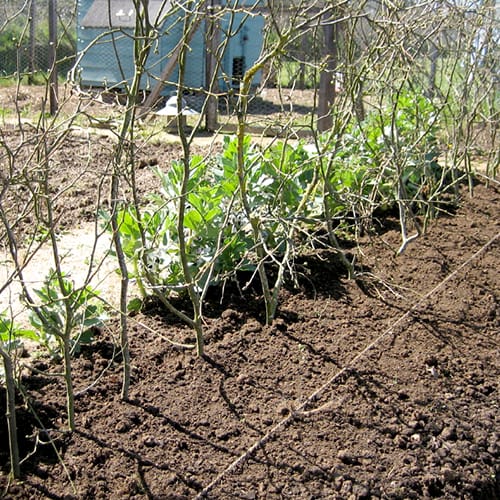
Hack 14: Use Discarded Christmas Tree Branches
After the holiday season, you can repurpose discarded Christmas tree branches as natural supports for climbing plants. This simple, cost-free method makes use of materials that would otherwise go to waste.
Why It Works:
Christmas tree branches are sturdy enough to support light climbing plants like peas, beans, or other vines. The natural texture of the branches gives your plants something to cling to, and it’s a great way to recycle seasonal waste.
Steps:
- After the holiday season, collect discarded Christmas trees (from your own or from neighbors).
- Cut off the branches and trim them into manageable lengths.
- Place the trimmed branches in your garden where you plan to grow climbing plants, such as peas or beans.
- Stick the branches into the soil around the plants, allowing them to create a natural trellis for the vines to climb.
By using this eco-friendly support system, you’ll save money on plant stakes and reduce waste. It’s a simple, sustainable solution that benefits your garden and the environment.
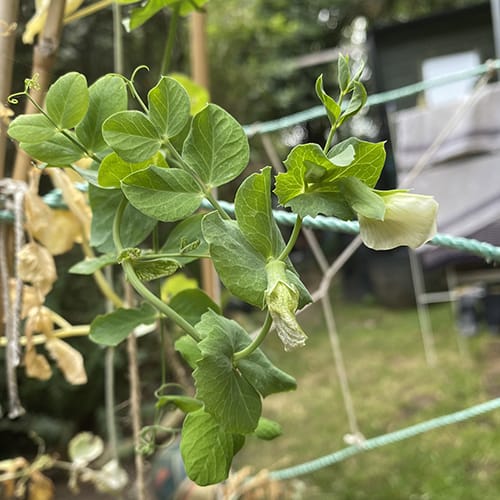
Hack 15: Growing Kitchen Cupboard Peas
Did you know that you can grow peas straight from the dried peas in your kitchen cupboard? This hack saves you from buying seeds and gives you fresh peas grown at home.
Why It Works:
Dried peas found in your kitchen can sprout just like seeds. By soaking them before planting, you encourage faster germination and get a head start on growing your own peas.
Steps:
- Take a handful of dried peas from your kitchen cupboard (such as split peas or whole peas).
- Soak the peas in a bowl of water for 24 hours to soften them and encourage germination.
- After soaking, drain the peas and plant them about 1 inch deep in your prepared garden bed or in containers.
- Water the soil well and keep it moist as the peas begin to sprout.
- Watch as the peas grow and produce fresh pods for you to harvest.
This is a simple, no-cost way to grow fresh peas from pantry staples. It’s perfect for budget-conscious gardeners who want to make the most of what they already have at home.
Here’s the fully developed Hack 16: Plank Trick for Better Germination:
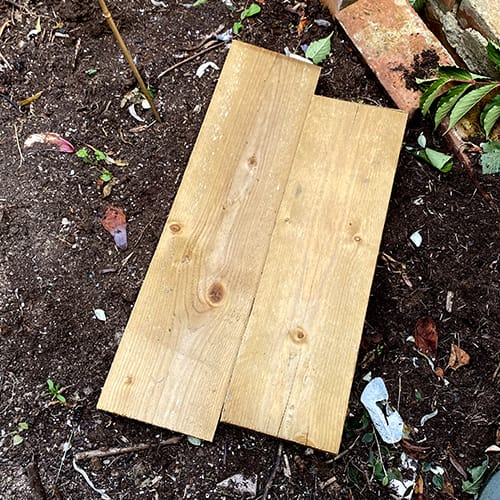
Hack 16: Plank Trick for Better Germination
Getting seeds like carrots and parsnips to germinate can sometimes be challenging, but using a wooden plank to cover the seeds helps retain moisture, ensuring more reliable germination.
Why It Works:
Covering the soil with a plank after sowing seeds helps trap moisture, preventing the soil from drying out. This creates an ideal environment for seed germination, particularly for slow-germinating crops like carrots and parsnips.
Steps:
- After sowing your seeds, lightly cover them with soil according to the depth recommended on the seed packet.
- Place a wooden plank directly on top of the sown area.
- Leave the plank in place for 5–7 days, checking periodically to ensure the soil underneath remains moist.
- Once you see the seedlings begin to sprout, remove the plank to allow them to grow.
By using this method, you’ll improve seed germination rates, ensuring that your vegetable seeds sprout successfully. It’s an easy and effective way to help your garden thrive.
Conclusion
By incorporating these 16 genius vegetable gardening hacks, you can transform your garden into a productive and efficient space. These simple yet effective tips help you:
- Save time
- Reduce costs
- Maximize your harvest
Whether you’re a beginner or an experienced gardener, these hacks will enhance your gardening experience. From repurposing household items like cardboard tubes and yogurt pots to using natural solutions like bramble canes and mulch, these hacks promote:
- Sustainability
- Creativity in the garden
Each hack simplifies your gardening tasks while ensuring healthy and thriving plants. Start by trying a few of these hacks and gradually implement more as your skills grow. By using what you already have and optimizing your techniques, you’ll enjoy:
- A bountiful harvest
- A more sustainable gardening experience
Happy gardening!
For more information on sustainable gardening practices, visit the Royal Horticultural Society’s guide on eco-friendly gardening.