Introduction
Why Grow Peas?
Growing peas is one of the most rewarding experiences for gardeners, whether you’re a beginner or have a few seasons under your belt. Not only are peas easy to cultivate, but they also offer a fresh, homegrown taste that store-bought varieties can’t match.
Is This Guide for You?
Whether you’re planting peas for the first time or looking to refine your technique, understanding how to grow peas is the key to a bountiful harvest.
What Will You Learn?
In this guide, we’ll cover:
- Choosing the best pea varieties for your garden
- Step-by-step instructions for cultivating peas
- Tips for maximizing your yields
- How to avoid common pea-growing problems
- Harvesting your peas at the perfect time
Ready to grow your own peas? Dive in with us as we explore the complete process of growing peas and enjoy the benefits of fresh, nutritious produce right from your garden.
Why Grow Peas?
Nutritional Benefits
Peas aren’t just a tasty addition to your meals—they’re loaded with nutrients that provide significant health benefits. Adding homegrown peas to your diet offers:
- Rich Source of Protein and Fiber: Peas are a fantastic plant-based protein. The fiber content helps regulate digestion, keeping your gut healthy.
- Packed with Vitamins and Minerals: Peas are rich in essential vitamins, which are important for immune function, skin health, and bone strength.
- Supports Heart and Digestive Health: The high fiber content in peas not only aids digestion but also helps lower cholesterol, supporting heart health.
| Nutrient | Benefit |
| Protein | Supports muscle growth and repair |
| Fiber | Aids digestion and promotes gut health |
| Vitamin A | Improves skin health and vision |
| Vitamin C | Boosts immune system |
| Vitamin K | Supports bone health and blood clotting |
| Iron | Helps with oxygen transportation in the body |
| Magnesium | Supports muscle and nerve function |
| Phosphorus | Helps build strong bones and teeth |
Ease of Cultivation
One of the biggest reasons to grow peas is their simplicity, making them perfect for both novice and seasoned gardeners. Here’s why:
- Quick Growing Season: Peas are one of the earliest crops you can plant, thriving in cool weather. You can start planting them in early spring, and within 60-70 days, they’re ready for harvest. Some varieties, like Douce Provence, can even be planted in autumn and harvested in early spring, giving you flexibility.
- Minimal Maintenance: Once established, peas require relatively little attention. They’re hardy plants that can tolerate slight variations in weather, as long as they’re given proper water and support. All they need is a sunny location and well-drained soil to thrive.
- Perfect for Small Gardens and Containers: Even if you have limited space, peas are adaptable. They can be grown vertically with support, making them ideal for small spaces, balconies, or raised beds. Whether you’re gardening in a large backyard or a compact urban garden, peas fit right in.
| Pea Variety | Growing Time | Best for | Maintenance Level |
| Garden Peas | 60-70 days | Traditional gardening | Low |
| Snap Peas | 50-60 days | Eating raw or cooked | Low |
| Snow Peas | 55-65 days | Stir-fries, salads | Moderate |
| Douce Provence | 80-90 days | Fall planting, early spring harvest | Low |
Environmental Benefits
Growing peas contributes to a healthier garden ecosystem. Here’s how:
- Natural Nitrogen Fixers: Peas belong to the legume family, which means they have the unique ability to fix nitrogen in the soil. By forming a symbiotic relationship with bacteria in their root nodules, pea plants convert nitrogen from the air into a form that other plants can use. This naturally improves soil fertility, reducing the need for synthetic fertilizers and making peas a great addition to crop rotations.
- Ideal for Crop Rotation: Rotating peas with other crops helps maintain soil health by breaking the life cycle of pests and diseases. Peas are often followed by more nutrient-demanding crops like tomatoes or squash because of the nitrogen they leave behind.
- Sustainable Gardening: Peas require minimal resources to grow, making them a sustainable choice for eco-conscious gardeners. Their low water needs, combined with their ability to enrich the soil, make them an excellent option for those looking to minimize their environmental footprint.
Choosing the Right Type of Peas for Your Garden
Selecting the best pea variety for your garden is key to a successful harvest. Each type of pea has unique qualities, and understanding these differences will help you choose the right one for your space, taste, and growing conditions.
Garden Peas (Shelling Peas)
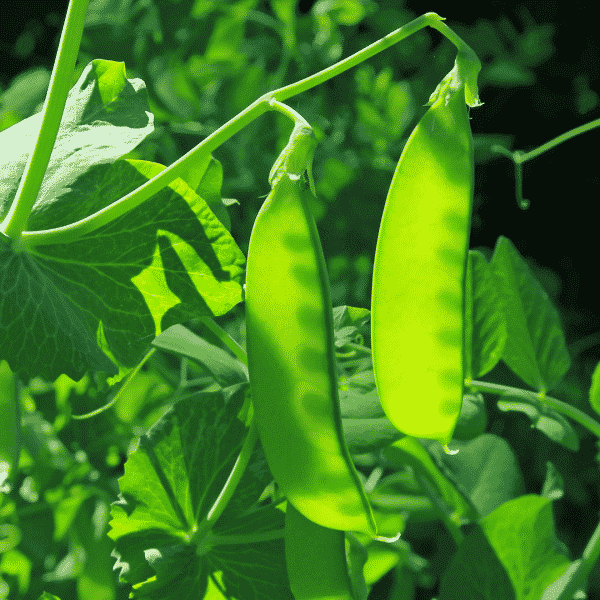
- Description: Garden peas, also known as shelling peas, are the traditional variety that most gardeners grow. These peas have thick, fibrous pods that are not edible, so they need to be shelled before eating. Garden peas come in smooth or wrinkled varieties, with wrinkled peas generally being sweeter.
- Best Uses: Garden peas are ideal for freezing or using in soups and stews.
- Growing Tips: These peas prefer cooler weather and are best planted in early spring or late autumn, depending on your climate. Be sure to provide trellises or other supports, as some varieties can grow quite tall.

Snap Peas
- Description: Snap peas, also known as sugar snap peas, are famous for their sweet, crisp pods that can be eaten whole. Unlike garden peas, snap peas don’t need to be shelled, which makes them perfect for snacking straight from the vine or adding to salads and stir-fries.
- Best Uses: Ideal for fresh eating, stir-fries, and quick sautéing.
- Growing Tips: Snap peas thrive in full sun and well-drained soil. Like garden peas, they benefit from support structures to keep the vines upright.
Snow Peas
- Description: Snow peas have flat, tender pods that are harvested before the peas inside fully develop. They’re known for their mild flavor and crunchy texture, making them a staple in Asian cuisine, especially in stir-fries.
- Best Uses: Snow peas are best suited for stir-fries, salads, or as a fresh, crunchy snack.
- Growing Tips: Snow peas prefer cooler weather and do well with consistent watering. They don’t require much space, which makes them great for container gardening.
Pea Variety Comparison Table
To help you choose the right pea variety for your garden, here’s a comparison of the main types of peas:
| Pea Variety | Best For | Growing Time | Maintenance | Taste Profile |
| Garden Peas | Freezing, soups, stews | 60-70 days | Requires trellis support | Traditional, slightly sweet |
| Snap Peas | Fresh eating, salads, stir-fries | 50-60 days | Requires moderate support | Sweet, crisp |
| Snow Peas | Stir-fries, salads, snacks | 55-65 days | Low support needed | Mild, crunchy |
Factors to Consider When Choosing Peas
When deciding which variety to grow, consider the following factors:
- Growing Space: If you have limited space, snap peas and snow peas are great options as they can be grown vertically. Garden peas, while delicious, may require more room due to their tall growth habits.
- Climate: Peas thrive in cooler weather, but some varieties are more tolerant of slight temperature changes. If you live in an area with variable spring conditions, snap peas or wrinkled garden peas might be the best choice.
- Harvest Time: If you’re looking for a quick harvest, snap peas are typically ready sooner than garden peas. Snow peas also mature relatively quickly, making them ideal for impatient gardeners!
- Flavor Preferences: For sweeter, crunchier peas, snap peas are the way to go. If you prefer a more traditional, hearty pea for soups and freezing, garden peas will be your best bet.
Companion Planting with Peas
Peas are excellent companions for many other plants. Their ability to fix nitrogen into the soil benefits nearby crops. Here are some ideal companions for peas:
- Carrots: Carrots grow well alongside peas and make efficient use of garden space.
- Radishes: Radishes help deter pests that may harm pea plants.
- Cucumbers: Both cucumbers and peas enjoy the same growing conditions, making them great neighbors.
How to Grow Peas: Step-by-Step Guide
Growing peas is simple and rewarding, but it’s important to follow a few key steps to ensure a healthy, bountiful crop. This guide will take you through the process, from preparing the soil to harvesting the peas.
Choosing the Right Location
To grow peas successfully, choose the right spot in your garden:
- Sunlight: Peas thrive in full sun, requiring at least 6 hours of sunlight per day.
- Soil: They prefer well-drained soil rich in organic matter. Aim for a soil pH between 6.0 and 7.5.
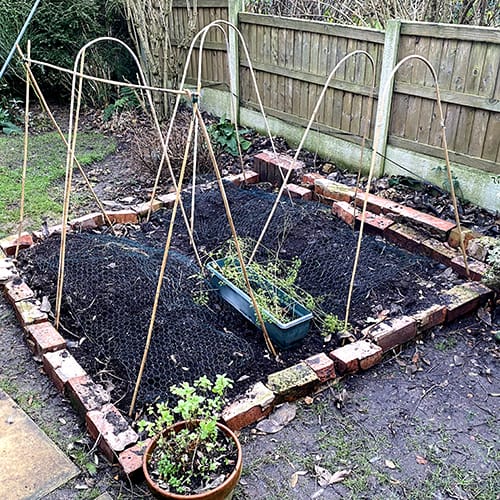
- Space: Whether you’re using garden beds or containers, make sure there’s enough room for the vines to grow vertically with the help of trellises or stakes.
Preparing the Soil
Healthy soil is the foundation of a successful pea crop:
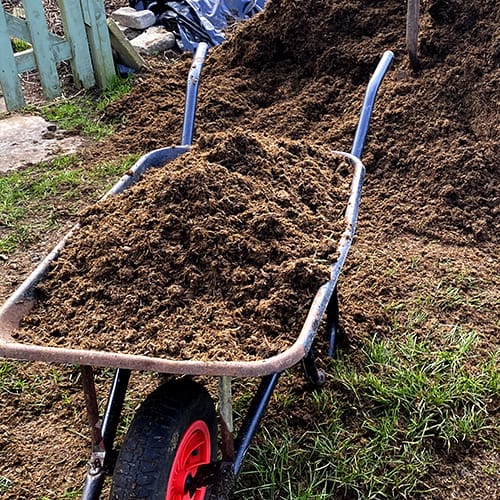
- Organic Matter: Incorporate compost or well-rotted manure into the soil to enrich it with nutrients.
- Loosening the Soil: Peas have shallow roots, so loosen the soil to a depth of about 6-8 inches to encourage healthy root development.
- Soil pH: Test your soil and adjust the pH if necessary using lime to raise it or sulfur to lower it.
Planting Peas
Peas can be planted directly into the ground or in containers:
- When to Plant: Sow peas as soon as the soil can be worked in early spring, about 4-6 weeks before the last frost date. For regions with mild winters, autumn planting is also possible.
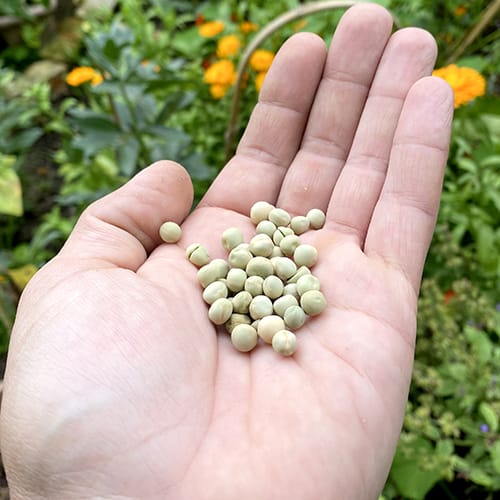
- Sowing Depth: Plant peas about 1 to 2 inches deep, with 2 inches between seeds.
- Spacing: Rows should be about 18-24 inches apart. If you’re using containers, ensure there’s enough depth for root growth.
Planting Time Table:
| Planting Season | Best Varieties | Sowing Depth | Spacing Between Plants | Time to Harvest |
| Early Spring | Garden Peas, Snap Peas | 1-2 inches | 2 inches | 60-70 days |
| Autumn | Douce Provence, Snow Peas | 1-2 inches | 2 inches | 55-65 days |
For help planning where to plant your peas and which crops they grow best with, check out our Free Allotment Planner with Companion Planting Tips.
Watering and Maintenance
Consistent care will help your peas grow strong:
- Watering: Peas need consistent moisture, especially during flowering and pod formation. Water deeply once a week, ensuring the soil stays moist but not waterlogged.
- Mulching: Apply a layer of mulch around the base of the plants to retain soil moisture and keep the roots cool. Organic mulch, such as straw or compost, works best.
- Supporting the Plants: Peas, especially tall varieties like garden peas, need support to grow vertically. Use trellises, stakes, or garden netting to help the plants climb.
Fertilising
Although peas don’t need much fertilizer, adding a light application of compost at planting can encourage healthy growth. Avoid nitrogen-heavy fertilizers, as peas naturally fix nitrogen into the soil.
Pest and Disease Control
Peas are generally hardy, but a few pests and diseases can affect them:
- Common Pests: Watch out for aphids, pea weevils, and slugs. Use natural predators or organic solutions like neem oil to manage pests.
- Diseases: Pea plants can be affected by powdery mildew and root rot. Prevent these by avoiding overhead watering and ensuring good airflow around the plants.
Common Pests & Solutions Table:
| Pest | Signs of Damage | Control Methods |
| Aphids | Stunted growth, sticky leaves | Introduce ladybugs, spray with water |
| Pea Weevils | Holes in leaves | Neem oil or insecticidal soap |
| Slugs | Chewed leaves and stems | Use beer traps, diatomaceous earth |
Harvesting Peas
Knowing when and how to harvest your peas is crucial for the best flavor:
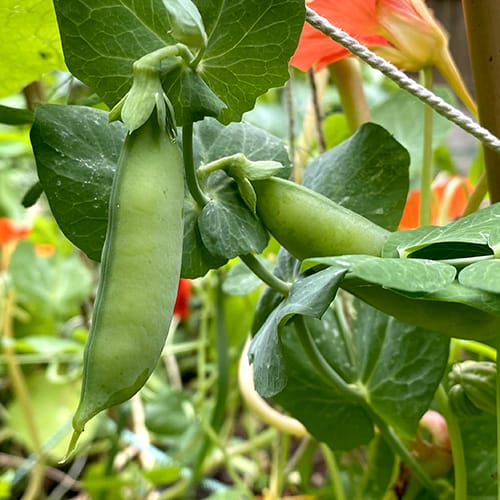
- Harvest Time: Pick peas in the morning when they’re crisp and at their sweetest. For garden peas, wait until the pods are plump. For snow and snap peas, harvest when the pods are still flat and tender.
- Harvesting Technique: Use one hand to hold the plant and the other to gently pull off the pea pods to avoid damaging the vines.
Post-Harvest Care
Once harvested, peas can be stored in the following ways:
- Short-Term Storage: Fresh peas can be kept in the refrigerator for up to a week in an airtight container.
- Long-Term Storage: Blanch peas and freeze them for longer storage. This will help preserve their flavor and nutritional value for up to 6-12 months
Harvesting and Storing Peas
Successfully growing peas doesn’t end at planting and maintenance; knowing when and how to harvest them is just as important to ensure maximum flavor and freshness. This section will guide you through harvesting techniques and the best ways to store your peas for later use.
When to Harvest Your Peas
Different types of peas have varying harvest times, and picking them at the right stage ensures you get the best taste and texture.
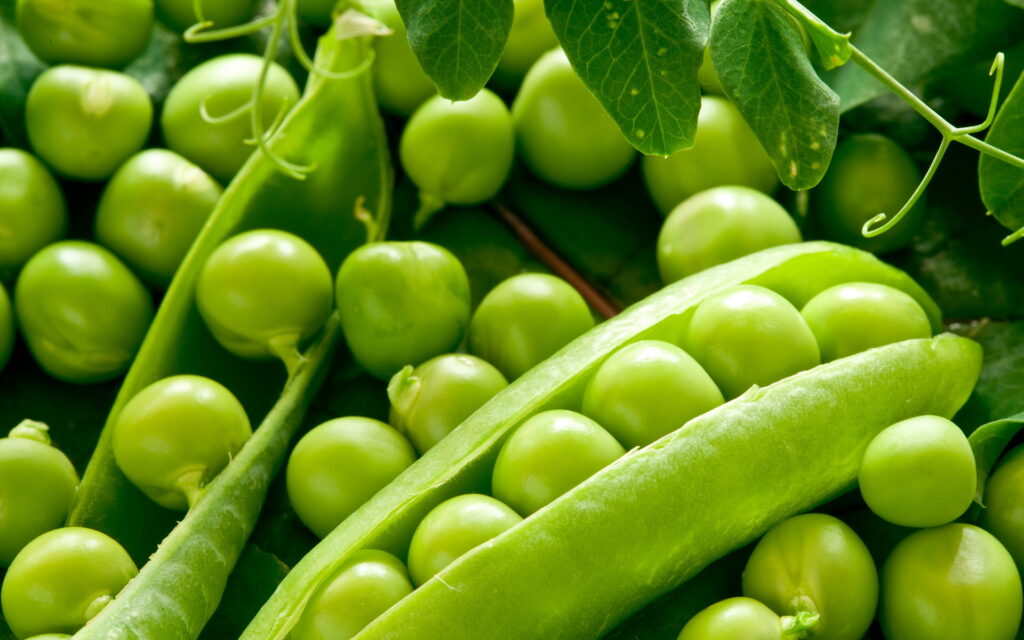
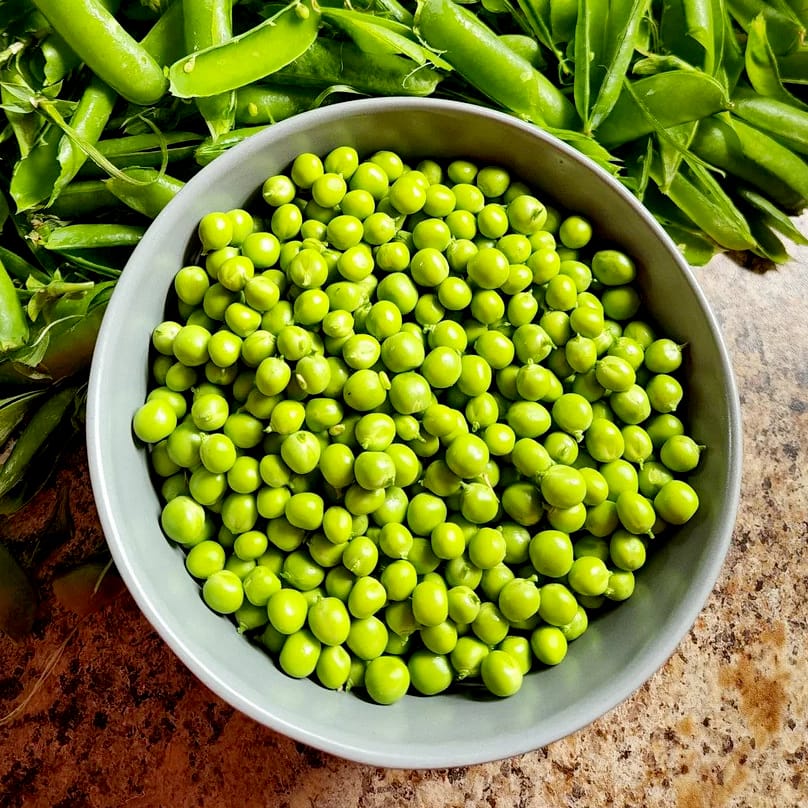
- Garden Peas (Shelling Peas): These are ready for harvest when the pods are full and round but still tender. If left too long, the peas inside will become tough and starchy.
- Snap Peas: Snap peas are best harvested when the pods are plump but still tender. Both the pods and peas inside are eaten, so check for crispness and sweetness before picking.
- Snow Peas: Snow peas should be harvested when the pods are still flat, thin, and tender, usually before the peas inside start to swell.
Harvest Timing Table:
| Pea Variety | Best Time to Harvest | Signs of Ripeness |
| Garden Peas | 60-70 days after planting | Pods are full and round, peas inside are plump |
| Snap Peas | 50-60 days after planting | Pods are crisp, slightly plump, and tender |
| Snow Peas | 55-65 days after planting | Pods are flat, thin, and flexible before peas swell |
How to Harvest Peas
Using the right technique when harvesting peas will help you avoid damaging the plant, which allows it to keep producing more pods.
- Use Two Hands: With one hand, hold the plant near the base of the pod. Use your other hand to gently pull the pea pod off the vine. This method prevents damage to the delicate vines.
- Harvest Regularly: Pea plants will produce more pods if you harvest regularly. Leaving mature peas on the plant can reduce further pod production.
- Morning Harvest: Pick peas in the morning for the freshest, sweetest flavor. Morning dew keeps the peas hydrated, enhancing their sweetness and crispness.
Storing Fresh Peas
After harvesting, how you store your peas affects their taste and texture. Here are the best methods for keeping peas fresh and delicious.
- Short-Term Storage: Freshly picked peas can be stored in the refrigerator for up to 5-7 days. Place them in an airtight container or a plastic bag to retain their moisture.
- Long-Term Storage: For long-term storage, blanch the peas and freeze them. Blanching helps preserve their color, flavor, and nutritional content. Once blanched, transfer the peas to freezer-safe bags or containers and store them in the freezer for up to 12 months.
How to Blanch and Freeze Peas
Blanching is the best way to preserve peas for long-term storage. This process briefly cooks the peas to stop enzyme activity, which can lead to flavor and nutrient loss.
Steps for Blanching and Freezing Peas:
- Boil Water: Bring a large pot of water to a rolling boil.
- Blanch the Peas: Add the peas to the boiling water and let them cook for 2-3 minutes.
- Cool the Peas: Immediately transfer the blanched peas to an ice bath to stop the cooking process. Let them sit for the same amount of time they were blanched.
- Drain and Dry: Once the peas are cooled, drain them well and pat them dry with a clean towel.
- Freeze: Place the peas in a single layer on a baking sheet and freeze for 1-2 hours. Once frozen, transfer them to a freezer-safe bag or container.
Storing Peas Table:
| Storage Method | Duration | Tips for Best Results |
| Refrigeration | 5-7 days | Keep in an airtight container or plastic bag |
| Freezing (blanched) | Up to 12 months | Blanch before freezing to preserve flavor |
Drying Peas
For a longer shelf life, you can also dry peas. Dried peas are great for soups and stews and can be stored for up to a year.
- Air Drying: Allow peas to dry naturally by leaving them on the vine until the pods become brown and dry. Then, remove the peas from the pods and store them in a cool, dry place.
- Dehydrator: You can also use a food dehydrator to dry peas. Spread the peas on the trays of the dehydrator and dry them at a low temperature (around 120°F/50°C) until they are hard and brittle.
Using Fresh and Stored Peas
Whether fresh, frozen, or dried, peas are incredibly versatile in the kitchen. Here are some ideas for using your harvested peas:
- Fresh Peas: Use in salads, stir-fries, or as a crunchy snack straight from the garden.
- Frozen Peas: Add to soups, casseroles, or pasta dishes throughout the year.
- Dried Peas: Ideal for making hearty pea soups or stews during the colder months.
Troubleshooting Common Issues
Growing peas is generally straightforward, but like any plant, they can occasionally run into problems. This section will cover common issues that gardeners face when growing peas and provide solutions to keep your plants healthy and productive.
Common Pea Pests
Several pests can affect pea plants, but with early intervention, they can be managed effectively. Here are the most common pests and how to deal with them:
- Aphids: These tiny insects feed on the sap of pea plants, causing stunted growth and distorted leaves. They also secrete honeydew, which attracts sooty mold.
- Solution: Spray plants with a strong stream of water to knock aphids off. Introduce natural predators like ladybugs or use insecticidal soap.
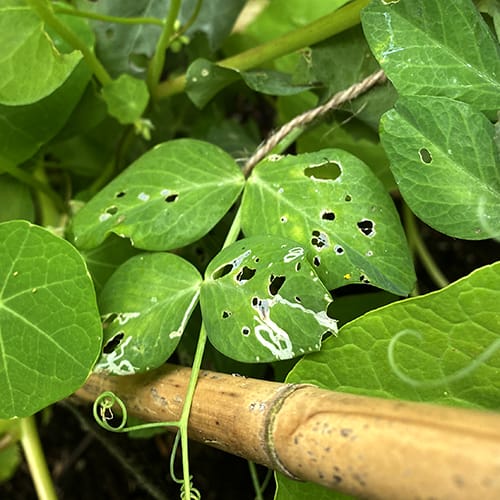
- Pea Weevils: Pea weevils chew holes in the leaves, reducing the plant’s ability to photosynthesize.
- Solution: Neem oil or insecticidal soap can control weevils. Crop rotation helps prevent the recurrence of weevils.
- Slugs and Snails: These pests chew on leaves and stems, often causing significant damage overnight.
- Solution: Use natural deterrents like diatomaceous earth, copper tape, or beer traps to attract and trap slugs.
Pea Pests and Solutions Table:
| Pest | Signs of Infestation | Control Methods |
| Aphids | Curled, yellow leaves, sticky residue | Water spray, introduce ladybugs, insecticidal soap |
| Pea Weevils | Holes in leaves | Neem oil, crop rotation |
| Slugs and Snails | Large, irregular holes in leaves | Beer traps, copper tape, diatomaceous earth |
Diseases Affecting Peas
Peas can also be vulnerable to several diseases. Knowing the symptoms can help you take action before the disease spreads throughout your crop.
- Powdery Mildew: This fungal disease appears as white powder on the leaves and stems of pea plants, particularly in dry, hot conditions.
- Solution: Increase air circulation by spacing plants appropriately and water at the base of the plant. Use a sulfur-based fungicide if needed.
- Root Rot: Caused by overly wet or poorly drained soil, root rot can lead to stunted growth and yellowing of the plant. Peas may wilt and die if the condition worsens.
- Solution: Avoid overwatering and improve soil drainage by incorporating organic matter. Plant peas in raised beds if necessary.
- Fusarium Wilt: This soil-borne fungal disease causes yellowing, wilting, and eventual death of the plant.
- Solution: Rotate crops yearly and avoid planting peas in the same spot for several seasons. Remove and destroy infected plants to prevent spreading.
Common Diseases and Solutions Table:
| Disease | Symptoms | Prevention and Treatment |
| Powdery Mildew | White, powdery spots on leaves | Space plants for airflow, water at base, fungicide |
| Root Rot | Yellowing, stunted growth, wilting | Improve soil drainage, reduce watering |
| Fusarium Wilt | Yellowing, wilting, plant death | Crop rotation, remove infected plants |
Nutrient Deficiencies
Sometimes, issues with peas are due to a lack of proper nutrients in the soil. Identifying nutrient deficiencies can help you fix problems early and prevent them from affecting your entire crop.
- Nitrogen Deficiency: Nitrogen is essential for healthy, green growth. If your peas have pale leaves or stunted growth, they might be lacking nitrogen.
- Solution: Add a balanced organic fertilizer or plant peas in rotation with other nitrogen-fixing plants, like beans.
- Phosphorus Deficiency: If your pea plants have dark, purplish leaves, especially on younger plants, they may be lacking phosphorus.
- Solution: Use a phosphorus-rich fertilizer, such as bone meal or rock phosphate.
- Potassium Deficiency: A lack of potassium can cause browning of leaf edges and poor pod development.
- Solution: Add potassium-rich organic matter, like wood ash or compost, to the soil.
Nutrient Deficiencies and Solutions Table:
| Nutrient Deficiency | Symptoms | Solution |
| Nitrogen Deficiency | Pale leaves, stunted growth | Apply nitrogen-rich fertilizer, crop rotation |
| Phosphorus Deficiency | Purplish leaves | Add bone meal or rock phosphate |
| Potassium Deficiency | Browning leaf edges, poor pods | Incorporate wood ash, compost, or potassium fertilizer |
Environmental Issues
Sometimes, problems arise due to environmental factors such as water, light, or temperature extremes.
- Overwatering: Peas are susceptible to root rot if the soil stays too wet for too long.
- Solution: Ensure your soil is well-drained, and avoid watering too frequently. Mulching can help maintain the right moisture level without overwatering.
- Lack of Sunlight: Peas need at least 6 hours of sunlight per day to thrive. If they aren’t getting enough sun, you may notice slow growth or poor yields.
- Solution: Plant peas in a sunny location, or use reflective surfaces to maximize the sunlight they receive.
- Frost Damage: Peas prefer cooler weather but can be damaged by unexpected frosts.
- Solution: If frost is predicted, cover your plants with frost cloths or row covers to protect them.
General Tips for Preventing Problems
Here are some general tips to prevent common issues when growing peas:
- Crop Rotation: Rotating crops annually prevents the buildup of pests and diseases in the soil.
- Proper Spacing: Give your plants enough space to avoid overcrowding, which can lead to poor air circulation and increase the risk of disease.
- Soil Testing: Regularly test your soil to ensure it’s providing the nutrients your peas need.
FAQ Section
Yes, peas can be grown successfully in containers, making them ideal for small gardens or balconies. Choose a container that is at least 12 inches deep and provides good drainage. Use a trellis or stake to support the vines as they grow. Snap peas and dwarf varieties are particularly well-suited for container gardening.
Peas thrive in cooler weather, so the best time to plant them is in early spring, as soon as the soil can be worked—usually 4-6 weeks before the last expected frost. In regions with mild winters, you can also plant peas in late summer for a fall harvest. For an extended growing season, consider planting heat-tolerant varieties like snap peas.
Common pea pests include aphids, slugs, and pea weevils. To manage pests:
– Use natural predators like ladybugs to control aphids.
– Apply diatomaceous earth or use beer traps to deter slugs.
– Spray neem oil or insecticidal soap to combat weevils. Crop rotation and companion planting with garlic or marigolds can also help prevent pest infestations.
Yellowing pea plants could be a sign of several issues:
– Overwatering: Ensure the soil is well-drained, as peas don’t thrive in waterlogged conditions.
– Nitrogen Deficiency: Peas are nitrogen-fixing plants, but they still need a balanced soil to grow. Consider adding a light compost or an organic nitrogen fertilizer.
– Disease: Root rot or fusarium wilt may cause yellowing. Ensure proper spacing for airflow and avoid watering the foliage.
To get the best yields from your pea plants:
Provide Support: Use trellises or stakes to support climbing varieties, which increases air circulation and encourages more pod production.
Harvest Regularly: Picking peas frequently encourages the plant to produce more pods.
Feed the Soil: While peas don’t require heavy fertilization, they benefit from nutrient-rich soil. Add compost before planting and mulch to maintain moisture.
Water Consistently: Peas need consistent moisture, especially during flowering and pod formation, to produce a high yield.
Conclusion
Why Grow Peas?
Growing peas is a rewarding and simple process that offers a fresh, nutritious harvest with minimal effort. Whether you’re a beginner gardener or have years of experience, peas are an excellent choice for any garden due to their ease of cultivation, environmental benefits, and versatility in the kitchen.
Choosing the Right Variety
By choosing the right pea variety for your space and climate, you can maximize your harvest. Consider garden peas, snap peas, or snow peas depending on your gardening setup and taste preferences.
Best Practices for Success
To grow healthy, productive pea plants, follow these steps:
- Planting and Care: Use well-drained soil, provide proper support, and water consistently.
- Pest and Disease Management: Keep an eye out for common pests like aphids and pea weevils, and take preventive measures to avoid diseases like powdery mildew or root rot.
- Regular Harvesting: Picking peas frequently encourages the plant to produce more pods, ensuring a steady yield throughout the season.
Versatile in the Kitchen
Once harvested, peas can be used in a wide range of delicious dishes:
- Fresh salads
- Warm soups and stews
- Quick stir-fries and curries
With the tips and techniques outlined in this guide, you’re well on your way to growing healthy pea plants that will provide fresh produce and even improve your soil’s health.Get Started Today
Now that you know how to grow peas, it’s time to get started! Grab your seeds, prepare your soil, and plant your peas for a productive and tasty growing season.