Introduction
If you’re looking for an easy and rewarding crop to grow, kale is a brilliant choice. This nutrient-rich leafy green is cold-hardy, beginner-friendly, and thrives in UK gardens—even with minimal space or experience. Whether you’re planting directly in the ground, growing kale in containers, or setting up an indoor grow space, it fits effortlessly into any setup.
Why Grow Kale in the UK?
- Grows well in cool British climates
- Packed with vitamins A, C, and K
- Ideal for beginners and experienced gardeners alike
What You’ll Learn in This Kale Growing Guide:
- Which kale varieties grow best in the UK
- How to start seeds and boost germination
- Planting tips for pots, raised beds, or traditional beds
- How to harvest kale so it keeps producing
So, whether you’re just starting out or looking for a reliable, low-maintenance veg to grow year-round, kale is a fantastic addition to your plot.
Continue your vegetable growing & garden planning journey
- What vegetables are good to grow – Learn which vegetables are rewarding and productive in UK gardens, helping you choose complementary crops for kale
- UK vegetable planting calendar (interactive tool) – Check which vegetables are best sown when to coordinate kale with other seasonal plantings
- 10 perennial vegetables you should grow – Discover perennial options that work with annuals like kale to build long-term productivity and lower annual workload
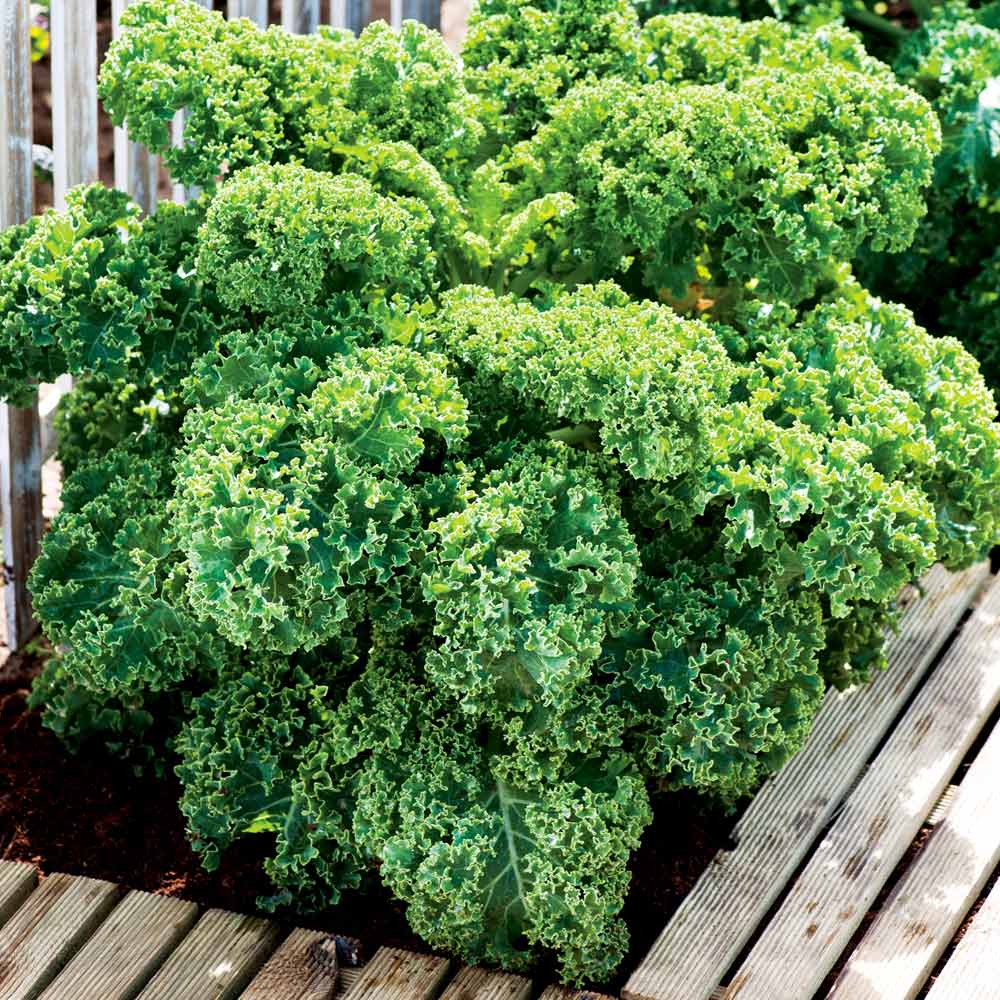
Choosing the Right Kale Variety
Choosing the best kale variety to grow in the UK can make a real difference—both in the garden and in the kitchen. Whether you’re after bold flavours, crisp textures, or a fast-growing leafy green for pots or raised beds, this kale growing guide highlights the top options suited to UK conditions.
Popular Kale Varieties in the UK:
| Variety | Description | Best For |
|---|---|---|
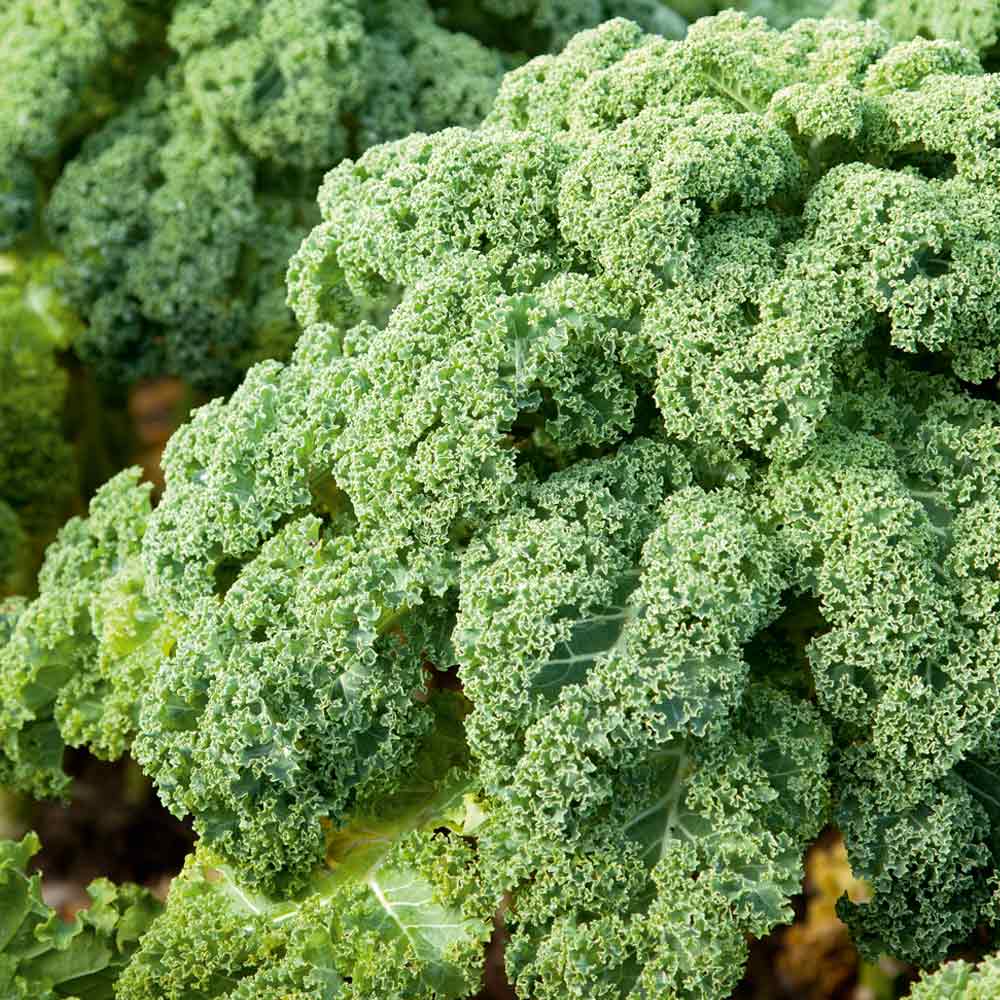
| Dwarf Green Curled | Hardy, compact, curly leaves | Small spaces, containers |
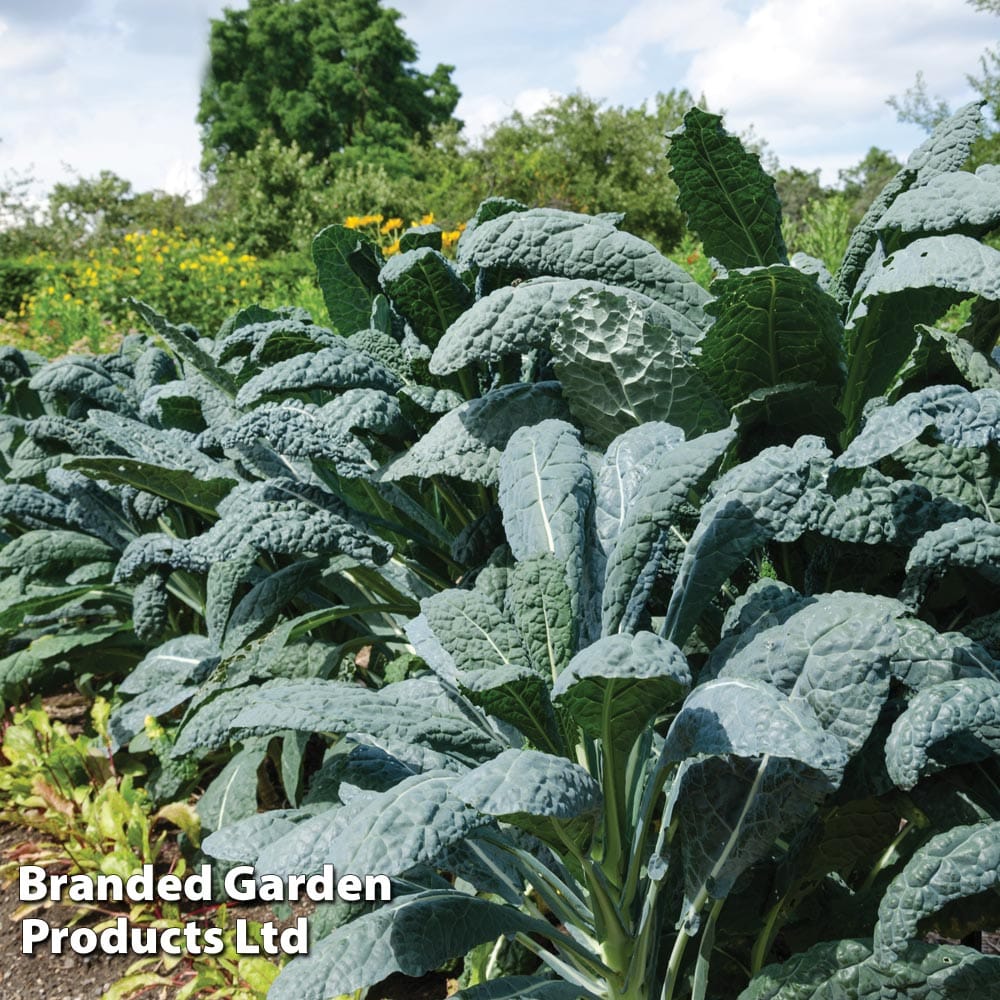
| Nero di Toscana | Dark, bumpy leaves with rich flavour | Cooking, Italian dishes |
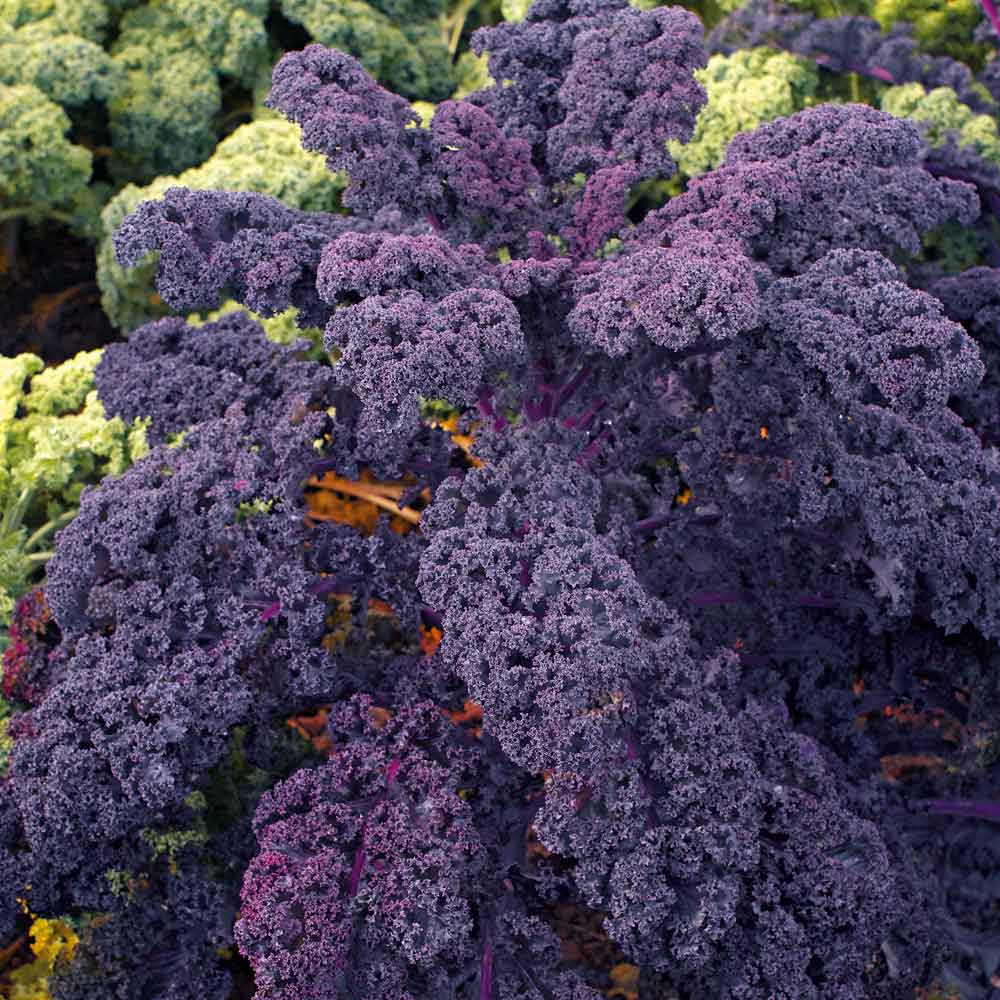
| Redbor F1 | Deep red-purple, frilly leaves | Ornamental & edible |
| Reflex F1 | High-yielding, winter-hardy curly type | All-round performance |
Top Tip:
If you’re after a cold-hardy, low-maintenance option, Dwarf Green Curled and Reflex F1 are both excellent for UK growers. These varieties are tough, productive, and bounce back quickly after harvesting.
For even more variety, consider growing two or more types. Not only will your garden look more vibrant, but you’ll also have plenty of options to suit different recipes.
Think about what you love to eat and the space you have available. Use this quick kale variety guide to find the best match for your growing setup, garden size, and cooking style.
Germinating Kale Seeds (Optional but Recommended)
Starting your kale seeds with a little extra care can make a big difference. Germinating them before planting gives your seedlings a strong head start—especially helpful in cool spring conditions. Germinating kale seeds indoors is one of the best ways to boost success, particularly if you’re gardening in the UK’s unpredictable weather.
What You’ll Need:
- Kale seeds (choose your preferred variety)
- Kitchen roll or paper towel
- Tupperware or a plastic container with a lid
- Water
- A warm, dark space (like an airing cupboard)
Step-by-Step Germination Guide:
- Moisten your paper towel – Fold it and lightly dampen it with water (avoid soaking)
- Place your seeds – Space them about 1cm apart on one half of the towel.
- Fold it over – Gently cover the seeds by folding the towel
- Seal and store – Place the folded towel inside your container and close the lid.
- Check daily – In 2–5 days, you should see small white roots starting to sprout.
What’s Next?
Once your seeds have sprouted, carefully move each one into a toilet roll tube or seed tray filled with compost. Be gentle—those tiny roots are fragile and easy to damage.
Why Germinate First?
- Avoids poor germination rates in cold outdoor soil
- Lets you see which seeds are viable before planting
- Speeds up your growing timeline, especially indoors
While not essential, germinating kale seeds gives them the best possible start. If you’re wondering how to germinate kale seeds successfully, this quick and reliable method is well worth trying.
Growing Kale in Pots or Indoors
No garden? No problem! Kale grows surprisingly well in containers—even on small patios or balconies. In fact, it’s one of the easiest leafy greens to grow in pots, and you can even grow kale indoors in the UK with just a bit of light and care.
Ideal Conditions for Container Kale:
- Container Size: Choose pots at least 20–30cm deep
- Soil Mix: Use rich, well-draining compost mixed with organic matter
- Sunlight: Aim for 6+ hours of sunlight daily (or supplement with a grow light)
- Drainage: Ensure your pots have holes to prevent soggy roots
Planting in Pots:
- Fill your container with compost-rich soil
- Transplant your germinated seedlings—or sow seeds directly
- Water gently and keep the soil evenly moist (but not waterlogged)
- Place your pot in a sunny, sheltered spot or on a bright windowsill
Indoor Growing Tips:
- Use a south-facing windowsill to maximise natural light
- Supplement with grow lights during winter or in darker rooms
- Maintain indoor temperatures between 15–20°C for the best results
Bonus Tip:
Since containers are portable, you can easily move your kale indoors when the temperature drops. This makes it an ideal crop to grow all year round—even if you’re living in a flat or have limited outdoor space.
With just a bit of space, the right container, and consistent care, you can enjoy a steady harvest of healthy kale—right from your windowsill, balcony, or conservatory.

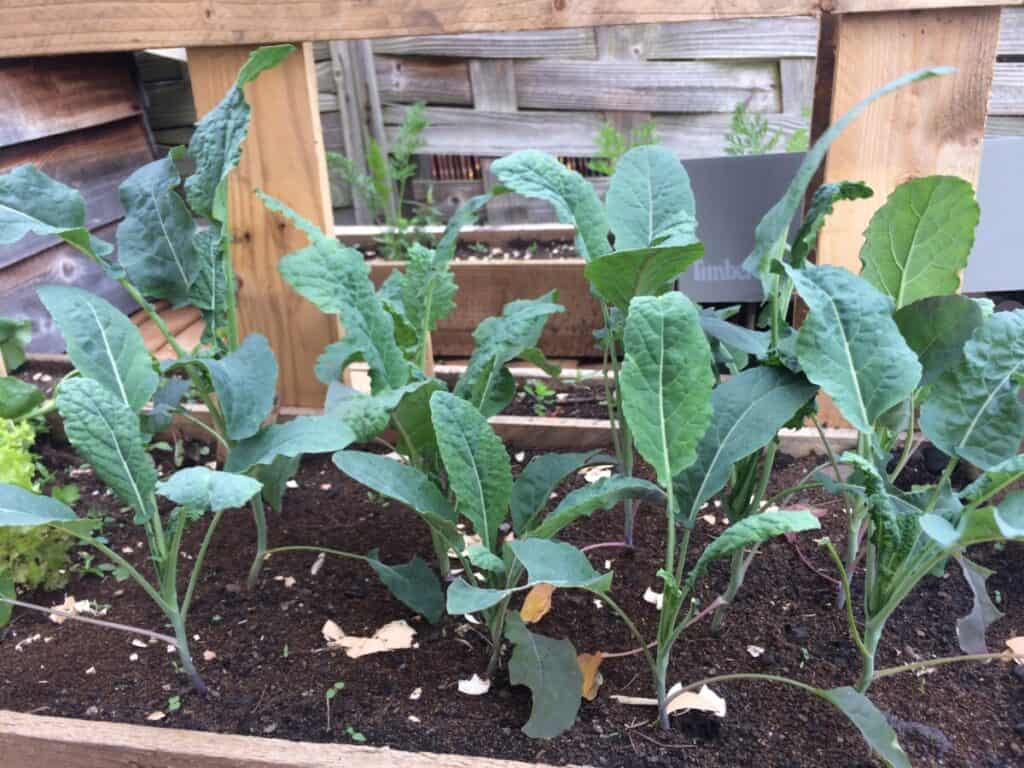
Transplanting Kale Seedlings Outdoors
Once your kale seedlings have developed their first set of true leaves, it’s time to move them outside. Transplanting kale seedlings outdoors is a key step toward strong, healthy growth. Whether you’re using raised beds, containers, or traditional veg plots, knowing how to transplant kale seedlings properly helps ensure a successful crop.
When to Transplant:
- Wait until after the last frost (typically between late March and May across the UK)
- Make sure seedlings are around 10–15cm tall with a few mature leaves
Preparing the Soil:
- Choose a sunny or lightly shaded spot
- Mix in compost or well-rotted manure to enrich the soil
- Lightly dig over the area and rake it level for a smooth planting surface
How to Transplant Using Toilet Tubes:
- Dig a hole deep enough to fully bury the toilet tube
- Place each seedling—tube and all—directly into the hole
- Space the plants 30–45cm (1–1.5ft) apart to give them room to grow
- Firm the soil gently around each plant and water thoroughly
The cardboard tube will break down naturally, allowing roots to expand without disturbance.
Companion Planting for Kale:
| Good Neighbours | Bad Neighbours |
|---|---|
| Onions | Strawberries |
| Beetroot | Beans |
| Celery | Tomatoes |
| Dill & Chamomile | Other brassicas |
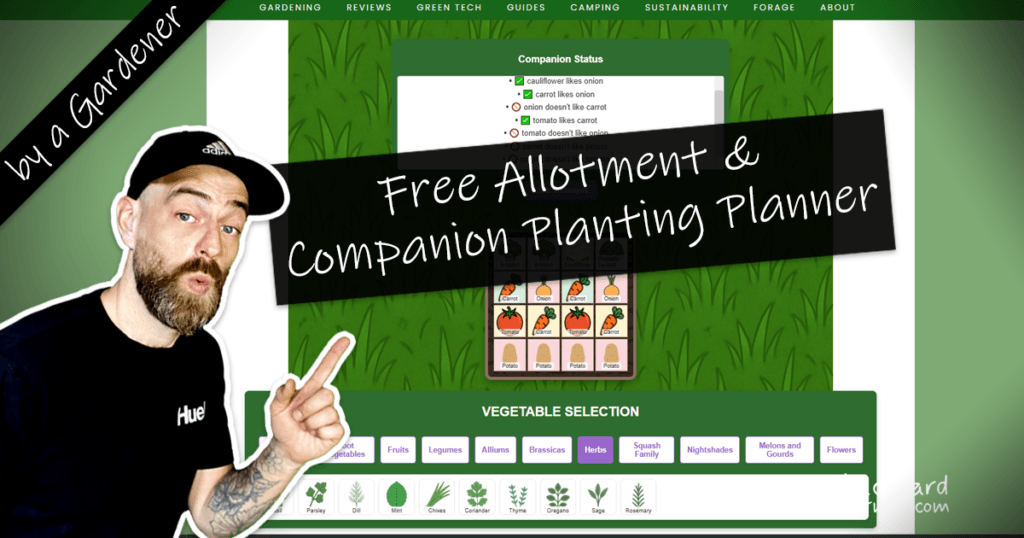
Plan Your Plot with the Free Allotment & Companion Planting Planner
Design your veg patch in minutes — no sign-up, just a smart, drag-and-drop planner made for UK growers.
Pro Tip:
Apply a layer of mulch around each plant to retain moisture and suppress weeds. Also, check regularly for slugs during the first week—they’re especially fond of young kale leaves.
With the right spacing, soil prep, and transplant timing, your seedlings will thrive—whether you’re planting kale in a raised bed, garden border, or small backyard patch.
Caring for Kale Plants
Kale doesn’t need much fuss, but learning how to care for kale plants properly will keep them healthy and productive. With just a bit of regular attention, you can enjoy a steady harvest of vibrant, flavour-packed leaves for months.
Watering Tips:
- Keep the soil consistently moist—never waterlogged
- Water early in the morning to minimise the risk of mildew
- During hot or dry spells, water more often to keep plants thriving
Feeding Your Kale:
- Feed every few weeks using a liquid seaweed or compost tea
- Avoid overfeeding with nitrogen—it can lead to lush leaves with bland flavour
Mulching and Weeding:
- Mulch around each plant with straw, grass clippings, or compost
- This helps lock in moisture and suppresses weeds
Pest Prevention:
- Slugs and Snails: Use crushed eggshells or coffee grounds around the base
- Caterpillars and Aphids: Inspect leaves regularly and remove pests by hand
- Nets or Fleece: Use row covers to protect young plants from butterflies and pigeons
Common Problem: Holes in Leaves
One of the most common kale plant problems is finding small holes in the leaves. These are usually caused by cabbage white caterpillars or slugs.
- Check the undersides of leaves frequently
- Act quickly to remove pests and limit damage
- Try organic pest control methods like garlic spray or neem oil
By staying consistent with watering, light feeding, and pest prevention, you’ll avoid the usual kale pests and diseases and keep your plants growing strong all season long. Ground elder can compete aggressively with leafy crops like kale. Learn how to spot and get rid of it before it takes over your veg patch.
Harvesting Kale and Encouraging Regrowth
Once your kale plants reach a decent size, it’s time to start harvesting. In the UK, knowing when kale is ready to harvest—and how to do it properly—helps you get more from each plant. Here’s the best part: the more you harvest the right way, the more your plants will grow.
When to Start Harvesting:
- Begin when plants are around 20–30cm tall
- Look for mature leaves about the size of your hand or larger
- Expect to start picking 55–75 days after sowing
- In the UK, most kale is ready to harvest from late spring through autumn, depending on your sowing time
How to Harvest Kale Properly:
- Use clean hands or scissors to snip off the outer leaves first
- Always leave the centre leaves (the growing tip) intact
- Harvest little and often—removing no more than a third of the plant at once
This method keeps your kale thriving and encourages it to continue producing fresh leaves.
Does Kale Grow Back After Cutting?
Absolutely. Kale is a true cut-and-come-again crop. As long as the central crown remains intact, it will continue sending out new growth—sometimes even through the winter.
Harvesting Tips for Better Growth:
By mastering the cut and come again kale method, you’ll get the most out of each plant—and enjoy a continuous supply of fresh, homegrown kale throughout the season.
Growing Kale in Winter
Kale is a fantastic vegetable to grow through the colder months in the UK. In fact, a light frost can actually improve its flavour. The chill naturally sweetens the leaves, making them more tender and delicious.
Why Kale Thrives in Winter:
- It’s exceptionally cold-hardy
- It continues growing slowly in low temperatures
- Frost enhances its flavour rather than damaging the plant
Tips for Winter Growing:
- Sow Early: Start your seeds in late summer so plants are well established before the cold sets in
- Use Containers: Growing kale in winter pots makes it easy to move them into a cold frame, greenhouse, or sheltered porch when frost is forecast
- Protect Outdoor Plants:
- Cover with fleece or garden fabric to insulate leaves
- Add mulch around the base to shield roots from freezing
- Block cold winds with a cloche, mini greenhouse, or DIY shelter
Harvesting in Winter:
- Harvest outer leaves regularly as needed
- Always leave the central growth tip intact to encourage continuous production
- Avoid picking frozen leaves—wait until they thaw naturally to prevent plant stress
Great Companion for Winter Veg Beds:
- Kale pairs well with winter crops like leeks, garlic, and winter lettuce
- It helps keep your veg patch productive, even during the quiet season
With a little planning and light protection, winter gardening with kale is not only possible—it’s rewarding and surprisingly easy. It’s one of the best winter vegetables to grow if you want fresh, homegrown greens throughout the colder months.
Common Questions (FAQ)
If you’re new to growing kale or just need some quick answers, these FAQs cover the essentials. From planting to pests, here’s what gardeners ask most often.
Yes! Kale is a cut-and-come-again crop. As long as you harvest the outer leaves and leave the centre intact, the plant will continue producing fresh leaves for several months. So if you’re wondering, “does kale grow back?”—the answer is absolutely.
Generally, kale takes around 55–75 days from sowing to first harvest. If you start with germinated seedlings, they’re usually ready to move outdoors in just 2–3 weeks. This makes kale a relatively fast-growing crop—perfect if you’re looking for a quick win in the garden.
Most kale varieties grow between 30–90cm tall. Curly Kale and Lacinato tend to stay compact, while Red Russian can grow taller and spread a bit more. If you’re wondering how tall kale gets in containers or smaller spaces, expect a slightly shorter growth habit.
Definitely. Kale thrives in pots—just choose a container that’s at least 20–30cm deep and place it somewhere that receives 6 or more hours of sunlight per day. Growing kale in containers is perfect for patios, balconies, or even bright indoor windowsills.
Absolutely. Kale is frost-hardy and often tastes even better after a cold snap. Just make sure to give it some protection—like fleece, mulch, or a sheltered spot—during heavy frosts. If you’re wondering how to protect kale from frost, using a cloche or garden fleece is a simple and effective solution.
That’s usually down to pests like slugs, snails, or cabbage white caterpillars. To keep them away, try natural deterrents such as coffee grounds, crushed eggshells, garlic spray, or row covers. Keeping leaves dry and regularly checking for pests also helps.
Hopefully, these quick answers help you feel more confident in your kale-growing journey. Still have questions? Drop a comment or explore the full growing guide for even more tips!
Start Growing Kale with Confidence
Kale is easily one of the most rewarding vegetables you can grow at home—whether you’ve got a garden bed, a balcony container, or just a sunny windowsill. This beginner-friendly leafy green is hardy, nutrient-dense, and thrives in UK conditions with very little effort.
Quick Recap:
- Pick the right variety for your space and taste
- Start with germinated seeds for a stronger head start
- Use toilet roll tubes to ease transplant stress
- Keep soil moist and feed lightly every few weeks
- Stay ahead of pests like slugs, snails, and caterpillars
- Harvest outer leaves often to encourage steady regrowth
So, whether you’re aiming for flavour, a year-round supply of greens, or a low-maintenance crop, kale is a top choice for any gardener.
Let kale earn its spot in your veg patch or container garden—it’s one of the easiest vegetables to grow in the UK. With the tips in this guide, you’ll be harvesting fresh, homegrown kale before you know it.
To learn more about taking back control of our food from large companies, read my article ‘Taking back Control of our Food’ here.