Blackcurrants produce their best crops on relatively young wood, so regular pruning helps keep bushes productive. The aim is to remove ageing stems and encourage fresh growth from the base.
Winter is the best time to prune, but the correct method depends on the bush’s age and condition. Here’s how to identify which branches to remove, where to cut and how to restore neglected bushes.
Blackcurrant Pruning at a Glance
| Bush condition | Recommended pruning |
|---|---|
| Best time | Winter, during dormancy |
| Newly planted dormant bush | Cut stems to 1–2 buds above ground |
| Healthy young bush | Minimal pruning during the first three years |
| Weak young bush | Stronger pruning may encourage replacement shoots |
| Mature bush | Remove up to one-third of the oldest stems annually |
| Overgrown bush | Gradually remove ageing wood or consider renovation |
| Standard-trained bush | Maintain its raised crown using a different approach |
When to Prune Blackcurrants in the UK
The best time to prune blackcurrants is during winter, once the leaves have fallen and before new growth begins in spring.
In most parts of the UK, this gives a pruning window from late autumn to early spring. February is often a convenient time because the bushes are dormant and their bare stems are easy to inspect.
There’s no need to follow an exact date. Choose a reasonably dry day when the stems aren’t frozen, allowing you to make clean cuts.
Can You Prune Blackcurrants in Summer?
Some growers remove selected older stems during or immediately after harvesting, making it easier to pick berries from the cut branches.
Winter remains the recommended time for routine pruning, particularly for beginners.
How Much Should You Prune a Blackcurrant Bush?
The amount of pruning depends on the bush’s age, vigour and available replacement growth.
A newly planted blackcurrant needs very different treatment from a mature bush that has been producing fruit for several years.
| Bush condition | What to do |
|---|---|
| Newly planted during dormancy | Cut back hard to encourage basal shoots |
| Young and growing strongly | Retain healthy growth; remove weak stems if necessary |
| Young with poor growth | Consider stronger corrective pruning |
| Mature and productive | Remove selected older stems annually |
| Old and overcrowded | Renovate gradually over several winters |
| Weak or potentially diseased | Investigate the cause before heavy pruning |
For established bushes, removing up to one-third of the oldest stems each winter is a useful guideline, not a compulsory target.
If a bush has plenty of healthy younger growth and only a few ageing branches, removing one or two old stems may be sufficient.
The aim is to maintain a productive mixture of stem ages rather than reduce the plant by a fixed percentage every year.
How to Identify Old and Young Blackcurrant Stems
Identifying which stems to remove is the most important part of pruning blackcurrants.
Unlike redcurrants, which are commonly grown with a permanent framework of fruiting branches, blackcurrants benefit from regularly replacing ageing wood.
A mature blackcurrant bush typically has around six to ten main stems emerging from its base.
What Young Blackcurrant Wood Looks Like
Younger stems are generally lighter in colour, smoother and more vigorous than older wood.
They often grow upright from the base and have fewer established side branches.
These shoots are particularly valuable because blackcurrants produce their best harvests on strong growth formed during the previous few years.
Keep healthy young stems, even if they have already produced berries. A branch doesn’t automatically need removing simply because it fruited last summer.
How to Recognise Older Wood
Older blackcurrant stems are generally thicker, darker and more weathered.
They may have rougher bark, numerous side branches or a tendency to spread outwards and lean towards the ground.
Some become less vigorous, producing fewer strong shoots as they age.
These are the stems to consider removing during annual pruning.
However, colour and thickness alone don’t establish a branch’s exact age. Look at its overall condition, position and vigour.
Prioritise older stems that are:
- Crowding healthy younger shoots.
- Growing awkwardly or lying close to the ground.
- Heavily branched with little vigorous new growth.
- Clearly less productive than the surrounding stems.
If you’re uncertain whether a healthy branch needs removing, leave it for another year rather than cutting unnecessarily.
How to Prune Blackcurrant Bushes Step by Step
Once you can distinguish younger growth from ageing stems, pruning an established blackcurrant bush is straightforward.
You’ll need sharp secateurs for smaller branches and loppers or a pruning saw for thicker wood.
The following method applies to conventional, multi-stemmed blackcurrant bushes that are approximately four years old or older.
Step 1: Inspect the Bush
Before making any cuts, stand back and examine the entire plant.
Look for thick older stems, vigorous new shoots emerging from the base and any dead or damaged branches.
Also identify stems that cross, rub against one another or trail along the ground.
Identify the younger growth you want to keep before selecting branches for removal.
This helps prevent accidentally cutting away productive replacement shoots.
Step 2: Select the Oldest Stems
Choose the oldest, least vigorous stems for removal.
On a mature bush, remove up to one-third of the oldest main stems, depending on its condition.
For example, a healthy bush with nine main stems might need only two or three older branches removed.
Prioritise thick, dark stems that are crowding younger growth or spreading awkwardly.
Don’t remove every branch that produced berries the previous summer. Younger wood can remain productive for several seasons.
Step 3: Cut Old Stems Close to the Base
Trace each selected old stem down to where it emerges from the base of the bush.
Use secateurs, loppers or a pruning saw to make a clean cut as close to the base as practical, without damaging neighbouring young shoots.
Avoid leaving long, unnecessary stumps.
Removing older stems near the base creates room for vigorous replacement growth to develop.
The important point is to remove selected old stems completely rather than shortening every branch by a third.
Step 4: Remove Weak and Poorly Positioned Growth
Once you’ve removed the main older stems, inspect the remaining bush.
Remove dead, damaged or badly crossing growth where necessary.
Weak shoots and branches trailing along the ground may also be removed if they interfere with healthy growth or harvesting.
However, avoid removing useful younger stems simply to make the bush look symmetrical.
A slightly uneven plant with healthy, productive growth is preferable to a neatly shaped bush that has lost too much fruiting wood.
Step 5: Check the Finished Bush
Stand back and assess the plant again.
A well-pruned blackcurrant should retain a mixture of healthy younger and established stems, with space for fresh shoots to emerge from the base.
The centre should be reasonably accessible, but the bush shouldn’t look stripped bare.
If you’ve removed the oldest, least productive stems and preserved plenty of healthy younger growth, the job is done.
There’s no need to keep cutting simply to reach a particular number of branches.
Pruning Newly Planted and Young Blackcurrants
Young blackcurrants need different treatment because their first few years are spent developing a productive framework.
The initial hard pruning is a one-off establishment technique, not something to repeat every winter.
Pruning a Newly Planted Blackcurrant Bush
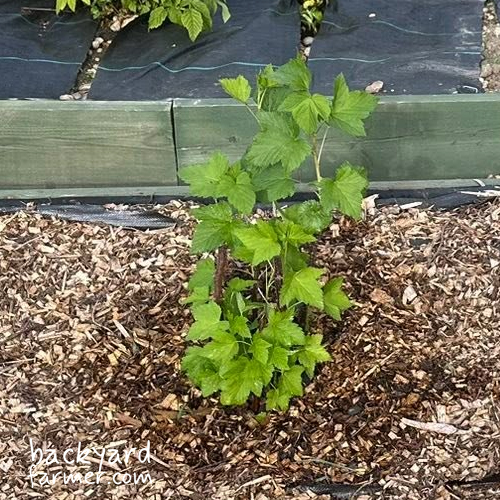
When planting a conventional blackcurrant bush during dormancy, cut all the existing stems back to one or two buds above ground level.
This encourages vigorous replacement shoots to develop from buds below the soil.
Although cutting a newly purchased plant back so severely can seem counterproductive, it encourages a stronger framework for future harvests.
The trade-off is that you’ll usually sacrifice the first year’s fruit.
This method doesn’t apply to standard-trained blackcurrants, which have a permanent upright trunk.
If you purchase a container-grown bush during summer, avoid automatically removing all its leafy growth immediately. Carry out the appropriate formative pruning during dormancy instead.
For information on planting depth, soil preparation and establishment, see our guide to growing blackcurrants in the UK.
Pruning Blackcurrants During Their First Three Years
After the initial pruning, healthy young bushes generally need little additional work during their first three years.
Allow vigorous shoots to develop, removing weak, damaged or badly positioned stems where necessary.
However, if a young bush produces very little new growth, stronger corrective pruning may help.
The RHS recommends cutting at least half the shoots back to the base when young plants are growing poorly, encouraging fresh replacement stems.
Before pruning heavily, check that the bush isn’t struggling because of drought, waterlogging, root competition or disease.
A healthy young blackcurrant doesn’t need severe annual pruning simply because winter has arrived.
How to Prune an Overgrown Blackcurrant Bush
Blackcurrants that haven’t been pruned for several years can become crowded with thick, woody stems.
These older bushes may still produce fruit, but harvesting becomes difficult and there may be little space for vigorous replacement shoots.
The best approach depends on the plant’s health, the amount of younger growth available and whether you want to preserve the next harvest.
| Bush condition | Recommended approach |
|---|---|
| Healthy with some ageing stems | Normal annual renewal pruning |
| Very crowded but still productive | Gradual renovation |
| Mostly old wood with little new growth | Consider stronger renovation or replacement |
| Persistently weak or diseased | Investigate plant health before pruning heavily |
Gradual Renovation
Gradual renovation is generally the safest approach for an overgrown but otherwise healthy blackcurrant.
Instead of removing the entire old framework, replace ageing stems over several winters.
Start by identifying any vigorous young shoots already growing from the base.
Remove selected older stems close to ground level, prioritising those that are crowded, damaged or growing awkwardly.
Where possible, retain younger branches capable of producing fruit.
During the following growing season, fresh shoots may develop in response to the pruning.
Inspect the bush again the following winter and remove another selection of ageing stems.
Continue until the original overcrowded framework has largely been replaced.
Gradual renovation takes time, but it reduces the immediate loss of productive wood and gives the bush an opportunity to develop healthy replacements.
Don’t expect the first round of pruning to produce an immediate increase in fruit. The plant needs time to establish its new growth.
Can You Cut an Old Blackcurrant Bush Right Back?
Severely neglected bushes may produce fresh shoots after hard pruning, provided their roots remain healthy and vigorous.
Removing most of the existing framework can encourage replacement growth, but recovery isn’t guaranteed. It can also sacrifice the following harvest while the plant regenerates.
For a bush that still produces reasonable crops, gradual renovation is usually preferable.
Consider severe renovation only when the existing stems are largely unproductive and you’re prepared to lose a season’s fruit.
Even when strong new growth appears, it may take another growing season or more for the bush to return to worthwhile cropping.
Avoid assuming that cutting everything down will automatically restore a struggling plant. If the bush is already weak or shows signs of serious disease, replacement may be more sensible.
When Is It Better to Replace the Bush?
Some old bushes are poor candidates for renovation.
A blackcurrant that produces little healthy new growth despite suitable soil and moisture may have underlying root or disease problems.
Winter is a useful time to inspect its buds.
Blackcurrant big bud mite causes unusually swollen, rounded buds that may fail to develop normally in spring.
A few affected buds can sometimes be removed during winter, but heavily infested bushes may be better replaced with healthy planting stock.
Big bud mites can also spread blackcurrant reversion disease, which reduces vigour and cropping.
Pruning cannot cure reversion disease, and swollen buds alone don’t prove that a bush is infected.
If a plant remains persistently weak, is heavily infested or shows signs of a serious systemic disease, investigate the cause before attempting major renovation.
Can You Prune Blackcurrants After Harvesting?
Some experienced growers prune blackcurrants during or immediately after harvesting.
The method involves identifying older stems that would normally be removed during winter pruning, cutting them near the base and then picking the berries from those branches.
This can make harvesting easier, particularly on large or awkwardly positioned bushes.
The important point is to select the stems before cutting them, using the same principles as winter renewal pruning.
Only remove older branches that are due for replacement.
Younger stems may continue producing good harvests for several seasons, even if they have already carried fruit.
Avoid removing large amounts of healthy foliage unnecessarily during summer.
For beginners, winter remains the simpler option because the bare branches are easier to inspect.
How to Prune Standard-Trained Blackcurrants
Standard-trained blackcurrants grow with a single upright trunk supporting a raised crown of fruiting branches.
Unlike conventional multi-stemmed bushes, the aim is to maintain the crown while encouraging younger fruiting wood.
During winter:
- Remove dead, weak or crossing branches.
- Shorten excessively long shoots to maintain the crown’s shape.
- Remove downward-growing or overcrowded branches.
- Clear unwanted shoots emerging from the trunk below the crown.
- Gradually replace ageing branches where suitable younger growth is available.
Do not cut a standard-trained blackcurrant back to one or two buds above ground level, as this would destroy its trained framework.
Common Blackcurrant Pruning Mistakes
Blackcurrants are relatively forgiving, but removing too much productive growth can reduce future harvests.
| Common mistake | Better approach |
|---|---|
| Cutting every stem back annually | Remove selected older stems |
| Shortening every branch by one-third | Renew ageing stems from the base |
| Removing all branches that have fruited | Retain healthy younger wood |
| Heavily pruning young bushes every winter | Allow their framework to develop |
| Pruning blackcurrants like redcurrants | Use blackcurrant-specific renewal pruning |
| Removing too much growth at once | Match pruning intensity to the bush’s condition |
| Hard pruning a weak or diseased bush | Investigate the underlying problem first |
Remember that pruning is primarily about renewing productive wood, not simply reducing the size of the bush.
What to Do After Pruning Blackcurrants
Blackcurrants need little special attention after routine winter pruning.
Clear unwanted branches from around the base and inspect the remaining stems for damage or unusually swollen buds.
Clean your tools after pruning, particularly if you’ve removed potentially diseased material.
There’s no need for wound sealants or specialist pruning treatments on healthy cuts.
In spring, apply garden compost or well-rotted manure around the bush, leaving a gap immediately around the stems.
This helps maintain soil moisture and fertility as new growth develops.
Healthy young stems removed during dormant pruning may also be suitable for hardwood cuttings.
Avoid propagating from plants with suspected reversion disease or serious pest problems.
Frequently Asked Questions
If the bush is still dormant and its buds haven’t opened, routine pruning can generally be carried out.
Once spring growth is well underway, postpone substantial renewal pruning until the following dormant season. Dead or broken branches can still be removed when necessary.
Avoid severe pruning simply because you’re moving the bush.
Remove dead or badly damaged stems if necessary, but retain healthy growth where possible. Move blackcurrants during dormancy, keeping as much of the root system intact as practical and watering thoroughly after transplanting.
Yes. Healthy blackcurrant prunings can be composted once chopped into smaller pieces or shredded.
Mix woody material with softer compost ingredients. Avoid adding material suspected of carrying serious disease or significant big bud mite infestations to an ordinary home compost heap.
Yes. Healthy young stems removed during dormant pruning can be used as hardwood cuttings.
Take sections approximately 20cm long and insert them into suitable soil or growing medium, leaving a few buds above the surface. Avoid using cuttings from bushes suspected of carrying serious pests or diseases.