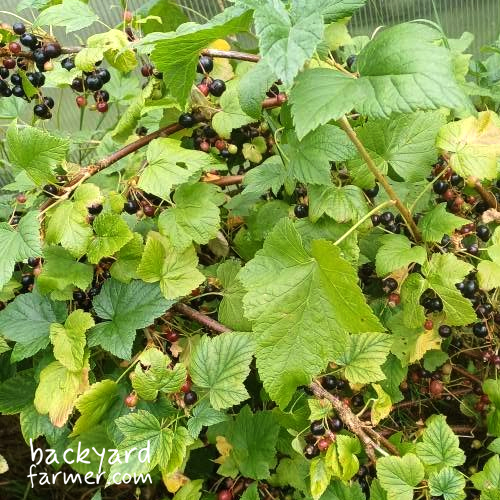
Blackcurrants are hardy, productive fruit bushes that grow well in UK gardens and allotments. They tolerate some shade, require little maintenance once established and can provide generous summer harvests for years.
The key is planting them correctly, maintaining healthy soil and encouraging new growth through pruning. Here’s how to grow blackcurrants, from planting your first bush to harvesting the fruit.
Blackcurrants at a Glance
| Growing requirement | Details |
|---|---|
| Botanical name | Ribes nigrum |
| Position | Full sun or light shade |
| Soil | Fertile, moisture-retentive and well-drained |
| Planting time | Late October to March |
| Plant spacing | 1.5–1.8m |
| Planting depth | 5cm deeper than the original soil level for bush forms |
| Mature size | Approximately 1–1.5m tall and wide |
| Pollination | Self-fertile |
| Harvest | June to August |
| Pruning | Winter |
| Difficulty | Easy |
Where to Grow Blackcurrants
Blackcurrants grow best in fertile soil that holds moisture without becoming waterlogged. They are well suited to permanent fruit-growing areas, allotment boundaries and dedicated sections of the garden.
Allow around 1.5–1.8m between bushes so each plant has room to develop and can be accessed for pruning and harvesting.
Sunlight and Shelter
A sunny position generally produces the best harvests, although blackcurrants tolerate light shade. This makes them useful in gardens where direct sunlight is limited for part of the day.
Avoid deep shade, where growth and cropping may suffer.
Choose a reasonably sheltered position, ideally away from areas where cold air collects. Although blackcurrant bushes are winter-hardy, their flowers can be damaged by late spring frosts, reducing the eventual harvest.
Soil Conditions
Blackcurrants prefer soil that remains reasonably moist throughout the growing season.
They grow in clay, loam and lighter soils, provided drainage is adequate. Heavy clay can be suitable because it retains moisture, but avoid areas where water regularly collects around the roots.
If your ground remains saturated after rainfall, investigate the cause before planting. Our guide to improving waterlogged soil explains how to identify drainage problems and choose an appropriate solution.
Where soil is poor or very light, incorporate garden compost or well-rotted manure into the planting area to improve moisture retention and soil structure.
Blackcurrants tolerate a broad range of soil pH levels and do not require ericaceous compost.
Remove perennial weeds before planting and keep surrounding grass from competing with the developing roots.
Best Blackcurrant Variety for UK Gardens
Several reliable blackcurrant varieties are available in the UK, with differences in plant size, flavour, harvesting time and resistance to pests and diseases.
Recommended Variety: ‘Ben Connan’ AGM
A compact, early-cropping blackcurrant with large, richly flavoured berries. RHS Award of Garden Merit winner and an excellent choice for UK gardens and allotments.
Other worthwhile varieties include:
- ‘Big Ben’ AGM: Large, relatively sweet berries suitable for eating fresh.
- ‘Ben Hope’: Upright growth, later cropping and resistance to big bud mite.
- ‘Ben Sarek’: Compact growth, making it suitable for smaller gardens and large containers.
Blackcurrants are self-fertile, so one bush is enough to produce fruit. Growing varieties with different ripening periods can extend the harvest if space allows.
When to Plant Blackcurrants
The best time to plant blackcurrants in the UK is between late October and March, while the bushes are dormant.
Autumn planting allows roots to begin establishing before spring growth, although winter and early spring planting work well too.
Avoid planting into frozen or waterlogged ground.
Bare-Root vs Potted Blackcurrants
Bare-root bushes are generally available between autumn and early spring. They are often cheaper than container-grown plants and establish well when planted during dormancy.
Keep the roots moist after delivery and plant as soon as practical. If they have become dry, soak them in water briefly before planting.
Container-grown bushes are available throughout more of the year and can be planted outside the dormant season. However, they require closer attention to watering during warm or dry weather.
Choose healthy plants from a reputable nursery. Where available, look for FPCS-certified stock, which is produced under a recognised fruit plant health certification scheme.
How to Plant Blackcurrant Bushes
Conventional blackcurrant bushes should be planted approximately 5cm deeper than their previous soil level.
This encourages fresh shoots to emerge from below ground, helping the bush develop a continuous supply of productive young stems.
Step 1: Prepare the Ground
Remove weeds and grass from the planting area.
Loosen compacted soil where necessary so roots can spread beyond the planting hole.
Dig a hole at least twice as wide as the rootball and deep enough to position the bush correctly.
If the soil is poor, incorporate some garden compost or well-rotted manure into the excavated soil or wider planting area. Avoid creating a small pocket of heavily amended soil surrounded by compacted ground.
Step 2: Position the Bush
Place the blackcurrant approximately 5cm deeper than it was previously growing.
For bare-root plants, look for the original soil mark on the stems. For container-grown plants, use the compost surface as your guide.
Spread bare roots gently across the bottom of the hole. If a container-grown plant has tightly circling roots, loosen the outer roots carefully before planting.
Important: Standard-trained blackcurrants, which have a single upright trunk and raised crown, should be planted at their original depth and supported with a suitable stake.
Step 3: Backfill and Water
Return the soil around the roots, firming gently to remove large air pockets.
Avoid compacting wet clay soil excessively.
Water thoroughly after planting to settle the soil around the roots.
Step 4: Apply Mulch
Spread a layer of garden compost or well-rotted manure approximately 5cm deep around the bush.
Mulching helps retain moisture, suppress weeds and gradually improve the soil.
Leave a small gap around the stems to prevent damp material sitting directly against their bases.
Caring for Newly Planted Blackcurrants
For conventional blackcurrant bushes planted during dormancy, cut the stems back to one or two buds above ground level immediately after planting.
This encourages vigorous replacement shoots to develop from the base. It also means sacrificing the first year’s fruit, but helps establish a productive bush for future seasons.
This hard initial pruning does not apply to standard-trained blackcurrants, which require a different pruning approach.
If planting a container-grown bush while it is actively growing, avoid automatically cutting all its leafy stems back in summer. Carry out any necessary formative pruning during dormancy.
Keep the surrounding ground free from competing weeds and water during prolonged dry spells throughout the first couple of growing seasons.
Growing Blackcurrants in Pots
Blackcurrants can grow in large containers, although they generally perform better in the ground.
Choose a pot at least 45cm wide and deep, with adequate drainage holes. Fill it with a peat-free, soil-based compost, such as John Innes No. 3.
Compact varieties, particularly ‘Ben Sarek’, are sensible choices.
Position the container in sun or light shade and maintain reasonably even moisture throughout the growing season. Check regularly during warm weather, as compost can dry out quickly.
Container-grown blackcurrants also need additional nutrients because their roots are restricted to a limited volume of compost. Apply a suitable granular fertiliser in spring or use an appropriate liquid feed during active growth, following the manufacturer’s instructions.
Refresh the compost and repot when the plant becomes root-bound or begins to outgrow its container.
If a larger pot is impractical and the bush is no longer cropping well, consider moving it into the ground.
For gardeners with suitable growing space, planting directly into the soil is generally the easier long-term option.
How to Care for Blackcurrant Bushes
Routine care is straightforward: maintain soil moisture, apply organic mulch and remove ageing stems during winter.
Watering Blackcurrants
Water newly planted bushes thoroughly during dry spells, particularly during their first two growing seasons.
Aim to moisten the soil around the developing root system rather than repeatedly wetting the surface.
Established blackcurrants growing in moisture-retentive ground rarely need routine watering during normal UK weather. However, prolonged drought can still affect growth and fruit development, especially on lighter soils.
Avoid sudden heavy watering when the berries are ripening, as rapid changes in moisture can sometimes cause fruit splitting.
Mulching and Feeding
Apply a fresh layer of garden compost or well-rotted manure around established bushes each spring.
Mulch helps conserve moisture, suppress weeds and gradually return organic matter to the soil.
Blackcurrants benefit from fertile ground, but bushes growing in regularly mulched soil often need no additional fertiliser.
You can produce your own soil improver by making garden compost at home. Well-rotted horse manure is another useful option, provided it comes from a safe source and is fully decomposed.
If growth becomes weak or harvests decline, check soil moisture, drainage, pruning and light levels before assuming nutrients are lacking.
Additional feeding may be useful where a genuine deficiency is identified, but it should not replace good soil management.
Protecting Blackcurrants from Frost and Birds
Although blackcurrants tolerate winter temperatures well, their flowers and developing fruit can suffer damage from late spring frost.
If frost is forecast during flowering, temporarily cover smaller bushes with horticultural fleece overnight. Support the fleece above the flowers where practical and remove it during the day to allow pollinating insects access.
Bird damage varies between gardens. Some bushes lose little fruit, while others can be stripped as berries ripen.
Where protection is needed, use a fruit cage or securely fitted netting before the fruit reaches maturity.
Keep netting taut and check it regularly to prevent birds or other wildlife becoming entangled.
Blackcurrant Growing Calendar
| Season | Main jobs |
|---|---|
| Winter | Plant dormant bushes and prune established plants |
| Spring | Apply mulch, monitor flowering and protect against late frost |
| Summer | Water during prolonged dry weather, protect fruit and harvest |
| Autumn | Clear competing weeds, prepare planting areas and take hardwood cuttings |
Exact timing varies with location, variety and seasonal weather.
When and How to Prune Blackcurrants
Blackcurrants produce their best crops on strong, relatively young wood. Pruning encourages fresh shoots to replace ageing, less productive stems.
Most pruning takes place during winter dormancy.
| Bush age | Pruning approach |
|---|---|
| Newly planted dormant bush | Cut stems back to one or two buds above ground |
| First three years | Lightly remove weak or poorly positioned stems if growth is strong |
| Young bush with weak growth | Cut at least half the shoots back to the base to encourage new stems |
| Four years onwards | Remove up to one-third of the oldest stems each winter |
These instructions apply to conventional bush-form blackcurrants. Standard-trained plants require different formative pruning.
Older stems are usually thicker, darker and more woody than young shoots.
Cut selected older stems close to their base rather than shortening every branch. This encourages replacement growth while retaining younger wood for future harvests.
Avoid cutting the entire bush down every winter, as this removes productive growth.
For detailed instructions on identifying old wood, making the correct cuts and restoring neglected bushes, see our guide to pruning blackcurrants in the UK.
When and How to Harvest Blackcurrants
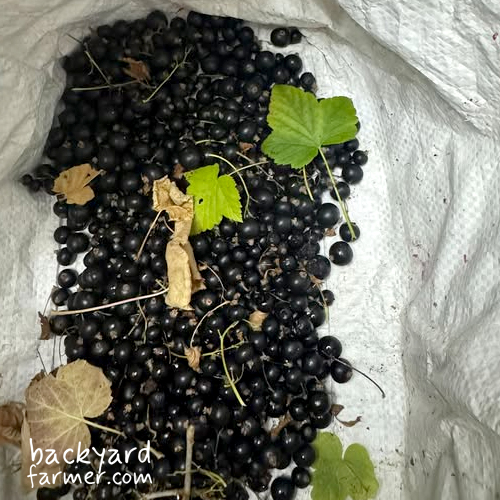
Blackcurrants generally ripen between June and August in the UK, depending on variety, location and seasonal weather.
A healthy, established bush can produce several kilograms of berries in a good season.
When Are Blackcurrants Ready to Pick?
Ripe blackcurrants develop a deep black colour and become slightly softer as they mature.
However, colour alone isn’t always enough to judge ripeness. The berries should have developed their characteristic rich flavour and detach without excessive force.
Taste a berry if you’re uncertain. Blackcurrants are naturally sharp, but immature berries have a less developed flavour.
How to Pick Blackcurrants
Modern varieties often ripen most berries on a cluster at approximately the same time.
Where this happens, remove the entire cluster, known as a strig, and separate the berries afterwards.
Older varieties may ripen unevenly, requiring individual berries to be picked over several visits.
Handle ripe fruit gently to avoid crushing it.
How to Store Blackcurrants
Fresh blackcurrants are best used within a few days and can be refrigerated until needed.
Freezing is useful when bushes produce more than you can immediately use.
Remove damaged berries and unwanted stalks, wash if necessary and allow the fruit to drain thoroughly. Freeze the berries separately on a tray before transferring them to a suitable freezer container or bag.
Frozen blackcurrants are useful for jams, syrups, compotes and desserts.
Common Blackcurrant Growing Problems
Blackcurrants are generally healthy plants, but occasional problems can affect growth, foliage and fruit production.
Start by identifying the symptoms rather than applying treatments unnecessarily.
| Symptom | Possible cause | What to check |
|---|---|---|
| Healthy bush, no fruit | Frost, pruning or poor fruit set | Did the bush flower? |
| Small harvest | Ageing stems, shade or poor growing conditions | Check pruning history and new growth |
| Curled leaves | Aphids or gall midge | Examine affected shoots and leaves |
| Large, rounded buds | Big bud mite | Compare winter buds with healthy pointed buds |
| White powder on leaves | Powdery mildew | Look for fungal growth on leaves and shoots |
| Brown leaf spots | Currant leaf spot | Check for spotting and premature leaf fall |
| Missing ripe berries | Birds or other wildlife | Look for feeding damage as berries ripen |
Why Is My Blackcurrant Bush Not Fruiting?
First, establish whether the bush produced flowers.
If there were no flowers, consider the age of the bush and its pruning history.
Newly planted bushes that were cut back hard may not fruit during their first year. Older bushes can also crop poorly if too much productive young wood has been removed.
If flowers appeared but no berries developed, investigate late spring frost, unsuitable weather during flowering and poor fruit set.
Cold conditions can damage blossoms or interfere with pollination without visibly harming the rest of the bush.
If some berries formed but the harvest remained small, check whether the plant experienced prolonged dryness, excessive shade or poor growing conditions.
Avoid applying extra fertiliser until you’ve identified the likely cause.
Curled Leaves and Swollen Buds
Curled or crumpled young leaves may indicate aphids or blackcurrant gall midge.
Inspect affected growth closely.
Aphids often gather on tender shoots and leaf undersides. Small populations can usually be tolerated, particularly where ladybirds, hoverflies and other natural predators are present.
Blackcurrant gall midge can cause distorted, crumpled young leaves. Established bushes often tolerate minor damage without a significant reduction in cropping.
Large, rounded winter buds require different attention.
These are characteristic symptoms of blackcurrant big bud mite. Healthy buds are typically narrower and more pointed.
Where only a few buds are affected, they can be picked off during winter and disposed of away from the bushes.
Heavily infested plants may need replacing with healthy stock, particularly where growth and cropping have declined.
Big bud mites can also spread blackcurrant reversion disease, which can seriously reduce productivity. However, swollen buds alone do not confirm that a plant has reversion.
Powdery Mildew and Leaf Problems
Powdery mildew produces a white, powdery coating on leaves and young shoots.
Keep bushes growing strongly, avoid unnecessary overcrowding and maintain soil moisture during prolonged dry periods.
Remove badly affected shoot tips where practical.
Currant leaf spot causes small brown or dark spots on leaves and can lead to premature leaf fall when severe.
Remove affected fallen leaves where practical to reduce material carrying the disease into the following season.
Good growing conditions help plants tolerate occasional leaf damage, and minor symptoms do not always require intervention.
How to Grow Blackcurrants from Cuttings
Blackcurrants are easily propagated from hardwood cuttings taken during dormancy, usually from mid-autumn to late winter.
Select healthy, vigorous shoots produced during the current growing season. Avoid taking cuttings from old plants of uncertain health because some diseases can be carried into new plants.
Cut stems into sections approximately 20cm long, removing any soft tip growth.
Make a clean cut just below a bud at the base and another above a bud at the top.
Insert each cutting into prepared, well-drained soil or a deep container of suitable growing medium, with approximately two-thirds of its length below the surface and a few buds remaining above ground.
Firm the soil gently and keep it moist without waterlogging.
Roots and shoots should develop during the following growing season. Leave outdoor cuttings to establish before moving them to their permanent positions, usually the following autumn.
Frequently Asked Questions
Blackcurrants can produce berries while relatively young, but a newly planted bush may not crop during its first year if it has been pruned hard.
Harvests generally improve over the following few seasons as a strong framework of productive stems develops.
No. Blackcurrants are self-fertile, so a single bush can produce a harvest.
Growing several varieties can provide more fruit and extend the picking season, but it isn’t necessary for pollination.
Yes. Compact varieties are suitable for smaller gardens provided they have adequate growing space.
Blackcurrants can also be grown in large containers, although planting directly into the ground generally provides better long-term results with less maintenance.