Starting a wormery is a practical way to turn kitchen scraps into useful compost for your garden. You don’t need much space or expensive equipment, but getting the conditions right from the beginning makes a big difference.

With a suitable container, composting worms, damp bedding and a sheltered position, you can establish a wormery that processes food waste throughout much of the year. This guide covers setup, feeding, maintenance and harvesting, including how to keep your worms healthy through the British seasons.
Wormery Quick Guide
| What You Need | Recommendation |
|---|---|
| Best worms | Tiger worms or other composting worms |
| Ideal temperature | Around 18–25°C |
| Best location | Sheltered, shaded and protected from extremes |
| Bedding | Damp shredded cardboard, paper or coir |
| Food | Small amounts of suitable kitchen scraps |
| Starting a wormery | Allow worms time to settle before regular feeding |
| First harvest | Usually after several months |
| Maintenance | Check food, moisture and temperature regularly |
What Is a Wormery and How Does It Work?
A wormery uses composting worms and microorganisms to break down organic waste into vermicompost.
Unlike a conventional compost heap, which can handle larger quantities of garden waste, a wormery is particularly suited to processing smaller amounts of kitchen scraps.
The worms live among decomposing material, feeding on softened organic matter and the microorganisms growing within it. Over time, this produces dark, crumbly compost containing worm castings and decomposed organic material.
The finished vermicompost can improve garden soil or be incorporated into suitable growing mixes.
A compact wormery can work on a sheltered patio, in a suitable shed or even indoors, provided its conditions are properly managed.
Is a Wormery Worth It?
For gardeners looking to reduce kitchen waste and produce their own soil amendments, a wormery can be a worthwhile addition.
Advantages of a Wormery
- Processes kitchen scraps: Vegetable peelings, fruit waste and other suitable organic materials can be composted at home.
- Produces useful compost: Finished vermicompost can be used around vegetables, flowers and container plants.
- Needs relatively little space: Compact systems suit smaller gardens, patios and sheltered areas.
- Works without a large compost heap: Useful where space for traditional composting is limited.
- Can operate year-round: With suitable temperature protection and seasonal adjustments.
What Are the Limitations?
A wormery won’t necessarily process all the food waste produced by a household, particularly while the worm population is becoming established.
It also needs occasional attention. Overfeeding, excess moisture and extreme temperatures can create unhealthy conditions for the worms.
Large quantities of grass clippings, woody prunings and general garden waste are usually better handled by a conventional compost heap.
A wormery works best alongside ordinary composting and food waste collection, rather than necessarily replacing either.
What Do You Need to Start a Wormery?
You only need four essentials: a suitable container, composting worms, bedding and food.
Choosing the Right Wormery
You can buy a ready-made wormery or make one using suitable containers.
| Ready-Made Wormery | DIY Wormery |
|---|---|
| Designed specifically for worm composting | Can use repurposed containers |
| Usually includes ventilation and drainage | Requires suitable ventilation and moisture management |
| Stacking models can simplify harvesting | Single-bin designs are straightforward |
| Higher initial cost | Potentially cheaper to establish |
| Often supplied with instructions | Worms and bedding may need sourcing separately |
Stacking wormeries use several trays. Food is introduced into the active tray, and worms can move between trays towards fresh material.
Single-bin wormeries keep everything in one container. They’re simpler in design, although separating worms from finished compost may take more effort.
If you’re considering a ready-made system, our Wormcity Wormery Review examines a four-tray model, including its capacity, drainage, build quality and practical limitations.
Which Worms Should You Use?

Not all earthworms are suitable for a wormery.
The large earthworms commonly found when digging garden soil generally live in permanent burrows. A wormery needs species adapted to living in decomposing organic matter.
Suitable composting worms include:
- Tiger worms (Eisenia fetida): Commonly sold as composting worms or brandling worms.
- Red worms (Eisenia andrei): Another species well suited to composting organic waste.
- European nightcrawlers (Dendrobaena veneta): Larger composting worms also used in some wormeries.
Composting worms can be purchased from specialist suppliers or obtained from an established wormery.
The right number depends on your container size and how much food you’ll add. Many starter kits supply several hundred worms, often sold by weight.
For beginners, establishing a healthy population and increasing feeding gradually is more important than starting with the largest possible number of worms.
Preparing the Bedding
Bedding provides the moist, aerated environment that composting worms need.
Suitable materials include:
- Shredded plain cardboard
- Shredded, non-glossy paper
- Coconut coir
- Partially decomposed leaves
- A little mature compost
The amount of bedding depends on your wormery design. Some compact stacking systems begin with a shallow layer of suitable compost or bedding, while larger single-bin wormeries benefit from a deeper layer.
Follow the manufacturer’s instructions where available. For a DIY system, use the bedding depth specified by a verified design rather than assuming that one measurement suits every container.
Mix the bedding with water until evenly damp.
It should feel like a wrung-out sponge. When squeezed, it should hold together and release only a few drops of water.
Avoid packing it tightly. Worms need moisture, but they also need oxygen.
Where Should You Keep a Wormery in the UK?
A sheltered, shaded position is usually the best starting point.
Composting worms are most active at around 18–25°C. Their activity slows considerably in colder conditions, while excessive heat can become dangerous.
These temperatures describe preferred conditions, not exact survival limits.
Suitable locations include:
- A shaded corner of the garden
- A sheltered patio
- A ventilated shed
- A garage with suitable temperatures
- A utility room or another appropriate indoor space
Protect outdoor wormeries from heavy rain, direct summer sunlight and hard frost.
A greenhouse can become dangerously hot during summer, while an unheated shed may still freeze in winter.
Choose a location based on the temperatures your worms will actually experience, rather than assuming that being under cover is enough.
How to Start a Wormery: Step by Step
Once you’ve chosen your container and sourced your worms, setting up the system is straightforward.
Step 1 — Prepare Your Container
Place the wormery in its intended position before filling it.
Check that ventilation openings are clear and that excess moisture cannot accumulate around the worms.
For a stacking system, assemble the trays according to the manufacturer’s instructions. Make sure the collection chamber and any drainage tap are accessible.
For a DIY container, check its ventilation and moisture-management arrangements before introducing the worms.
Step 2 — Add Damp Bedding
Prepare enough moist shredded cardboard, paper or other suitable bedding for your wormery design.
Spread it loosely across the active compartment, leaving space for food and future bedding additions.
The bedding should be damp but not dripping wet.
Avoid starting with a container full of kitchen scraps. Fresh food alone doesn’t provide the same stable habitat as prepared bedding.
Step 3 — Introduce the Composting Worms
Gently place the worms onto the prepared bedding.
Allow them to move into the material naturally rather than mixing them in by hand.
Composting worms generally avoid strong light, so they’ll usually begin moving down into the bedding.
If your starter worms arrive with healthy, established bedding or vermicompost, add this to the wormery too.
Step 4 — Allow the Worms to Settle
Close the wormery and give the worms time to adjust to their new environment.
For a typical new system, allow several days to around a week before beginning regular feeding, unless the supplier’s instructions recommend otherwise.
Starter worms may arrive with some food already mixed into their bedding, so additional feeding isn’t always immediately necessary.
Check moisture and temperature during this period, but avoid repeatedly disturbing the contents.
Step 5 — Begin Feeding Cautiously
Once the worms have settled, introduce a small amount of chopped vegetable scraps.
For a modest starter colony, a small handful is a cautious illustrative starting point, although the appropriate quantity depends on the number of worms and their conditions.
Bury the food lightly beneath the bedding.
Fresh scraps need time to decompose, so don’t fill the tray with waste.
Step 6 — Increase Feeding Gradually
Check whether the previous food is breaking down before adding more.
If plenty of recognisable scraps remain, wait longer.
As the population becomes established and conditions remain suitable, the wormery should gradually process larger quantities.
The best feeding schedule is the one your worms can keep up with.
Making a Simple DIY Wormery: What You Need to Know
You don’t need to buy a commercial system to start worm composting.
A suitable opaque plastic storage container can provide the basis for a simple single-bin wormery.
A working DIY design needs:
- A suitable container: Sturdy, covered and large enough for bedding, food and worm movement.
- Ventilation: Openings positioned to provide airflow without leaving the bin exposed to pests.
- Moisture management: A design that prevents excess liquid accumulating around the worms.
- Accessible bedding: Enough space to maintain and harvest the material.
- A sheltered location: Protection from direct sunlight, heavy rain and extreme temperatures.
A single-bin design is usually the easiest approach for beginners, while stacking containers can make separating different stages of composting more convenient.
For a fully specified build, the Natural History Museum’s DIY worm composter guide provides container dimensions and instructions for assembly and ventilation.
Use a verified plan before drilling holes or modifying containers. Incorrect drainage and ventilation can make a DIY wormery difficult to maintain.
What Can You Feed Wormery Worms?
Worms thrive when they’re given suitable organic waste in manageable quantities.
They feed within a decomposition process involving microorganisms, so softer materials that break down easily are generally more suitable than tough, woody waste.
Foods Suitable for a Wormery
| Food or Material | Guidance |
|---|---|
| Vegetable peelings | Excellent everyday feed |
| Fruit scraps | Suitable in moderate amounts |
| Banana skins | Chop into smaller pieces |
| Coffee grounds | Use in moderation |
| Loose tea leaves | Suitable in modest amounts |
| Crushed eggshells | Use small quantities |
| Shredded plain cardboard | Adds bedding and absorbs moisture |
| Soft garden leaves | Small amounts are suitable |
| Plain cooked vegetables | Small quantities without added fats or oils |
Only add tea bags if you’re confident they contain no plastic or unsuitable materials.
Chopping larger scraps into smaller pieces helps them break down more quickly.
Foods to Limit or Avoid
Some materials create more problems than they’re worth in a small wormery.
Limit:
- Citrus peel
- Onions, garlic and leeks
- Large amounts of acidic fruit
- Bread and starchy leftovers
- Large quantities of wet fruit waste
Avoid:
- Meat and fish
- Dairy products
- Grease, fats and oils
- Bones
- Large quantities of woody garden waste
- Materials contaminated with harmful chemicals
Meat, dairy and greasy foods can attract pests and create unpleasant smells.
Tough woody materials break down slowly and are generally better suited to conventional composting.
How Much Should You Feed?
Feeding rates vary with worm numbers, temperature and how quickly food decomposes.
Start small and check the remaining scraps before feeding again.
If the previous food is disappearing and the wormery smells earthy, cautiously increase the quantity.
If food accumulates, stop feeding temporarily and let the system catch up.
Overfeeding is one of the easiest beginner mistakes, particularly when trying to process more household waste than a new wormery can handle.
Your First Month With a Wormery
The first few weeks are about establishing healthy conditions rather than producing compost as quickly as possible.
| Stage | What to Focus On |
|---|---|
| First few days | Allow the worms to settle and check bedding moisture |
| Once food begins breaking down | Assess whether more food is needed |
| When scraps are consistently processed | Establish a regular feeding routine |
| Throughout the first month | Monitor moisture, smell and worm behaviour |
These are observations rather than fixed deadlines.
A wormery started during warm weather may establish more quickly than one started in a cold shed during winter.
You should gradually notice food softening, worms moving through the bedding and the contents becoming darker.
If the wormery smells unpleasant, becomes waterlogged or contains large amounts of untouched food, correct those conditions before increasing feeding.
How to Maintain a Healthy Wormery
Once established, a wormery needs relatively little work, but it shouldn’t be neglected.
Most maintenance involves checking moisture, airflow and the amount of food remaining.
Managing Moisture and Drainage
Food scraps naturally release moisture as they decompose, often providing much of the water a wormery needs.
Check the bedding occasionally using the squeezed-sponge test.
If the contents are excessively wet, add shredded dry cardboard or paper and check that drainage isn’t blocked.
If the bedding becomes too dry, lightly moisten it.
Avoid watering routinely without checking conditions first.
Keeping the Wormery Aerated
Worms need oxygen to survive.
When wet material becomes compacted, air spaces disappear and decomposition can become anaerobic, often causing unpleasant smells.
Adding shredded cardboard helps absorb moisture and maintain the structure of the bedding.
If necessary, gently loosen compacted material without aggressively turning the entire wormery.
Recognising a Healthy Wormery
A healthy wormery will generally have:
- Moist but not saturated bedding
- An earthy smell rather than a rotten one
- Food scraps gradually breaking down
- Worms moving through bedding and decomposing material
- No persistent build-up of excess liquid
Small insects and other organisms may also be present.
Not every insect indicates a problem. More serious warning signs include persistent rotten smells, repeated escape attempts and significant worm deaths.
Looking After a Wormery in Summer and Winter
A wormery can operate throughout the year in the UK, but composting activity changes with temperature.
Winter Wormery Care
During cold weather, worms become less active and process food more slowly.
Reduce feeding if scraps are no longer disappearing at their usual rate.
Move portable wormeries into a sheltered, frost-protected location where possible.
Insulation can reduce temperature fluctuations, but it won’t guarantee protection during prolonged freezing weather.
An unheated shed or garage can still become extremely cold.
Summer Wormery Care
Summer heat can be just as damaging as winter frost.
Keep the wormery out of direct sunlight and watch for overheating during hot weather.
Dark plastic containers can become particularly warm, while enclosed sheds and greenhouses may reach higher temperatures than the surrounding garden.
If necessary, move the wormery somewhere cooler with adequate ventilation.
Check moisture more frequently during hot weather, but avoid saturating the bedding in an attempt to cool it.
Aim for stable conditions, not maximum warmth or moisture.
When and How to Harvest Worm Compost
An established wormery gradually produces dark, crumbly vermicompost.
The first usable material may become available after several months, although fully emptying a wormery can take considerably longer.
Harvesting time depends on feeding, temperature, worm population and system design.
How to Tell When Worm Compost Is Ready
Finished worm compost should generally:
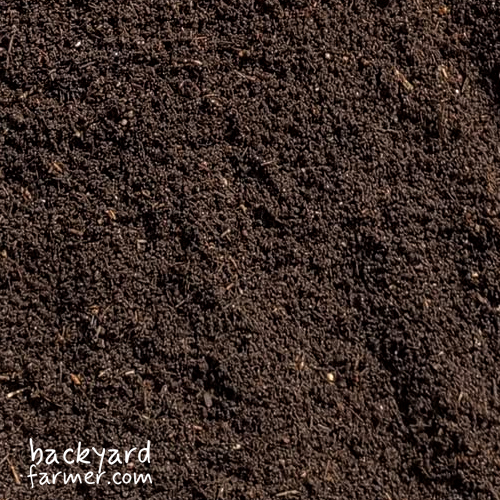
- Be dark and crumbly
- Have an earthy smell
- Contain little recognisable food
- Have a relatively even texture
Any larger pieces of unfinished bedding can be returned to the wormery.
Harvesting from a Stacking Wormery
Stacking systems allow worms to move between trays as fresh bedding and food are introduced.
When a lower tray contains mostly finished material, it may be ready for harvesting.
However, worms don’t always migrate neatly upwards.
Check the material carefully and return remaining worms to the active composting area.
Follow the manufacturer’s instructions for rotating trays, as designs differ.
Harvesting from a Single-Bin Wormery
Move most of the older material towards one side of the bin.
Add fresh bedding and food to the opposite side.
Over time, many worms will move towards the new food source, making it easier to harvest finished material from the older side.
You may still need to separate some worms by hand.
Another option is to place small piles of finished material under a bright light. Worms tend to move away from the exposed surface, allowing you to remove small amounts of compost gradually.
Keep this process brief and avoid exposing worms to excessive heat or allowing them to dry out.
How to Use Finished Worm Compost
Vermicompost can be used as a soil amendment, applied around established plants or incorporated into suitable growing mixes.
It’s usually produced in smaller quantities than ordinary garden compost, so targeted applications often make the best use of it.
Our Worm Castings Guide explains how to use finished material in garden beds, containers and growing mixes.
If you’re deciding which amendment suits your garden, see our Worm Castings vs Compost comparison.
Common Wormery Problems and How to Fix Them
Most wormery problems involve feeding, moisture, ventilation or temperature.
Use the following table to identify what to check before making changes.
| Problem | What to Check | What to Do |
|---|---|---|
| Rotten smell | Excess food, wet bedding or poor airflow | Remove uneaten food and add dry bedding |
| Worms escaping | Moisture, temperature, ventilation and recent disturbance | Correct unsuitable conditions |
| Fruit flies | Exposed food scraps | Bury food beneath bedding |
| Soggy compost | Wet food, blocked drainage or compacted bedding | Improve drainage and add cardboard |
| Food not breaking down | Cold conditions or excessive feeding | Reduce feeding and check temperature |
| Dry bedding | Insufficient moisture | Add a little water or damp bedding |
| Worms dying | Extreme temperatures, contamination or unsuitable conditions | Investigate promptly and correct the cause |
What If Your Wormery Smells?
A healthy wormery should generally smell earthy.
A strong rotten smell suggests excess food, poor airflow or waterlogged conditions.
Remove accumulating food, check moisture and drainage, and add shredded cardboard where needed.
Avoid chemical treatments or products intended merely to mask the smell.
Why Are My Worms Trying to Escape?
A few worms exploring a new container can be normal during establishment.
However, large numbers repeatedly gathering around the lid or attempting to escape may indicate unsuitable conditions.
Check temperature, moisture, ventilation and whether too much food is decomposing at once.
Correct any obvious problems before adding more food.
How Do You Get Rid of Fruit Flies?
Fruit flies are usually attracted to exposed scraps, particularly fruit.
Bury fresh food beneath the bedding, remove excessive waste and reduce fruit feeding if necessary.
Keep the lid secure without blocking ventilation.
Avoid insecticides inside the wormery, as they can harm the organisms responsible for composting.
What About the Liquid from a Wormery?
Some wormeries collect liquid in a drainage chamber beneath the composting trays.
This is known as wormery leachate. It has passed through the wormery contents and may contain dissolved nutrients, but its composition varies.
It isn’t the same as worm casting tea or extract, which is prepared separately using finished worm castings and water.
Liquid collected from unfinished decomposing waste may contain undesirable microorganisms, so it shouldn’t automatically be regarded as a safe fertiliser.
For beginners, preventing waterlogging is more important than trying to produce large quantities of liquid.
Our Worm Casting Tea Guide explains the different preparations, the available evidence and appropriate uses.
Frequently Asked Questions
Yes. A well-maintained wormery can be kept indoors in a suitable ventilated location, such as a utility room.
The main considerations are temperature, drainage, cleanliness and avoiding overfeeding.
A secure, properly maintained wormery is less likely to attract rodents, but food waste can still be an attraction.
Keep the lid secure, prevent access through openings, avoid meat and dairy waste, and don’t leave scraps accumulating around the container.
An established, healthy wormery can often cope without fresh food for a couple of weeks, although this depends on its condition and the weather.
Before leaving, check moisture, drainage and temperature. Avoid adding a large pile of food to compensate for your absence.
Composting worms reproduce when conditions are suitable, but the rate depends on species, temperature, food availability and population density.
A healthy colony can gradually increase without continually adding more worms.
Small quantities of suitable soft garden waste can be added.
Large amounts of grass clippings, woody prunings and tough plant material are generally better suited to a conventional compost heap.
Avoid adding plant material contaminated with pesticides or other harmful chemicals.
Not usually once a healthy population has become established.
Composting worms reproduce within the wormery, allowing the population to adjust over time to available food and living conditions.
If significant numbers die, correct the underlying problem before introducing replacements.