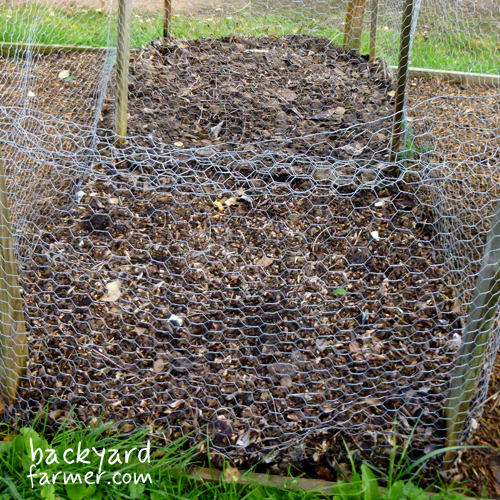
Fallen autumn leaves can be turned into leaf mould, a useful soil conditioner that improves soil structure and moisture retention. Sometimes called leaf compost, it’s easy to make using old compost bags, a mesh cage or a sheltered heap. The process takes time but requires very little maintenance.
Quick Guide: Making Leaf Mould
| Best time | Autumn, when leaves are falling |
| Materials | Fallen leaves, bags or a suitable container |
| Preparation | Collect leaves; shred if desired |
| Moisture | Keep damp, not waterlogged |
| Storage | Perforated bags, a mesh cage or sheltered heap |
| Maintenance | Occasional moisture checks |
| Time to make | Time to make: Around 1 year for coarse leaf mould; often 2+ years for fine material. |
| Finished result | Dark, crumbly material with an earthy smell |
The basic process: Collect fallen leaves, moisten them if necessary, store them in a ventilated container and allow them to decompose. Check occasionally to make sure they haven’t dried out or become waterlogged.
What Is Leaf Mould?
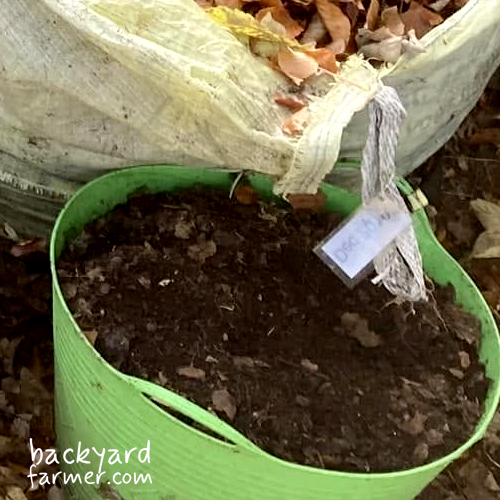
Leaf mould is the material produced when fallen leaves gradually decompose. Unlike ordinary garden compost, which contains a mixture of green and brown materials, leaf mould is made almost entirely from leaves.
Fungi play an important role in breaking down the leaves, so the process generally happens at lower temperatures than active composting. There’s no need to balance ingredients or maintain a hot compost heap.
The finished material adds organic matter, improves soil structure and helps soil retain moisture. However, leaf mould is relatively low in nutrients, so its main benefit is conditioning the soil rather than directly feeding plants.
Which Leaves Can You Use to Make Leaf Mould?
Most fallen deciduous leaves are suitable for making leaf mould. There’s no need to separate every species, although some take considerably longer to break down.
| Leaf type | What to expect |
|---|---|
| Birch, lime, willow and cherry | Suitable deciduous leaves; decomposition speed varies |
| Oak, beech and hornbeam | Produce good leaf mould, but some batches break down slowly |
| Sycamore and horse chestnut | Larger leaves may benefit from shredding |
| Holly and laurel | Tough evergreen leaves break down slowly |
| Pine and other conifer needles | Very slow; best kept separate from ordinary deciduous leaf mould |
Oak and beech leaves are sometimes described as unsuitable because of their slower decomposition. In reality, they can produce excellent leaf mould when given sufficient time and moisture.
Pine needles and other conifer litter can also decompose, but the process is slower, and the resulting material may be more acidic than ordinary deciduous leaf mould.
Where Should You Collect Leaves?
Lawns, paths and other areas where leaves need clearing are convenient places to collect them. A garden rake is usually all you need.
However, fallen leaves already serve an important purpose. Leaf litter provides shelter for insects and other invertebrates while gradually returning organic matter to the soil.
Where practical, leave leaves beneath hedges, trees and in sheltered wildlife areas. Avoid unnecessary blowing, vacuuming or shredding of established leaf litter, particularly where animals may be sheltering.
Avoid collecting leaves from heavily trafficked roads, where contamination may be a concern. Ordinary leaf spotting doesn’t necessarily make material unsuitable, but leaves affected by known plant diseases may need different handling. A cool leaf-mould heap won’t reliably destroy all disease organisms.
You can also use fallen leaves directly to protect vegetable beds over winter rather than collecting everything for composting.
How to Make Leaf Mould Step by Step
The basic method is the same whether you’re using old compost bags, a wire mesh cage or a sheltered heap.
Step 1 — Collect Fallen Leaves
Gather leaves during autumn using a rake or by hand. Remove obvious rubbish, plastic and other unwanted materials.
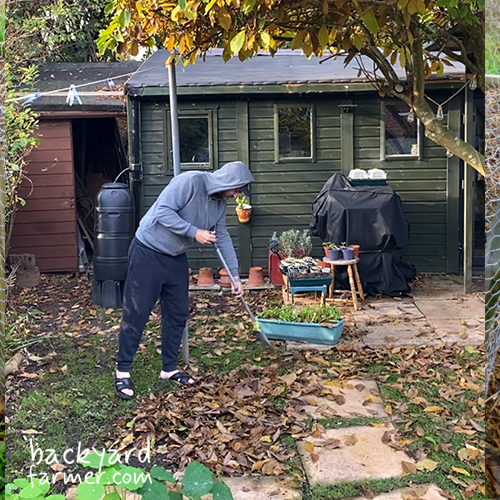
Leaves can be collected dry or damp, although dry leaves are often lighter and easier to handle.
Collect a generous quantity if you have the space. Leaves shrink considerably as they decompose, and several bags of freshly collected material may eventually produce only one partly filled bag of leaf mould.
Step 2 — Prepare the Leaves
Check the moisture before storing your leaves.
They should feel damp rather than saturated. If they’re dry, water them lightly as you fill the container. If they’re dripping wet, allow excess moisture to drain away.
Shredding can speed up decomposition, particularly with tougher leaves such as oak or sycamore.
However, shredding isn’t essential. Whole leaves will still break down naturally, and leaving them intact avoids unnecessary work and disturbance.
Step 3 — Choose a Container or Storage Area
Place the leaves into perforated bags, a wire mesh cage or a sheltered heap.
Whichever method you choose, the leaves need sufficient moisture, some ventilation and drainage to prevent waterlogging.
There’s no need for specialist equipment or compost activators.
Step 4 — Leave the Leaves to Decompose
Once stored, leaf mould requires very little attention.
Check occasionally to ensure the leaves remain damp. If they’re drying out, add water. If they’ve become waterlogged or tightly compacted, improve drainage and gently loosen the material.
Unlike a conventional hot compost heap, leaf mould doesn’t require frequent turning.
Over time, the leaves will shrink, darken and gradually break down.
Making Leaf Mould in Bags, Bins or a Heap
The best method depends on how many leaves you collect and how much space you have available.
| Method | Best for | Main advantage |
|---|---|---|
| Perforated bags | Small gardens and limited space | Cheap, simple and compact |
| Wire mesh cage | Large gardens and allotments | Holds substantial quantities |
| Open heap | Gardens with spare sheltered space | Requires very little equipment |
Making Leaf Mould in Bags
Reusing old compost bags is one of the simplest methods.
Fill each bag with damp leaves, make several holes in the sides and bottom for ventilation and drainage, then close the top loosely.
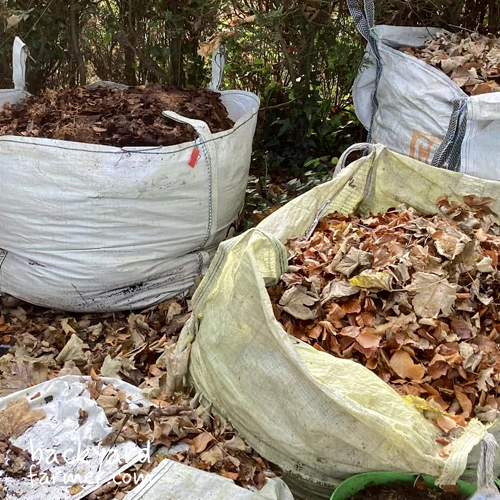
Store the bags somewhere sheltered, away from strong sunlight and drying winds.
Large woven builders’ bags are another option for bigger quantities. Ensure water can escape rather than collecting around the bottom, particularly during wet weather.
As the contents shrink, you can consolidate several bags into fewer containers.
Making Leaf Mould in a Wire Mesh Cage
A wire mesh cage is particularly useful for allotments and gardens with plenty of trees.
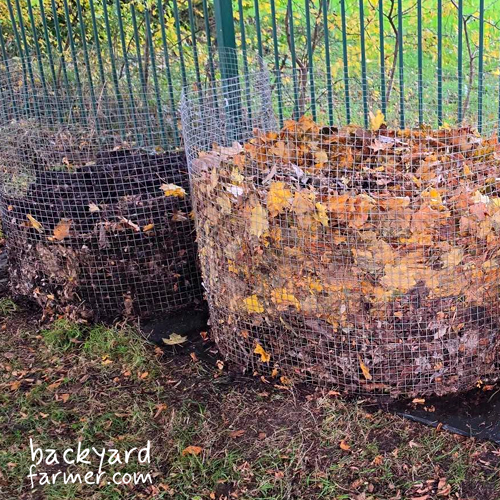
The simplest design uses wooden posts and wire mesh to create an open-topped enclosure. The mesh contains the leaves while allowing air to circulate.
Choose a sheltered location to reduce drying and prevent leaves blowing away.
A permanent cage is convenient if you collect large quantities every autumn and want a dedicated storage area.
Making Leaf Mould in an Open Heap
If you have sufficient space, leaves can be piled in a sheltered corner of the garden.
Choose a position protected from strong winds. Reclaimed boards or a simple wire surround can help contain loose material.
Keep the heap reasonably moist and allow it to decompose naturally.
This requires very little equipment, although a loose heap can be more difficult to contain than bags or a dedicated cage.
How Long Does Leaf Mould Take to Make?
Leaf mould usually takes longer to produce than conventional garden compost.
Shredded leaves may break down sufficiently for some uses within six to twelve months under favourable conditions. Whole leaves, particularly tougher varieties, often require considerably longer.
| Stage | Approximate timeframe | What to expect |
|---|---|---|
| Partly decomposed leaves | Potentially usable within 6–12 months in favourable conditions | Softer, darker leaves beginning to break apart |
| Coarse leaf mould | Often around 12 months or longer | Darker, fragmented material suitable for mulching |
| Fine, mature leaf mould | Often 18–24 months or longer | Dark, crumbly material with little recognisable leaf structure |
These are approximate stages rather than guaranteed completion dates. Leaf species, moisture, ventilation and preparation all influence decomposition.
Don’t be discouraged if your leaves remain recognisable after their first winter. Slow decomposition doesn’t necessarily mean something has gone wrong.
How to Tell When Leaf Mould Is Ready
The best way to judge leaf mould is by examining its texture and appearance rather than relying entirely on how long it has been stored.
There is no precise dividing line between partly decomposed leaves, coarse leaf mould and fully mature material.
Partly Decomposed Leaves and Coarse Leaf Mould
You may still recognise individual leaves, but they should be softer, darker and beginning to break apart.
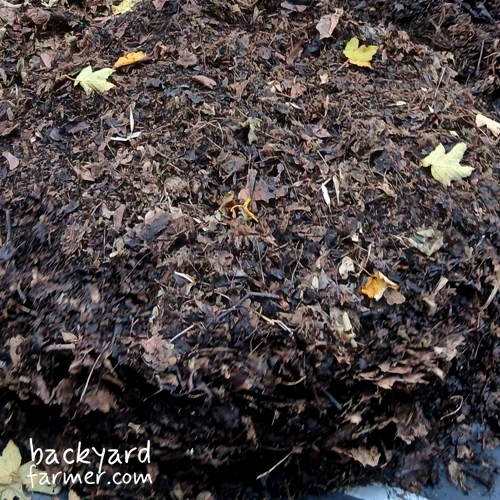
As decomposition progresses, the material becomes more fragmented and develops a loose, coarse texture.
This material can be useful as a surface mulch around established plants and on garden beds, even before it has fully decomposed.
Fine, Mature Leaf Mould
Mature leaf mould is dark brown to nearly black, with a relatively fine, crumbly texture and a pleasant earthy smell.
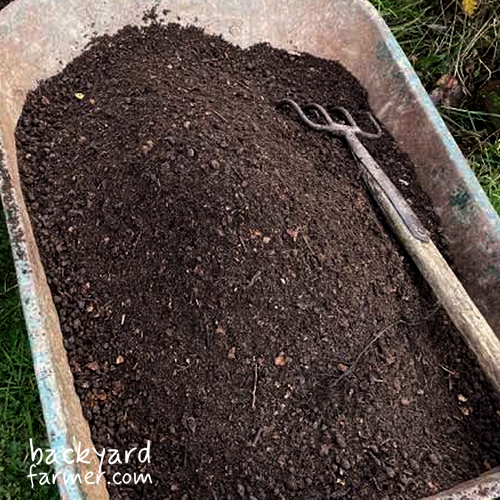
Most of the original leaf structure should no longer be recognisable.
This material is suitable for soil conditioning and, when sufficiently mature, clean and appropriately prepared, as a component of homemade growing media.
If your leaves are still largely intact, simply allow more time.
Common Leaf Mould Problems and Solutions
Leaf mould is a forgiving process, but unsuitable moisture conditions can slow decomposition.
| Problem | Likely cause | Solution |
|---|---|---|
| Leaves remain dry | Insufficient moisture or exposed storage | Add water and improve shelter |
| Leaves are soggy and compacted | Excess moisture and poor airflow | Improve drainage and loosen gently |
| Decomposition is very slow | Tough leaves, dryness or insufficient time | Check moisture and allow longer |
| Leaves keep blowing away | Exposed heap or cage | Improve containment |
| Weeds appear | Seeds have germinated in the material | Remove weeds before they set seed |
| Some leaves remain intact | Different leaves decompose at different rates | Leave longer or use suitable coarse material as mulch |
There’s no need to turn leaf mould regularly. Occasional loosening is only worthwhile if the material becomes excessively compacted or waterlogged.
Otherwise, leaving it largely undisturbed is perfectly reasonable.
What to Do With Last Year’s Leaves
One common problem is running out of storage space when the next autumn arrives.
Your original batch may still be decomposing when it’s time to collect more leaves.
Fortunately, the material shrinks considerably over time.
If you’re using bags, consolidate older leaves into fewer containers. If you’re using a mesh cage, partly decomposed material can be transferred into bags to free the enclosure for a fresh collection.
You can also use suitable coarse leaf mould as mulch rather than waiting another year for a finer product.
Keeping older and newer batches separate makes it easier to judge their progress.
With a little organisation, you can establish a simple annual cycle of collecting, storing and using your own leaf mould.
What Can You Use Leaf Mould For?
Leaf mould is primarily a soil conditioner. It adds organic matter, improves soil structure and helps the soil retain moisture.
Coarser material is useful as mulch around established plants, while finer, mature leaf mould can be used to improve soil or as a component of suitable homemade growing-media mixes.
However, leaf mould is generally low in nutrients and shouldn’t be treated as a complete replacement for compost, manure or other sources of plant nutrition.
The best application depends on how thoroughly the leaves have decomposed and what you’re growing.
Frequently Asked Questions
The terms are often used interchangeably. Leaf mould specifically refers to material produced by decomposing fallen leaves, usually through a relatively slow process dominated by fungi.
Ordinary garden compost generally contains a mixture of materials and is managed differently.
Yes. Whole leaves will decompose naturally without shredding.
Shredding can accelerate the process, but it’s entirely optional. If you’re happy to allow more time, collecting and storing whole leaves is a suitable method.
Yes. An existing compost bin can be used, provided it has adequate moisture, ventilation and drainage.
A bin filled entirely with fallen leaves will usually decompose more slowly than a well-managed mixed compost heap.
Shredding leaves increases their exposed surface area and can speed up decomposition.
Maintaining suitable moisture and avoiding excessive compaction also helps. However, leaf mould still requires time, and specialist compost activators aren’t necessary.
Not necessarily. Although some freshly fallen leaves are acidic, their properties change as they decompose.
The pH of finished leaf mould varies with the source material and conditions. Ordinary deciduous leaf mould shouldn’t be assumed to substantially acidify garden soil.
You can compost grass clippings alongside leaves, but adding substantial quantities changes the process towards conventional mixed composting.
If your aim is to produce traditional leaf mould, it’s simpler to compost the leaves separately.
Sometimes. After a year, the leaves may have broken down sufficiently to produce coarse material suitable for mulching.
Fine, mature leaf mould usually takes longer. Judge the material by its condition and intended use rather than its age alone.