Some of the easiest vegetables to grow indoors in the UK are cress, pea shoots, microgreens and baby salad leaves. They need little space, require minimal equipment and can provide fresh, edible harvests from a bright windowsill.
However, not every vegetable grows well indoors, particularly during the darker winter months. Choosing the right crop for your available light makes all the difference.
Here are ten worthwhile options, from quick-growing shoots to leafy vegetables you can harvest more than once.
Best Vegetables to Grow Indoors at a Glance
Quick-growing shoots are the easiest starting point. Larger leafy crops need more sustained light and may benefit from supplementary lighting during winter.
| Vegetable | Best for | Growing conditions | First harvest |
|---|---|---|---|
| Cress | Complete beginners | Bright indoor spot | 7–14 days |
| Radish microgreens | Quick, peppery greens | Bright windowsill | 1–3 weeks |
| Pea shoots | Tender edible shoots | Bright windowsill | 3–4 weeks |
| Loose-leaf lettuce | Fresh salads | Bright window; grow light helpful in winter | 4–8+ weeks |
| Rocket | Peppery salad leaves | Bright window; grow light helpful in winter | 4–6+ weeks |
| Mizuna | Repeated baby-leaf harvests | Bright window; grow light helpful in winter | 4–6+ weeks |
| Mustard greens | Spicy salad mixes | Bright window; grow light helpful in winter | 4–6+ weeks |
| Spring onions | Fresh green tops | Bright windowsill | Variable from rooted bases; around 2 months from seed |
| Baby spinach | Tender cooking greens | Strong light; grow light often useful in winter | 4–8+ weeks |
| Baby pak choi | Salads and stir-fries | Strong light; grow light often useful in winter | 4–6+ weeks |
Harvest times are approximate and assume suitable growing conditions. Natural daylight is limited during UK winters, so growth can be considerably slower than these estimates.
Not sure where to start? Try cress, radish microgreens or pea shoots. They’re harvested young, making them more forgiving than vegetables that need several weeks to develop substantial foliage.
The 10 Best Vegetables to Grow Indoors
1. Cress — Best for Complete Beginners
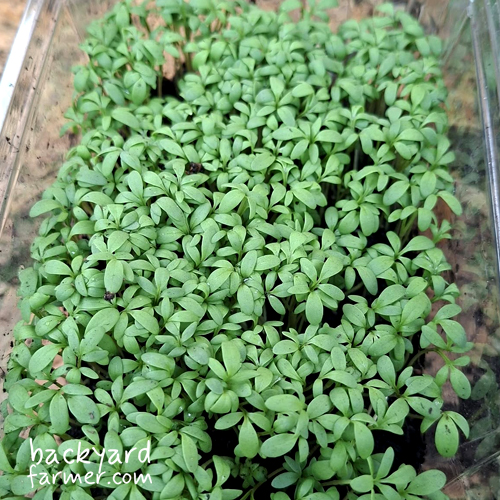
Cress is one of the simplest edible crops you can grow indoors. It germinates quickly, takes up very little space and doesn’t even need compost.
A shallow container lined with damp kitchen paper or cotton wool is enough to get started.
Growing essentials
- Position: Warm, bright windowsill.
- Container: Shallow tray or clean food container.
- Growing medium: Damp kitchen paper, cotton wool or peat-free compost.
- Harvest: Approximately 7–14 days.
How to grow: Moisten your growing material and sprinkle cress seeds evenly across the surface. Keep them damp without leaving water pooled underneath.
Once the shoots have developed their first leaves and reached a useful cutting height, snip them with clean scissors.
Cress has a fresh, peppery flavour that’s particularly good in sandwiches and salads.
Watch out for: The growing material drying out. Shallow containers hold very little moisture, so check them regularly.
Cress is normally harvested once. Sow another small batch every week or two if you want a continuous supply.
2. Radish Microgreens — Best for Quick, Peppery Greens
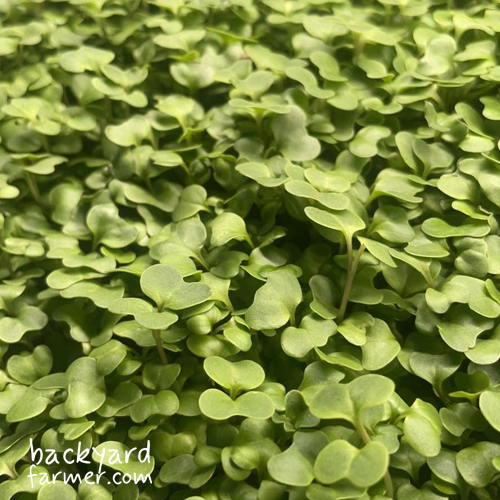
Radish microgreens are a much easier indoor crop than full-sized radish roots.
Instead of waiting for a swollen root to develop, you harvest the young stems and leaves shortly after germination. They have a distinctive peppery flavour and make an excellent addition to salads and sandwiches.
Growing essentials
- Position: Bright windowsill or grow light.
- Container: Shallow tray with drainage.
- Growing medium: Peat-free seed compost.
- Harvest: Approximately 1–3 weeks.
How to grow: Fill a shallow tray with moist compost and scatter untreated radish seeds evenly across the surface. Sow more densely than you would for mature radishes, but avoid piling seeds on top of one another.
Cover lightly according to the seed instructions and maintain moisture during germination.
Once the seedlings emerge, provide plenty of light. Harvest when the first true leaves begin to develop, cutting the stems just above the compost with clean scissors.
Watch out for: Excess moisture and overcrowding. Both can encourage mould and poor seedling development.
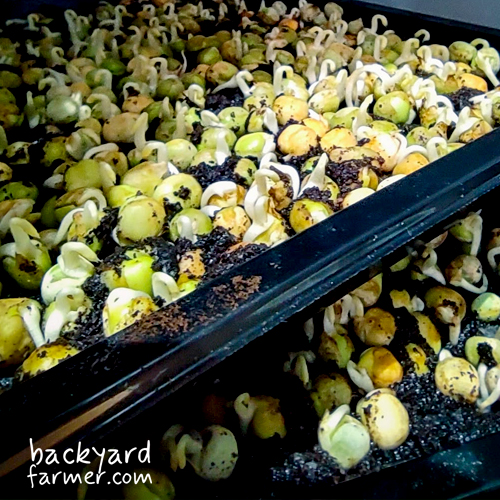
Fine white root hairs around newly germinated seeds can sometimes resemble mould. However, if a tray develops genuine mould contamination, discard the affected crop rather than attempting to salvage the shoots.
Unlike mature radishes, microgreens don’t require deep containers or room for large roots. They’re normally harvested once, so sow fresh batches for more greens.
For detailed instructions, see our guide to growing microgreens indoors in the UK.
3. Pea Shoots — Best for Tender, Edible Shoots
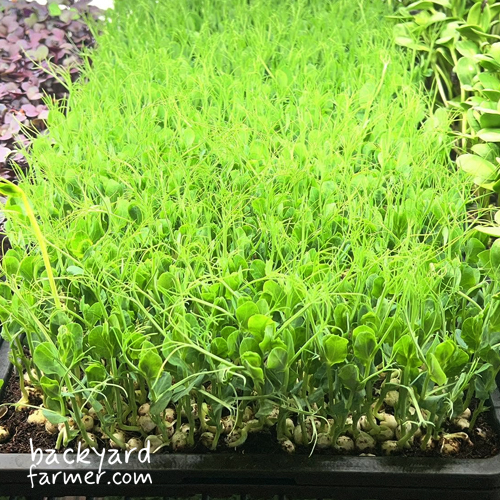
Pea shoots taste similar to fresh garden peas, but you harvest the tender stems and leaves rather than waiting for pods.
They’re inexpensive to grow, take up little space and can provide further pickings if harvested carefully.
Growing essentials
- Position: Bright windowsill.
- Container: Seed tray with drainage.
- Growing medium: Peat-free multi-purpose compost.
- Harvest: Approximately 3–4 weeks.
How to grow: Choose untreated peas suitable for growing edible shoots. Sow them approximately 2.5cm deep and 2.5cm apart in moist compost.
Once the shoots reach roughly 10–15cm tall, harvest the tender upper growth by cutting above the lower leaf joints.
Leave some healthy leaves and growing points behind if you want to encourage further shoots.
Watch out for: Allowing the shoots to become too mature. Older stems can turn fibrous and chewy, so concentrate on the tender growing tips.
Healthy plants may provide additional harvests, although regrowth depends on the growing conditions and how much foliage remains. Fresh sowings are the most dependable way to maintain a supply.
Pea shoots are excellent raw in salads or added to stir-fries shortly before serving.
4. Loose-Leaf Lettuce — Best for Fresh Salads
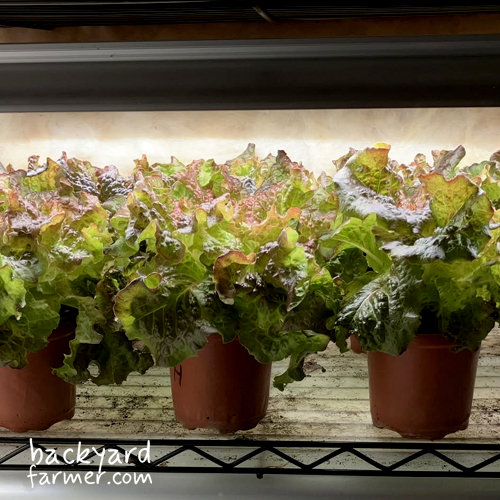
Loose-leaf lettuce is a useful indoor vegetable if you have a sufficiently bright growing position.
Unlike heading lettuces, which need considerable room to mature, loose-leaf varieties can be harvested young. This makes them better suited to windowsill containers.
Growing essentials
- Position: Bright window with strong natural light.
- Container: Pot or trough around 12–15cm deep or more.
- Growing medium: Peat-free multi-purpose compost.
- Harvest: Approximately 4–8 weeks or longer.
How to grow: Sow loose-leaf lettuce thinly into moist compost. Once the seedlings are established, thin overcrowded plants so the remaining leaves have room to develop.
Begin harvesting when the plants have several healthy leaves. Pick a few outer leaves at a time, leaving the central growing point intact.
Alternatively, suitable varieties can be harvested using the cut-and-come-again method, cutting above the growing points to allow further foliage to develop.
Watch out for: Slow growth during winter. Lettuce may germinate successfully in a warm room but remain small for weeks when natural daylight is limited.
A few pots can provide useful additions to meals, although a small windowsill container won’t replace the household’s weekly lettuce shopping.
For more detailed advice, see How to Grow Salad Leaves Indoors.
5. Rocket — Best for Peppery Salad Leaves
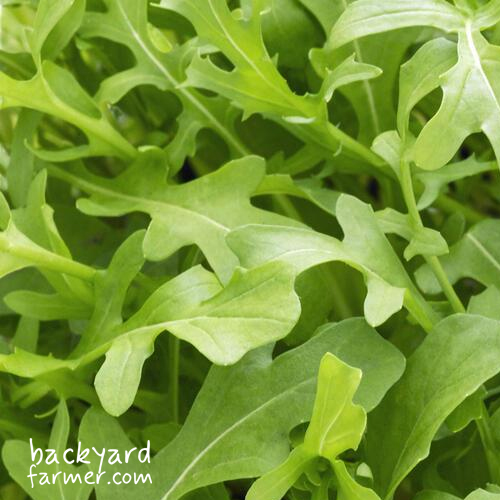
Rocket is worth growing when you want plenty of flavour from a relatively small harvest.
Its peppery leaves are ideal for salads, sandwiches and topping homemade pizzas. You don’t need to grow large plants either, as young leaves are usually the most useful for indoor harvesting.
Growing essentials
- Position: Bright windowsill.
- Container: Pot or trough with drainage.
- Growing medium: Peat-free multi-purpose compost.
- Harvest: Approximately 4–6 weeks or longer.
How to grow: Sow salad rocket seeds thinly and cover lightly according to the packet instructions.
Thin crowded seedlings and allow the remaining plants to develop several healthy leaves before harvesting.
Pick small quantities of tender foliage, leaving enough growth behind for the plants to recover. Sow another batch before the first finishes if you want a steady supply.
Watch out for: Excessive heat and dry compost. Rocket can bolt, producing flower stems instead of the tender leaves you’re growing it for.
Avoid positioning containers directly above hot radiators. A bright but relatively cool position is usually better than an excessively warm one.
6. Mizuna — Best for Cut-and-Come-Again Leaves
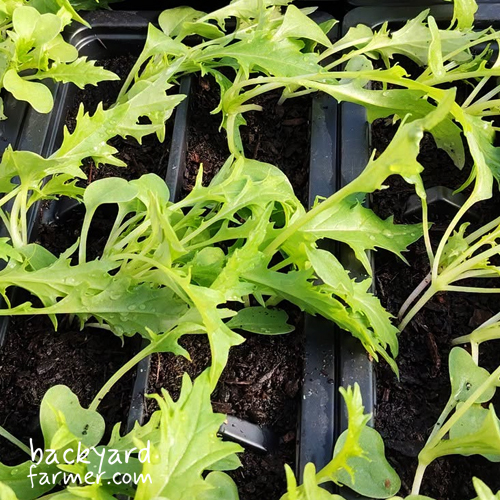
Mizuna is a Japanese leafy brassica with finely divided leaves and a mild, slightly peppery flavour.
It’s a good alternative to ordinary lettuce and works well in salads, sandwiches and lightly cooked dishes.
The main advantage is its ability to produce further leaves when harvested carefully under suitable conditions.
Growing essentials
- Position: Bright windowsill.
- Container: Pot or trough with drainage.
- Growing medium: Peat-free multi-purpose compost.
- Harvest: Approximately 4–6 weeks or longer.
How to grow: Sow mizuna seeds thinly into moist compost and allow enough room for the young plants to develop.
Harvest when the leaves are around 8–10cm long, taking a few outer leaves while keeping the central growing point intact.
Alternatively, established plants can be cut above their growing centres to encourage another flush of foliage.
Watch out for: Harvesting too heavily during slow growth. Removing most of the foliage in midwinter can leave plants struggling to recover.
Small, regular pickings make better use of the available growth.
For more detailed advice, see our UK mizuna growing guide.
7. Mustard Greens — Best for Spicy Salad Mixes
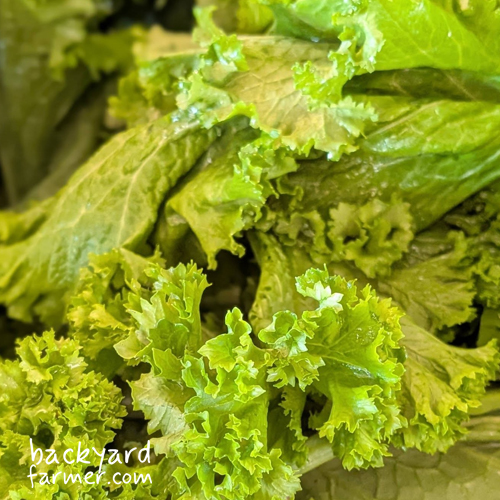
Mustard greens are ideal if you enjoy stronger-flavoured leaves.
Different varieties range from relatively mild to noticeably spicy, making them useful for mixing with milder lettuce or mizuna.
They can be grown as microgreens, but allowing them to develop baby leaves provides a more substantial harvest.
Growing essentials
- Position: Bright windowsill.
- Container: Pot or trough with drainage.
- Growing medium: Peat-free multi-purpose compost.
- Harvest: Approximately 4–6 weeks or longer.
How to grow: Choose a mustard variety grown for edible leaves and sow thinly into moist compost.
Thin seedlings as they develop, giving plants more room than you would for densely sown microgreens.
Begin harvesting once the leaves are large enough to use, taking small quantities while leaving healthy growth behind.
Watch out for: Allowing the plants to become overcrowded or stressed. Older leaves can develop a stronger flavour and coarser texture.
Harvesting while the foliage is young generally produces the most tender salad greens.
8. Spring Onions — Best for Fresh Green Tops
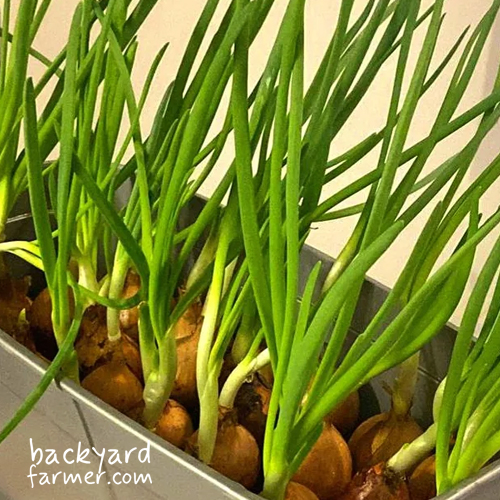
Spring onions are compact, versatile and useful in everyday cooking.
You can grow them from seed, but one of the easiest ways to start is by regrowing the rooted bases of supermarket spring onions.
It’s a simple way to obtain additional edible green tops from something you might otherwise throw away.
Growing essentials
- Position: Bright windowsill.
- Container: Pot with drainage.
- Growing medium: Peat-free multi-purpose compost.
- Harvest: Variable from rooted bases; around two months from seed in suitable conditions.
How to grow: Save the lower white portion of a healthy spring onion, keeping its roots attached.
Plant the base into moist compost, leaving the upper part exposed. New green growth should emerge from the centre under suitable conditions.
Once the tops have grown sufficiently, cut them while leaving the lower plant intact.
If growing from seed, sow suitable spring onion varieties into a container and allow around two months for the plants to develop under favourable conditions. Growth may take longer on a winter windowsill.
Watch out for: Expecting unlimited regrowth.
The rooted bases contain stored reserves, but repeated harvesting gradually reduces their productivity. Growing them in compost provides a better foundation for sustained growth than leaving them indefinitely in water.
9. Baby Spinach — Best for Tender Cooking Greens

Spinach is a useful edible crop, but it’s more demanding indoors than cress, pea shoots or microgreens.
It prefers relatively cool growing conditions and needs plenty of light to develop healthy foliage.
Growing it for baby leaves is more practical than maintaining large mature plants in a small container.
Growing essentials
- Position: Very bright windowsill or suitable grow light.
- Container: A shallow trough around 10–15cm deep for small baby-leaf harvests; larger containers for established plants.
- Growing medium: Peat-free multi-purpose compost.
- Harvest: Approximately 4–8 weeks or longer.
How to grow: Sow spinach seeds at the recommended depth and thin the seedlings once established.
Allow enough space for the leaves to develop and keep the compost consistently moist without waterlogging.
Begin harvesting young outer leaves when the plants are growing strongly, leaving the centre intact for further development.
If you want to grow larger plants and harvest them repeatedly, provide more root space. Containers around 30cm wide and deep are better suited to established spinach plants than small shallow trays.
Watch out for: Hot, dry conditions and inadequate light.
Spinach can bolt when stressed, while plants growing in poor light may remain small and unproductive.
A bright, relatively cool room is preferable to a hot windowsill above a radiator.
Spinach also reduces considerably in volume when cooked, so a small container is best suited to occasional handfuls rather than large meals.
10. Baby Pak Choi — Best for Salads and Stir-Fries
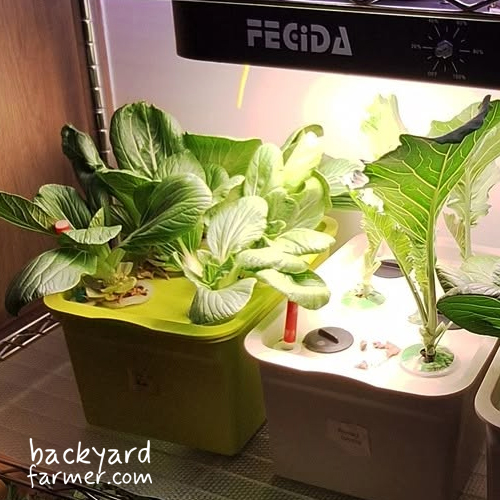
Pak choi is a leafy brassica grown for its tender leaves and crisp stems.
Although mature plants need more space, you can grow it for young leaves in containers, making it useful for salads and lightly cooked dishes.
It’s a good option for gardeners with a particularly bright indoor growing position.
Growing essentials
- Position: Very bright windowsill or suitable grow light.
- Container: Wide pot or trough, ideally at least 30cm across.
- Growing medium: Peat-free multi-purpose compost.
- Harvest: Approximately 4–6 weeks or longer for baby leaves.
How to grow: Sow pak choi seeds thinly into moist compost, following the packet instructions.
For individually grown baby-leaf plants, thin seedlings to around 8–10cm apart. This gives them enough room to develop healthy leaves without the space required for fully mature plants.
Maintain consistent moisture as the plants develop.
Begin harvesting tender outer leaves once the plants are established, leaving the central growing point intact.
Alternatively, allow selected plants to develop further if your container provides sufficient space.
Watch out for: Bolting.
Pak choi can begin flowering prematurely when exposed to unsuitable conditions, including temperature stress or drought.
Aim for steady growing conditions and harvest young rather than expecting full-sized supermarket heads from a small pot.
Can You Grow Vegetables Indoors During a UK Winter?
Yes, but winter growing requires realistic expectations.
The main limitation is daylight, not simply temperature.
A windowsill that receives plenty of useful light in June may provide very little in December or January. Even when the room is warm, plants can struggle to produce healthy foliage without adequate illumination.
Growing With Natural Window Light
Choose the brightest suitable window available.
A south-facing window generally provides the strongest natural light in a UK home, although nearby buildings, trees and other obstructions can make a significant difference.
East- and west-facing windows can also support useful growth, particularly during brighter months.
The crop you choose matters just as much as the window.
Cress, radish microgreens and pea shoots are good starting points because they’re harvested young.
Lettuce, spinach and pak choi require sustained healthy growth over a longer period. They’re less likely to produce worthwhile harvests on a poorly lit winter windowsill.
Watch how plants develop after germination.
Tall, thin seedlings leaning towards the glass are often a sign that they’re not receiving enough light.
Avoid placing pots directly against freezing-cold windows or above radiators that dry the compost and overheat the plants.
Remember: Seeds germinating successfully doesn’t mean there’s enough light to grow the resulting plants to harvest.
When Are Grow Lights Worth Using?
A suitable LED grow light can provide more consistent illumination when natural daylight is insufficient.
This is particularly useful for gardeners who want repeated salad-leaf harvests through winter or have limited access to bright windows.
However, lighting introduces equipment and electricity costs.
If you only want an occasional tray of cress or pea shoots, try using natural daylight first before investing in a dedicated growing system.
Larger fruiting vegetables, including tomatoes and chillies, need considerably more light, space and time than the crops listed above.
They can be grown indoors, but they’re better treated as separate projects requiring more careful management.
For more information, see our guide to growing vegetables under artificial light.
What about mushrooms?
Mushrooms are another worthwhile indoor food-growing option, particularly where natural light is limited.
They’re fungi rather than vegetables and don’t require sunlight for photosynthesis. Prepared mushroom-growing kits can be a convenient starting point, although temperature, moisture and ventilation still matter.
How to Start Growing Vegetables Indoors
You don’t need expensive equipment to grow a few edible crops inside your home.
For most beginners, a suitable container, seeds, peat-free compost and a bright growing position are enough.
1. Choose a Crop That Suits Your Space
Start with cress, radish microgreens or pea shoots.
These produce relatively quick harvests and don’t require the same sustained growing conditions as larger leafy vegetables.
If you have a very bright window, loose-leaf lettuce or rocket could be worth trying next.
2. Prepare a Suitable Container
Clean recycled food containers, seed trays and ordinary plant pots all work.
Choose a container with enough depth for the crop’s roots. Compost-grown vegetables generally need drainage holes, with a waterproof tray underneath to protect your windowsill.
Use suitable peat-free seed or multi-purpose compost rather than heavy soil collected from the garden.
Cress grown on damp kitchen paper or cotton wool is an exception, as it doesn’t need a conventional compost-filled pot.
3. Sow Seeds and Position the Container
Follow the seed packet’s instructions for sowing depth and spacing.
Some seeds need covering with compost, while others are sown near the surface.
Avoid overcrowding unless you’re deliberately growing densely sown microgreens.
Position the container somewhere suitable for germination, then ensure emerging seedlings receive enough light to develop healthy growth.
4. Water Carefully and Harvest at the Right Stage
Check moisture regularly rather than watering to a fixed daily schedule.
Keep the growing medium appropriately moist without leaving it saturated.
Harvest according to the crop.
Cress and most microgreens are normally cut once, while healthy salad plants can provide further harvests if their growing points remain intact.
For a continued supply, make small successive sowings rather than starting everything on the same day.
For a more detailed introduction to containers, growing media and equipment, see Getting Started with Indoor Growing in the UK.
Common Problems With Indoor Vegetables
Most problems with indoor vegetables come down to insufficient light, unsuitable temperatures, watering or overcrowding.
Identifying the cause is usually more useful than immediately adding fertiliser or buying more equipment.
| Problem | Likely cause | What to do |
|---|---|---|
| Tall, weak seedlings | Insufficient light | Move to a brighter position or provide supplementary lighting. |
| Seeds fail to germinate | Incorrect moisture, temperature, sowing depth or poor seed viability | Check the seed requirements and growing conditions. |
| Yellowing leaves | Watering, light, root or nutrient problems | Check moisture, drainage and light before feeding. |
| Very slow growth | Limited winter daylight or unsuitable temperatures | Improve conditions and allow more time. |
| Mould on growing medium | Excess moisture, decaying material or poor airflow | Improve moisture management; discard contaminated edible-shoot trays. |
| Leaves fail to regrow | Overharvesting or insufficient growing conditions | Leave healthy foliage or make a fresh sowing. |
| Small flies around pots | Fungus gnats associated with damp compost | Reduce unnecessary watering and remove decaying material. |
If your plants are struggling and you’re unsure what’s causing it, our guide to common indoor vegetable growing problems will help you identify symptoms, check likely causes and find practical solutions.
A Few Habits That Make Indoor Growing Easier
Keep containers clean, avoid stagnant water underneath pots and allow air to circulate around growing plants.
Check longer-lived crops for pests. Indoor growing doesn’t automatically prevent aphids or other plant-health problems.
For shoots and microgreens, use seeds suitable for growing edible crops. Avoid chemically treated seed, and discard batches with genuine mould contamination rather than trying to salvage edible shoots.
Bear in mind that the fine white root hairs sometimes visible around germinating seeds are not necessarily mould.
Microgreens are also different from jar-grown sprouts. Microgreens are normally cut above their growing medium, while sprouts are commonly consumed whole and require their own food-safety precautions.
Wash harvested vegetables before eating and use clean scissors when cutting young greens.
Not every crop needs feeding, either.
Short-lived microgreens generally have enough stored nutrients to reach harvest without additional fertiliser. Longer-growing leafy vegetables may eventually benefit from feeding, particularly after repeated harvests.
Getting the light, watering and growing conditions right should always come first.
Frequently Asked Questions
Cress is one of the easiest edible crops for beginners.
It needs very little equipment, can grow on damp kitchen paper or cotton wool and is usually ready within one to two weeks.
Pea shoots and radish microgreens are also excellent choices if you want something more substantial.
Vegetables need sufficient light to grow, but they don’t necessarily need direct sunshine throughout the day.
A bright windowsill can support certain crops using natural daylight.
Where natural light is inadequate, a suitable grow light can provide the illumination needed for photosynthesis.
Ordinary household lighting isn’t necessarily powerful enough to support healthy vegetable growth.
Cress, microgreens and pea shoots are among the most practical choices for year-round indoor growing.
Loose-leaf lettuce, rocket, mizuna and other leafy vegetables can also be grown throughout the year when adequate light and suitable conditions are available.
However, natural daylight becomes a significant limitation during UK winter. Supplementary lighting may be needed for reliable harvests in the darkest months.
Yes, although they’re considerably more demanding than microgreens and salad leaves.
Tomatoes and chillies need strong light, sufficient warmth, suitable containers and enough time to flower and produce fruit.
Compact varieties may grow successfully on particularly sunny windowsills during brighter months, but reliable winter production generally requires supplementary lighting.
They’re better treated as separate indoor-growing projects rather than beginner alternatives to cress or lettuce.
It depends on the crop, growing method and equipment.
A tray of cress, pea shoots or microgreens grown with inexpensive seeds, reused containers and natural daylight can cost relatively little.
However, grow lights introduce electricity costs, while larger plants need additional space, compost and ongoing care.
Indoor growing is often most worthwhile for producing small quantities of fresh shoots, herbs and salad leaves rather than replacing inexpensive vegetables bought in bulk.
The main advantage is having fresh edible crops close at hand, even when you don’t have access to an outdoor growing space.