
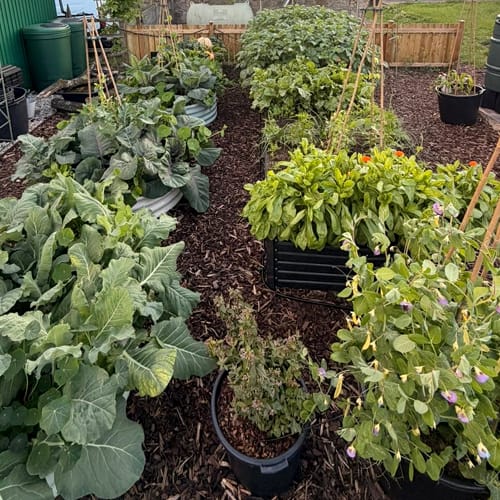
Raised beds create productive growing space without completely digging over a garden or allotment. They give you more control over soil quality, drainage and access.
Why Choose Raised Beds?
Raised beds aren’t essential for growing vegetables, but they can make a growing space easier to manage.
The main advantages include:
- Better control over soil quality
- Clearly defined growing areas and paths
- Reduced soil compaction and easier access
- A practical option where existing ground is poor or difficult to work
Raised beds can be useful on clay soil, contaminated ground or areas where digging is difficult. They can dry out more quickly than ground-level beds, however, and filling a large bed can be expensive, so plan the size and materials carefully.
To learn more about making your raised beds last, see our guide: ‘How to make raised beds last longer or long-lasting raised beds.’
Choose the Right Position
For most vegetables, aim for a position receiving around six hours or more of direct sunlight during the growing season. Leafy crops such as lettuce, spinach and chard can tolerate a little more shade, while tomatoes, peppers, courgettes and other fruiting crops need as much sun as possible.
Avoid placing the bed directly beneath trees where roots may compete for water and nutrients. Overhanging branches can also create shade and drop leaves onto the growing area.
Think about practical access too. A raised bed is much easier to manage when it’s close to a water source and positioned somewhere you can comfortably reach throughout the year. Leave enough room around it for paths, a wheelbarrow and access to all sides.
Before building, check whether the position becomes waterlogged in winter. Raised beds can improve drainage, but they should not be used to cover a serious drainage problem without addressing the cause.
How Big Should a Raised Bed Be?
A bed around 1–1.2 metres wide works well when you can access it from both sides, allowing you to reach the centre without stepping onto the soil. If the bed can only be accessed from one side, make it narrower, usually no more than around 60cm wide.
The length can suit the available space. Longer beds may need additional supports to prevent the sides from bowing, particularly when using timber and filling the bed deeply.
Leave around 60–90cm between beds where possible, particularly if you need room for a wheelbarrow. A wider path may be worthwhile if you plan to use a mower, trolley or mobility aid.
A height of around 20–30cm is enough for many vegetable beds. Deeper beds are useful where the existing ground is poor, but they require more filling material. Beds raised to around 45–60cm can reduce bending and make gardening more accessible, although they need stronger construction.
If you’re planning several beds, test the layout first in the free allotment planner before committing to the build.
What Should You Build a Raised Bed From?
Timber
Timber is one of the simplest materials for a DIY raised bed. It’s relatively inexpensive, easy to cut and straightforward to repair or replace later.
Thicker boards last longer than thin fencing timber. Reclaimed timber can reduce the cost, but avoid using wood if you’re unsure how it was treated.

If you’re buying treated timber, check that the manufacturer considers it suitable for garden use around edible crops. Avoid old railway sleepers or reclaimed timber that may contain creosote, oils or unknown treatments.
For a stronger frame, fix the boards to sturdy corner posts and add intermediate supports on longer sides. Timber beds can be built in layers for extra height, but each layer should be securely fixed to the one below.
If you have suitable reclaimed pallets available, see our guide to building a raised bed from pallets for a simple low-cost method.
Galvanised Metal
Galvanised steel beds are durable, low maintenance and quick to assemble. They cost more upfront than basic timber frames but require little ongoing maintenance.
Metal beds can warm up in direct sunlight, so check soil moisture more often during hot, dry weather.
Brick, Stone or Blocks
Brick, stone and concrete blocks create durable permanent beds. They take more time and effort to construct than timber or metal, and taller walls may need a solid base.
These materials suit formal gardens, terraced plots and accessible beds, but are less practical for temporary allotment layouts.
Prepare the Ground
Remove persistent perennial weeds such as bindweed, couch grass and dock wherever possible, then measure and mark the area with string, a hosepipe or wooden stakes.
If you’re building over grass or annual weeds, lay plain brown cardboard beneath the bed. Overlap the sheets, soak them with water and avoid glossy, heavily printed or plastic-coated cardboard.
Position the frame and make sure it sits level. Leave the bottom open to the existing soil so water, worms and plant roots can move naturally between the raised bed and the ground below.
Use a weed membrane only where there is a specific reason for doing so. In most vegetable beds, leaving the base open allows better drainage and lets soil organisms move freely between the bed and the ground below.
Build the Frame
For a simple timber bed, cut the boards to the required lengths and assemble the sides on a flat surface. Check each corner with a square or by measuring diagonally from corner to corner.
Fix the boards to corner posts using outdoor-rated screws. On longer beds, add intermediate stakes or supports to stop the sides bowing once filled.
Place the completed frame in position and check it with a spirit level. Adjust the ground beneath the frame where necessary rather than forcing the timber into place.
If you’re building a taller bed, use stronger timber and additional supports. Wet soil is heavy, and a frame that looks secure when empty may move once filled.
What Should You Fill a Raised Bed With?
Fill most raised vegetable beds with a mixture of good-quality topsoil and well-rotted compost or organic matter.
A useful starting point is around two-thirds topsoil to one-third compost, adjusting the mixture according to the materials you have. Topsoil provides structure and mineral content, while compost improves fertility, moisture retention and soil life.
Avoid filling the entire bed with compost, as it can settle significantly and may hold too much moisture or become depleted over time. For deeper beds, use cheaper soil lower down and concentrate the best compost-rich mixture towards the surface.
Do not use soil taken from areas affected by persistent weeds or disease. Leave a small gap below the top of the frame to prevent soil washing over the sides during heavy rain.
Buying Materials in Bulk
If you’re filling several beds, buying loose materials can be considerably cheaper than using dozens of small bags.
Compare local topsoil and compost suppliers with builders’ merchants and specialist landscape supplies yards.
Check exactly what you’re buying, particularly when ordering recycled soil, bulk topsoil or compost. Ask whether the soil has been screened, where it came from and whether it is suitable for growing food.
Calculate the volume required by multiplying the length by the width and depth of the bed in metres. This gives the amount needed in cubic metres; add a little extra to allow for settling.
Fill and Start Growing
Fill the bed in layers, spreading the material evenly and removing large stones, roots or debris as you go. Level the surface without compacting it and water thoroughly if the soil is very dry. Expect the contents to settle during the first few weeks and top up where necessary.
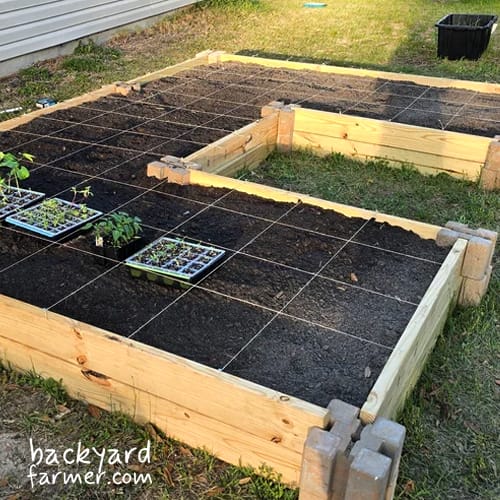
You can then sow or plant directly into the bed. If you want to make intensive use of a smaller growing area, our square foot gardening guide explains how to divide and plant the available space efficiently.
A well-positioned raised bed filled with decent soil gives you a manageable growing area that can be improved with compost and organic matter year after year.