
A long-lasting raised bed starts with good planning. Position, construction materials, soil quality and drainage all affect how well a bed performs and how much maintenance it needs over time.
Get these basics right and you’ll have a productive growing space that warms up quickly in spring, is comfortable to work in and can provide years of reliable harvests. With the right materials and construction, some raised beds can last for decades.
Choosing the Right Position for Your Raised Bed
Most vegetables need at least six hours of direct sunlight during the growing season. Fruiting crops such as tomatoes and peppers benefit from more, while lettuce and other leafy greens can tolerate some afternoon shade.
Watch how sunlight moves across your garden throughout the day. Fences, buildings and mature trees can create shaded areas, while nearby tree roots may compete with your crops for water and nutrients.
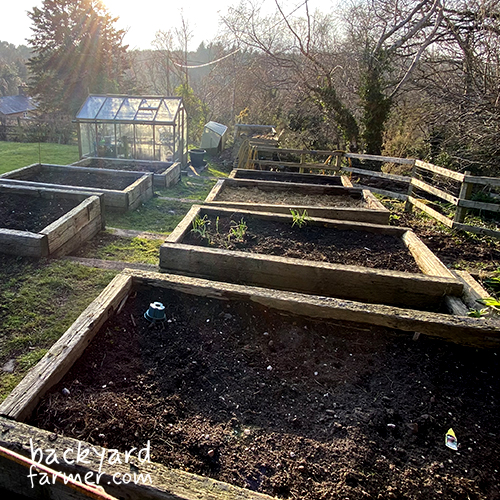
Keep beds around 90–120cm wide if you can access them from both sides. This allows you to reach the centre without stepping onto the soil. For beds against a wall or fence, a narrower width of around 60cm is more practical.
Allow approximately 60–90cm between beds for comfortable access, particularly if you use a wheelbarrow. Our guide to building a raised garden bed covers the construction process in more detail.
Before committing to a layout, mark out the beds with string or use our free allotment planner to test different arrangements.
If you’re planning paths, edging or other improvements alongside your beds, it’s worth comparing garden & landscaping supplies before ordering materials.
Choosing Raised Bed Materials That Last
The lifespan of a raised bed depends largely on its materials, construction and exposure to moisture. Timber is affordable and easy to work with, but even durable wooden boards will eventually deteriorate.
Thicker timber generally lasts longer than thin boards, while naturally durable hardwoods and suitable pressure-treated timber can offer better longevity. Avoid reclaimed wood if you’re unsure how it was treated, particularly old railway sleepers or materials that may contain creosote.
For a low-cost alternative, you can also build raised beds from pallets. These are useful for budget projects, although thinner pallet timber is unlikely to last as long as heavier construction materials.
Brick, stone and concrete blocks offer a more permanent solution. Properly constructed masonry beds can last for decades, although they cost more and may require suitable foundations.
Galvanised steel is another durable, low-maintenance option. Metal beds are relatively quick to assemble, but their sides can become warm in direct sunlight, so keep an eye on soil moisture during hot weather.
Whatever material you choose, use corrosion-resistant fixings and reinforce longer sides with suitable supports. Damp soil is heavy, and poorly supported walls can gradually bow outwards.
Soil Mixes That Support Healthy Crops
A productive raised bed needs soil that retains moisture without becoming compacted or waterlogged.
For most vegetable beds, a straightforward starting mix is approximately two-thirds good-quality topsoil and one-third mature compost. The topsoil provides structure, while compost improves fertility and moisture retention. Adjust the proportions according to the condition of the materials and your existing garden soil.
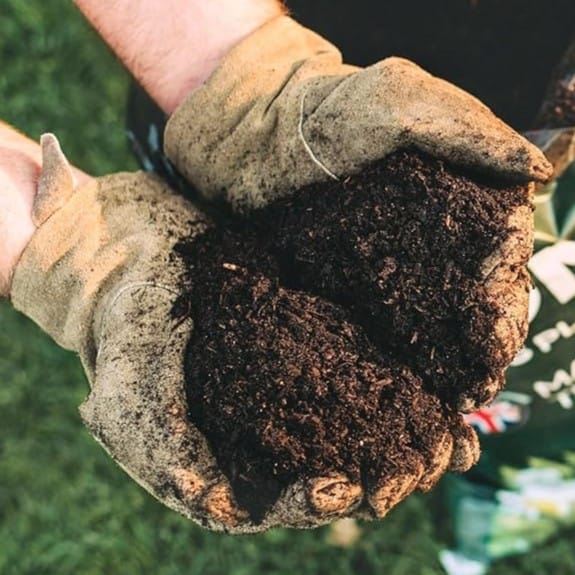
Check the texture before filling the entire bed. A damp handful should hold together when squeezed but crumble when gently broken apart. Heavy, sticky soil may need improving, while very sandy soil can benefit from additional organic matter.
Leave a small gap below the top of the frame to prevent soil washing over the sides. Expect some settling during the first growing season, particularly where large amounts of compost have been used.
Top up with around 2–5cm of mature compost when needed, usually in spring. Avoid repeatedly adding large amounts of rich compost or manure, as excess nutrients can encourage leafy growth at the expense of some crops.
Keeping feet off the growing area also helps preserve soil structure, allowing roots, water and soil organisms to move more freely.
Getting Raised Bed Drainage Right
Good drainage starts beneath the frame. Remove persistent perennial weeds and loosen compacted ground before installation, particularly if you’re building over heavy clay soil.
For beds placed directly on garden soil, an open bottom is usually best. This allows water to drain into the ground and gives earthworms and plant roots access to the soil below.
If you’re building over grass, lay overlapping sheets of plain cardboard, soak them thoroughly and cover them with your soil mixture. The cardboard helps suppress existing grass while gradually breaking down. Avoid placing impermeable plastic sheeting beneath the bed, as this can prevent water from escaping.
Where burrowing animals are a problem, suitable metal mesh can help protect the bed without blocking drainage.
Check how the area drains after heavy rain. If water remains standing for long periods, the underlying soil may be compacted or the bed may be positioned in a natural low spot. Address these problems rather than automatically filling the bottom with gravel or rubble, which can create drainage issues of its own.
Beds built on paving or concrete need a different approach, with sufficient growing depth and a reliable route for excess water to escape.
Once planted, finish the soil surface with a layer of straw, leafmould or another suitable organic mulch. This helps retain moisture, suppress weeds and protect the soil from heavy rain. Leave a small gap around plant stems to reduce the risk of rot.
Inspect corners, fixings and supports each spring, replacing damaged timber and topping up settled soil as necessary. These small maintenance jobs can significantly extend the useful life of a raised bed.
Once your beds are established, our square foot gardening guide explains how to make productive use of the available growing space.