
To improve plant growth under LED lights, first check whether useful light reaches the entire planted area and whether temperature, airflow, watering and root conditions are suitable. A strong fixture cannot compensate for cold compost, restricted roots, poor drainage or an uneven footprint.
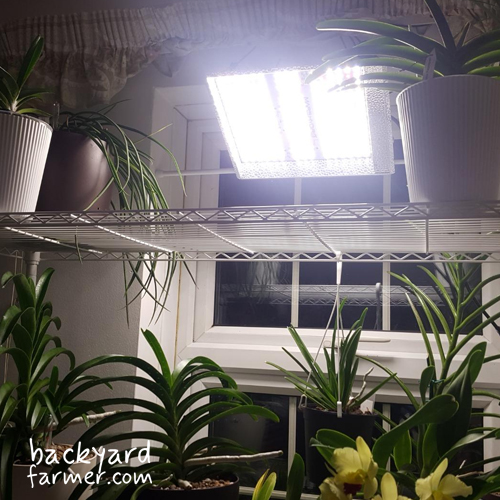
Before changing anything, record the current fixture height, brightness setting and daily operating hours. Correct obvious coverage or environmental problems first, then adjust only one factor at a time.
Judge the result mainly through new leaves, stems and overall development. Existing stretched growth, bleaching or scorch may not recover, even after the original cause has been corrected.
A Simple Grow-Light Optimisation Process
Use a consistent process rather than changing several parts of the setup at once.
- Record the current settings. Note the fixture height, dimmer position and daily lighting hours.
- Photograph the setup. Take clear images of the plants and the complete planted area for later comparison.
- Check the whole footprint. Compare growth at the centre, edges and corners rather than judging the light from one plant.
- Inspect the growing conditions. Check temperature, airflow, compost moisture, drainage and available root space.
- Identify the most likely limitation. Decide whether the main issue appears to be light, coverage, heat, watering or roots.
- Change one variable only. Adjust the height, brightness, duration or plant position—not several at once.
- Observe the response. Monitor plant posture and new growth over the following days.
- Record the result. Note what improved or worsened before making another change.
Existing stretched stems, bleached patches and scorched leaves may remain damaged. Assess whether the correction worked by looking for healthier new leaves, stems and overall development.
Change one variable at a time. Record the adjustment and assess new growth before changing the setup again.
Check Whether Light Is Really the Problem
Slow growth, yellowing, stretching or weak flowering does not automatically mean the grow light is too weak. Look at the pattern across the complete planted area before adjusting the fixture.
If every plant is affected, check overall coverage, temperature and watering. If edge plants are weaker than those in the centre, investigate fixture position and practical coverage. Where only one container is affected, inspect its roots, compost, drainage and leaves. Damage concentrated directly beneath the fixture is more likely to involve excessive intensity or heat.
Avoid diagnosing the setup from a single yellow, curled or damaged leaf. Compare several plants, note where symptoms occur and rule out obvious root or environmental problems before changing the height, brightness or lighting duration.
Check Coverage Across the Whole Growing Area
Before increasing brightness or extending the lighting schedule, check whether the fixture covers the planted area evenly. A healthy plant or strong reading in the centre does not prove that the edges receive enough light.
Assess coverage at plant height. Make sure the fixture is centred and check whether any containers extend beyond its practical coverage. Compare growth at the centre, edges and corners, looking for differences in height, leaf size or direction of growth.
Taller plants may sit closer to the fixture and shade shorter crops, while crowded foliage can reduce light reaching lower leaves.
Where coverage is uneven:
- Re-centre the fixture
- Group plants of similar height
- Raise shorter pots on stable supports
- Reposition movable containers
- Reduce crowding where appropriate
- Reduce the planted area if the fixture is too small
Rotating pots can help with slightly directional light, but it will not correct a permanently weak edge or undersized fixture.
Where coverage remains inadequate, see How to Choose an LED Grow Light.
Should You Change Height, Brightness or Duration?
Height, brightness and operating time affect the setup in different ways. Choose the adjustment that matches the pattern you can see rather than changing all three together.
| Situation | First adjustment | Why |
| Centre too intense but edges weak | Raise the fixture slightly and recheck coverage | Raising may broaden the useful footprint |
| Whole area appears too bright | Reduce brightness | This lowers overall output without intentionally narrowing coverage |
| Whole area appears under-lit | Confirm position and height, then increase brightness gradually | The complete area may need more output |
| Coverage is useful but the daily schedule is short | Increase duration within crop-appropriate limits | This raises total daily light |
| Edges remain weak at full power | Reduce the planted area or add coverage | Longer hours will not fix an undersized footprint |
| Plants differ greatly in height | Group similar heights or raise shorter pots | One fixture height cannot suit widely different canopy levels |
Changing height
Raising the fixture normally reduces intensity at plant level while spreading the light across a wider area. Lowering it usually increases central intensity but may make the useful footprint smaller.
After every height adjustment, check the centre, edges and corners again. Use the starting guidance for the exact fixture and revision rather than relying on universal hanging distances.
Changing brightness
A dimmer changes the fixture’s overall output without deliberately altering its position. This is useful when coverage is already suitable but the whole planted area appears too bright or too dim.
Increase or reduce brightness gradually. A 50% position on the dial does not necessarily mean exactly 50% photon output or electricity consumption, and not every fixture includes a dimmer.
Changing duration
Running the light for longer increases the total amount received over the day. This can help when useful light already reaches the plants but the operating period is too short.
Long hours cannot indefinitely compensate for very weak intensity or poor coverage. Keep the schedule consistent while assessing other changes, and avoid continuous lighting in normal home setups.
For crop-specific lighting schedules, see Growing Vegetables Under Artificial Light.
Check Temperature, Airflow and Root Conditions
Even a well-positioned grow light cannot compensate for unsuitable temperatures, poor airflow or unhealthy roots. Check these conditions before increasing brightness or extending the lighting schedule.
Temperature
Warm seedlings under weak light are especially prone to stretching, while cold compost can slow root activity despite adequate light at leaf level. Measure conditions close to the plants rather than relying on the temperature elsewhere in the room. LED fixtures and drivers still add heat, so the canopy may be warmer than expected.
Airflow and Humidity
Gentle airflow helps distribute heat and move damp air away from foliage. Stagnant conditions can increase fungal risk, but strong direct airflow may dry or stress tender plants. A fan cannot correct overcrowding, blocked drainage or saturated compost.
Water and Roots
Waterlogged compost, repeated drought and restricted containers can all limit growth regardless of fixture strength. Check moisture below the surface rather than watering by habit. As light intensity and growth increase, plants may also use water more quickly.
Nutrition
Nutrient deficiency and excess can both cause pale, weak or damaged growth. Feeding should suit the crop and its current growth rate.
Do not diagnose a feeding problem from leaf colour alone. First check moisture, root health, temperature, pests and which leaves are affected.
Optional Tools for Checking Your Setup
Most home growers can improve a setup through observation, a consistent timer and basic temperature checks. Specialist meters can add precision, but they are not essential for every shelf or small growing area.
| Tool | Useful for | Main limitation | Priority |
| Timer | Maintaining a consistent lighting schedule | Does not measure delivered light | Useful for most setups |
| Thermometer | Checking temperature near the plants | Does not show leaf or compost temperature | Useful |
| Hygrometer | Monitoring humidity trends | Cheap units vary in accuracy | Optional |
| Quantum sensor | Mapping PPFD across the planted area | Expensive and calibration-dependent | Optional or specialist |
| Lux meter | Comparing positions beneath the same fixture | Does not directly measure plant-usable photons | Optional |
| Phone light-meter app | Rough comparisons and detecting edge fall-off | Accuracy varies by device and calibration | Rough guide only |
| Infrared thermometer | Comparing leaf and surface temperatures | Technique and spot size affect results | Optional |
A lux meter or phone app can help compare the centre, edges and corners under the same unchanged fixture. However, neither should be used to claim precise PPFD or compare fixtures with different spectra.
How to Map PPFD Across the Planted Area
Where a quantum sensor is available, use a repeatable grid:
- Measure the actual planted area.
- Record the fixture, revision, height and dimmer setting.
- Take readings at plant height.
- Measure the centre, four corners and middle of each edge.
- Keep the sensor level and consistently positioned.
- Note whether reflective walls are present.
- Record every reading, not only the highest.
- Repeat the same grid after adjusting height or brightness.
Only compare published PPFD maps when they identify the exact fixture, revision, test area, height, power setting and reflective conditions. A map recorded inside a reflective tent may not represent the same light used on an open shelf.
How Long Should You Wait After an Adjustment?
Plants do not respond to every change at the same speed, so avoid adjusting the setup again before there has been enough time to judge the result.
Check immediately
After changing the height, brightness or plant position, check:
- Fixture coverage
- Canopy temperature
- Airflow
- Severe wilting
- PPFD distribution, where measured
These checks can confirm whether the adjustment created an obvious hotspot, reduced coverage or introduced a heat problem.
Check over the next 24–48 hours
Look for changes in:
- Leaf posture
- Leaning towards the light
- Immediate heat stress
- Wilting during the lighting period
Check over several days
Use new growth to assess:
- The rate of stretching
- New leaf expansion
- The colour and condition of emerging leaves
- Differences between central and edge plants
Flowering, fruit set and useful harvest take longer to assess and may depend on several growing conditions beyond lighting.
Existing stretched stems, bleached leaves and scorched tissue may not recover. Judge whether the adjustment worked by looking for healthier new growth.
Make rapid further changes only where there is immediate overheating, a safety concern or severe wilting.
Common Problems and First Checks
Use the pattern across several plants rather than diagnosing the setup from one damaged leaf. Check the simplest likely causes first, then make one cautious adjustment.
| Symptom | Possible causes | Check first | Safe next step |
| Leggy seedlings | Light: Weak or uneven coverage. Other: Excess warmth, crowding or unsuitable watering | Coverage, temperature and spacing | Improve useful light gradually and reduce unnecessary warmth or crowding |
| Plants leaning | Light: Directional or uneven coverage. Other: A nearby obstruction | Fixture position and plant placement | Re-centre the fixture or reposition movable plants |
| Pale new growth | Light: Insufficient useful light. Other: Nutrition, root damage, unsuitable pH or pests | Roots, affected leaves and feeding history | Check root and feeding conditions before changing the light |
| Yellow lower leaves | Light: Heavy shading. Other: Natural ageing, wet roots or nutrition | Compost moisture and plant density | Improve spacing and root conditions before increasing output |
| Slow growth | Light: Low daily light. Other: Cold compost, restricted roots or unsuitable conditions | Coverage, temperature and root space | Correct the clearest limitation, then monitor new growth |
| Uneven canopy | Light: Poor distribution. Other: Different plants, containers or local temperatures | Centre-to-edge growth pattern | Reposition plants, group similar heights or reduce the planted area |
| Bleached upper leaves | Light: Excessive intensity. Other: Heat or nutrition problems | Whether damage is concentrated beneath the fixture | Reduce brightness or raise the fixture slightly, then recheck coverage |
| Curled or dry leaves | Light: Excessive light may contribute. Other: Heat, drought, fertiliser salts or pests | Temperature, compost moisture and leaf undersides | Correct the most immediate heat, water or pest problem |
| Poor fruit set | Light: Inadequate daily light. Other: Pollination, temperature, watering or root stress | Flowers and overall plant condition | Check pollination and environmental conditions before increasing light |
| No useful harvest | Light: Fixture output or practical coverage is inadequate. Other: The crop is too demanding for the setup | Fixture capacity, planted area and crop suitability | Reduce crop demand, add coverage or upgrade the fixture |
Where bleaching, scorching or curling is concentrated beneath the fixture, see Grow Lights Too Close. For crop-specific watering, feeding and pollination problems, use the relevant growing guide rather than continuing to adjust the light.
When Adjustment Is No Longer Enough
Small changes cannot always overcome the limits of the fixture, room or crop. The setup may have reached its practical limit when:
- The fixture is already operating at full power
- It is at the nearest safe or manufacturer-recommended position
- Edge plants remain consistently weaker than those in the centre
- Mature plants extend beyond the useful footprint
- Vertical clearance has been exhausted
- Increasing output creates unacceptable heat
- Longer operating hours become too expensive
- The crop is too large or light-demanding for the available space
- The fixture is damaged, flickering or losing output
At this point, repeatedly changing the height or schedule is unlikely to solve the underlying problem. Practical options include reducing the planted area, switching to seedlings, herbs or leafy crops, adding another suitable fixture or replacing an undersized light.
Large fruiting plants may be better moved outdoors or into a greenhouse when conditions allow. Slower growth may also be acceptable where the plants remain healthy and the setup still meets its intended purpose.
For help assessing fixture size and suitability, see How to Choose an LED Grow Light, Best LED Grow Lights UK and Growing Vegetables Under Artificial Light.
Frequently Asked Questions
Stretching usually means the seedlings are not receiving enough useful light for the temperature and growth rate. The fixture may be too far away, poorly centred or weak around the edges. Excess warmth and overcrowding can make the problem worse, so check spacing and temperature as well as the light.
The fixture may be off-centre, or the planted area may extend beyond its practical coverage. Compare the centre, edges and corners at plant height, then reposition containers, reduce the planted area or add more suitable coverage.
Check temperature, wilting and coverage immediately. Leaf posture may change within 24–48 hours, but stretching, leaf size and colour should normally be judged through healthy new growth over several days.
No. A quantum sensor adds useful precision, particularly when mapping larger areas, but it is not essential for a modest home setup. Careful observation, a consistent timer and basic temperature checks are often enough.
Check compost temperature, moisture, root space, nutrition, crop suitability and self-shading. A powerful fixture cannot compensate for cold roots, waterlogging, overcrowding or unsuitable growing conditions.
Final Optimisation Checklist
Before making another adjustment, confirm that:
- The fixture is centred over the plants
- The centre, edges and corners have been checked
- Height, brightness and operating hours are recorded
- The timer is running consistently
- Temperature and airflow are suitable
- Compost and roots appear healthy
- All plants fit within the practical coverage
- Only one variable is being changed
- The result is being judged through new growth
- The fixture’s limits have been assessed honestly
Optimise the complete growing environment rather than repeatedly moving the light or chasing one specification.