Introduction
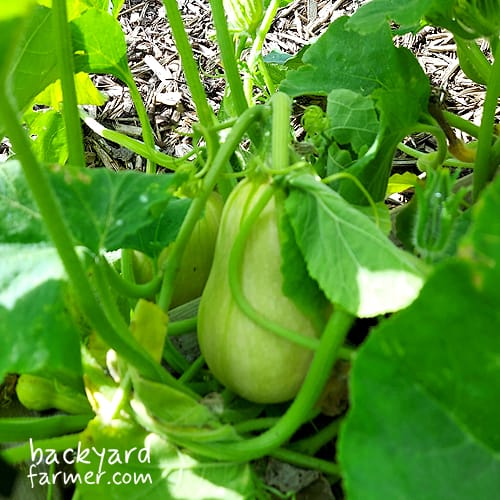
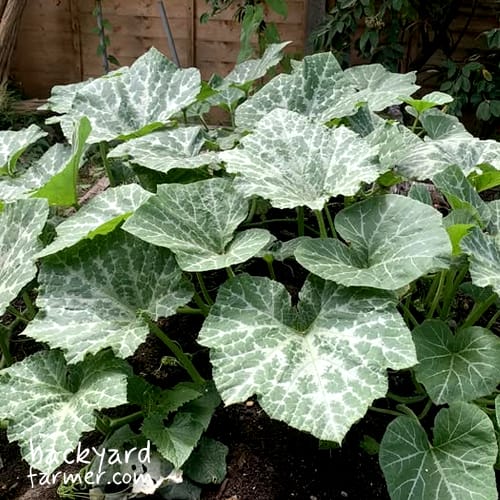
Winter squash is one of those crops that makes a garden or allotment feel and look like it’s the real deal. The plants sprawl, the flowers are hard to miss, and if the season goes your way, you end up with colourful squash that can store long after the summer crops have finished.
Winter squash can be grown successfully in the UK, but it needs a warm start, enough space, rich soil, and time to ripen before autumn frost. Sow indoors from mid-to-late April or May, plant out after frost, then harvest mature fruit in September or October before curing and storing.
This guide focuses on winter squash rather than courgettes or summer squash. That includes butternut squash, Crown Prince, Uchiki Kuri, acorn squash, buttercup squash, kabocha-style squash, and some pumpkins.
The difference matters. Courgettes are picked young and eaten fresh. Winter squash needs to mature fully before it is harvested, cured, and stored.
Use this guide to get the timing, spacing, ripening, and storage right, so you end up with proper winter squash rather than a huge leafy plant full of green maybes in October.
When to Plant Winter Squash in the UK
Winter squash needs a good run at the season, so timing matters. For most UK growers, the safest option is to sow winter squash indoors from mid-April to May, then plant it outside after the last frost, usually from late May to early June.
| Job | Typical UK timing |
|---|---|
| Sow indoors | Mid-April to May |
| Harden off | Late May |
| Plant outside | Late May to early June |
| Flowering and fruit set | July to August |
| Ripening | August to September |
| Harvest | September to October, before frost |
| Cure | 1–2 weeks after harvest |
| Store | Cool, dry, airy, frost-free place |
Late April into May is usually the sweet spot. The plants get moving early enough, but they are not stuck indoors for weeks getting leggy and hungry while you wait for the weather to catch up.
You can sow earlier if you have a warm, bright place to grow them on, but I would not rush it just to feel ahead. Squash seedlings grow quickly, and warmth without enough light soon turns them into long, awkward plants.
Planting out is where people often get caught. Winter squash does not only need the frost risk to pass; it also needs warm soil and settled nights. A strong plant put out in early June will usually do better than a stressed one sitting in cold soil in May.
In milder southern gardens, sheltered urban spaces, or warm raised beds, you may get away with planting a little earlier. On exposed allotments, windy sites, northern plots, or cooler parts of the UK, it is usually better to wait until conditions are properly settled.
If you are running late, early June sowings can still work with quicker varieties, but it becomes more of a gamble. The later you start, the less time the plant has to flower, set fruit, ripen, and cure before autumn weather arrives.
With winter squash, two or three properly ripened fruits are far more useful than a huge plant full of green maybes in October.
Best Winter Squash Varieties for UK Growers
Variety choice matters with winter squash, especially in the UK. Some types need a long, warm season, while others are much more forgiving in normal garden or allotment conditions.
If this is your first time growing winter squash, start with a reliable variety that ripens well outdoors before giving a whole bed to a slower butternut.
| Growing situation | Good varieties to try | Why they suit it |
|---|---|---|
| First-time UK growers | Uchiki Kuri, Sweet Dumpling, small acorn squash, Buttercup | More forgiving than slow, heat-hungry types |
| Allotments and bigger plots | Crown Prince, Blue Hubbard, larger storage squash, pumpkins | Good where vines have room to run |
| Butternut fans | Hunter, Barbara F1, Waltham, Cobnut, Sprinter | Shorter-season butternuts are a better bet outdoors |
| Smaller households | Sweet Dumpling, Table Gold, small acorn squash, Uchiki Kuri | Easier to use up than very large squash |
| Pots and containers | Compact bush types, Sweet Dumpling, small acorn squash | Smaller fruits are easier to manage in containers |
Reliable Winter Squash for Beginners
For a first attempt, look at Uchiki Kuri, Sweet Dumpling, small acorn squash, and Buttercup types. They are usually more sensible for a normal UK garden than very large or slow-maturing squash.
Uchiki Kuri, also sold as red kuri or onion squash, is a popular choice because it tends to ripen more reliably than many butternuts. The fruits are smaller, useful in the kitchen, and easier to manage than one huge squash that takes over the worktop.
Is Crown Prince Squash Good for the UK?
Crown Prince is a strong choice for UK growers, especially on allotments or bigger plots. It stores well, has good flavour, and feels like a proper winter crop when you get it right.
However, it is not a small-space plant. Crown Prince needs room, fertility, and a decent season, so grow it where the vines can run without smothering everything around them.
Can You Grow Butternut Squash Outdoors in the UK?
Yes, you can grow butternut squash outdoors in the UK, but it is not always the easiest winter squash to ripen.
The plants often grow well enough, but the fruit needs enough warmth and time to mature before autumn turns cold and damp. If you want to grow butternut, choose a shorter-season variety such as Hunter, Barbara F1, Waltham, Cobnut, or Sprinter, then give it your warmest, sunniest, most sheltered spot.
I would be cautious with saved seed from supermarket butternuts. It might grow, but you do not know how long it will take, what it crossed with, or whether it suits UK outdoor growing.
Best Winter Squash for Small Spaces
If space is tight, avoid the biggest trailing types unless you can let them run over paths, woodchip, or unused ground.
Better small-space options include:
- Sweet Dumpling
- Table Gold
- small acorn squash
- compact bush squash varieties
- Uchiki Kuri, if you have room for it to trail
Even smaller squash need more space than they look like they will. A young plant seems harmless in June, but by August it can be halfway across the bed.
Best Winter Squash for Allotments
Allotments suit winter squash well because you can usually give the plants more room. Larger types such as Crown Prince, Blue Hubbard, bigger pumpkins, and other storage squash make more sense when you are not squeezing everything into a small raised bed.
Grow larger squash where they have room to run, especially at the edge of a bed or in a generous allotment space.
The best winter squash is not always the biggest or most impressive-looking one. It is the one that ripens properly, stores well, and gets eaten.
Where to Grow Winter Squash
Winter squash needs the warmest, sunniest spot you can give it. In the UK, that matters because the plant needs enough warmth and light to ripen fruit before autumn.
Look for a spot with:
- full sun
- shelter from cold wind
- rich, moisture-retentive soil
- good drainage
- enough room for vines to trail
A south-facing bed, warm allotment corner, raised bed, or sheltered patch near a wall or fence can all work well.
Before planting, mix in compost, well-rotted manure, or create a rich planting pocket. Winter squash is a hungry crop, so it pays to feed the root zone before the plant gets going.
Raised beds can work well because they warm up quickly and drain better after rain. However, they can dry out faster in summer, so keep an eye on watering once plants start flowering and fruiting.
One of the best ways to grow winter squash is as a space-hungry edge crop. Give the roots a rich planting pocket, then let the vines trail into rougher or less valuable space, such as:
- woodchip paths
- spare ground
- grass edges
- compost heap areas
- old manure pockets
- compost-rich mounds
That way, the plant gets warmth, moisture, and food at the root without taking over your best beds.
Containers are possible for compact or smaller-fruited varieties, but large trailing squash are usually better in the ground. I’ll cover container growing properly later in the guide.
If your only option is a cold, shady corner, winter squash probably is not the best crop for that spot. You might get leaves, but ripe, storable fruit will be much harder.
How to Plant Winter Squash
The easiest way to grow winter squash in the UK is to start the seeds indoors, then plant them out once the weather has settled.
Direct sowing can work in warm soil, but indoor sowing gives you a safer head start. Winter squash needs time to grow, flower, set fruit, and ripen, so losing a few weeks to cold soil or slug damage can make a real difference later on.
Sowing Winter Squash Seeds Indoors
Sow winter squash seeds in individual pots, one seed per pot, about 2–3cm deep. Use a decent-sized pot if you can, as squash seedlings grow quickly and soon get cramped.
I like to sow squash seeds on their side rather than flat. It is a small detail, but it helps stop water sitting on the seed in damp compost.
Keep the pots warm until they germinate, then move them into the brightest spot you have. A warm windowsill, greenhouse, conservatory, or bright indoor growing space can all work, but light matters. Warmth without enough light soon turns squash seedlings long and leggy.
Keep the compost lightly moist, not soaked. If the plants outgrow their pots before it is warm enough outside, pot them on rather than letting them become rootbound and hungry.
Hardening Off Winter Squash Plants
Before planting winter squash outside, harden the plants off for about a week. This gets them used to wind, cooler nights, and real outdoor conditions before they go into the ground.
Put them outside during the day in a sheltered spot, then bring them back in at night if it is still cold. After a few days, leave them out for longer if the forecast looks settled.
This is easy to rush, but it matters. A cold, battered transplant can sit still for ages before it starts growing again.
Planting Winter Squash Outside
Plant winter squash outside after the last frost, usually from late May to early June in much of the UK. The soil should feel warm, and nights should be settled enough for steady growth.
Prepare the planting spot with compost or well-rotted manure. A rich planting pocket, low mound, or shallow watering basin works well because it keeps food and moisture close to the roots.
Plant each squash at the same depth it was growing in the pot. Firm it in gently, then water deeply around the rootball.
On exposed allotments, or during a cooler spell, protect young plants with fleece, cloches, or a temporary windbreak for the first week or two.
The main mistake is planting out too early. Even if frost has passed, cold soil and chilly nights can stall a squash plant badly. A strong plant in warm soil in early June is better than a stressed one sulking in cold soil in May.
Simple Planting Steps
- Protect young plants if the weather turns cold.
- Sow one seed per pot, about 2–3cm deep.
- Keep warm until germinated.
- Move seedlings into the brightest spot possible.
- Pot on if they outgrow their first pots.
- Harden off for about a week before planting outside.
- Prepare a rich planting pocket with compost or well-rotted manure.
- Plant out after frost, once the soil and nights are warm.
- Water deeply around the rootball.
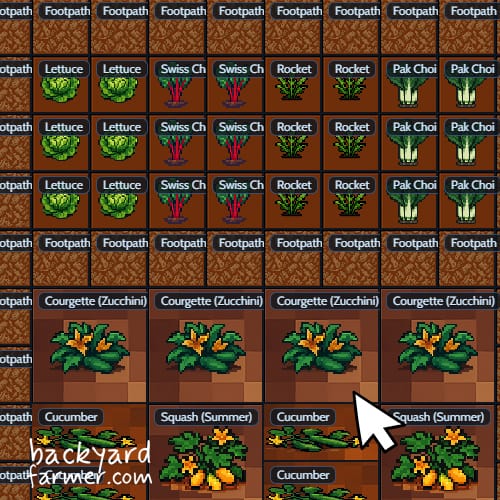
Spacing and Layout
Winter squash is where spacing plans either pay off or fall apart. It looks harmless as a seedling, then suddenly it is halfway across the path and trying to climb through the beans.
As a rough guide, allow around 90cm between compact or bush varieties and 1.2–1.5m or more for larger trailing types. Big squash will run further if they are well fed and have the room.
| Squash type | Rough spacing | Best layout |
|---|---|---|
| Compact or bush squash | Around 90cm apart | Raised beds, small gardens, large containers |
| Small-fruited trailing squash | Around 1.2m apart | Bed edges, paths, strong supports if fruit is light |
| Large trailing winter squash | 1.5m or more | Allotments, compost areas, open ground, bed edges |
| Very large pumpkins/storage squash | As much room as you can give them | Bigger plots, compost heaps, spare ground |
The main mistake is treating winter squash like a neat square-foot crop. Even smaller varieties need space for leaves, airflow, roots, and fruit.
Larger trailing types are better treated as edge crops. Plant them at the edge of a bed and let the vines run over woodchip paths, grass, spare ground, or around a compost bay. That way, the plant gets a rich root zone without stealing all your best growing space.
Try not to cram winter squash between other hungry crops. Packed plants compete for water and feed, airflow gets worse, mildew is more likely, and fruit sits in damp shade where it can rot.
If you are growing several plants, think about where the vines will go before you plant them. It is much easier to plan the sprawl in May than fight through it in August.
You can train smaller-fruited squash up a strong frame or arch, but be realistic. The support needs to be sturdy, and heavier fruits may need slings. Big storage squash are usually easier and safer grown along the ground.
Growing Winter Squash in Pots
You can grow winter squash in pots, but match the variety to the container. A giant trailing squash in a small tub is just a stress test with leaves.
For pots, choose compact, bush, or smaller-fruited varieties such as:
- Sweet Dumpling
- Table Gold
- small acorn squash
- compact bush squash
- Uchiki Kuri, in a very large container with room to trail
Butternut squash can grow in a pot, but it is not the easiest option. Choose a compact or shorter-season variety and use the biggest container you can manage. A small patio pot will not hold enough water, feed, or root space for a strong plant.
A good container setup needs:
- a large pot, barrel, grow bag system, or deep container
- drainage holes
- rich compost
- regular watering
- regular feeding once flowering starts
- space for the plant to trail or climb
Potted squash dry out much faster than plants in open ground. Water deeply, avoid letting the compost swing from bone dry to soaking wet, and mulch the surface if you can.
Once the plant starts flowering and fruiting, feed with tomato feed, comfrey feed, or another fruiting-crop feed.
You can train small-fruited squash up a strong frame, arch, or trellis, but the support needs to be sturdy. Larger fruits may need slings, and big storage squash are usually easier grown along the ground.
Pots can work if space is tight, but be realistic. A compact squash in a big tub is sensible. A sprawling winter squash in a tiny pot will give you plenty of effort and not much stored harvest.
Watering, Feeding, and Care
Winter squash is hungry and thirsty once it gets going. Those big leaves lose a lot of moisture, and the plant needs steady conditions if it is going to flower, set fruit, and ripen properly.
The main care jobs are:
- water deeply and consistently
- mulch around the plant
- feed once flowering and fruiting starts
- guide vines before they sprawl into awkward places
- lift fruit off damp soil
- remove tiny late fruits that will not ripen
A quick splash over the surface does not do much. Water deeply so moisture reaches the root zone, especially in dry spells, raised beds, and containers.
Try not to let the soil swing from bone dry to soaking wet. That stop-start stress can affect fruit set, slow growth, and make problems more likely.
Mulching is well worth doing. Compost, straw, grass clippings, leaf mould, or another organic mulch can help hold moisture, reduce weeds, and keep the soil more even in hot weather. Just keep it slightly away from the main stem so it does not sit damp against it.
Winter squash also needs feeding, but balance matters. Early on, rich soil and compost help the plant build strong roots and leaves. Once flowers and fruits start forming, shift towards fruiting rather than pushing more leafy growth.
Good feeding options include:
- tomato feed
- comfrey feed
- potassium-rich organic feed
- homemade liquid feed for fruiting crops
Avoid too much high-nitrogen feed late in the season, or you can end up with a huge plant and not enough mature squash.
As the vines grow, guide them where you want them. You do not need to fuss over every stem, but it helps to steer them away from paths, smaller crops, or neighbouring beds before they root into awkward places.
Once fruit starts swelling, lift it off damp soil if needed. Straw, slate, wood, cardboard, a tile, or an upturned tray can all work.
By late summer, the job changes from growing more plant to ripening the fruit you already have. Remove tiny new squash if they have no realistic chance of ripening, and pinch out some new vine growth if the plant is still running everywhere.
A squash plant with endless leaves is not always a success. The aim is mature, ripened fruit, not just a jungle.
Pollination and Fruit Set
Winter squash flowers are big and obvious, but they can be confusing the first time you grow them.
Squash plants produce separate male and female flowers:
- Male flowers grow on thin stems with no small fruit behind them.
- Female flowers have a small swelling behind the flower, which looks like a tiny squash.
It is normal for squash plants to produce male flowers first. They open, drop, and make it look like something has gone wrong, but usually the plant is just warming up.
Female flowers appear later. If a female flower is pollinated, the small fruit should swell. If not, it usually yellows, shrivels, and drops off.
Outdoors, bees and other insects usually handle pollination. However, cool, wet, windy weather can reduce insect activity, especially in a dull UK summer. Plants tucked under cover can also miss out if pollinators cannot reach them easily.
You can hand pollinate squash if needed:
- Pick a fresh male flower.
- Peel back the petals.
- Brush the pollen onto the centre of a female flower.
- Do it in the morning if you can, while the flowers are open and fresh.
A small paintbrush works too.
Hand pollination helps if tiny squash keep forming and dropping, but it is not a magic fix. The plant still needs warmth, water, feed, and enough strength to carry the fruit.
Baby squash can also drop because the plant is stressed by:
- cold nights
- dry roots
- poor light
- overcrowding
- too many fruits forming at once
If it happens once or twice, do not panic. If it keeps happening, check the basics first: warmth, water, feed, light, spacing, and pollination.
A few pollinator-friendly flowers nearby can help. Nasturtiums, calendula, borage, and other open flowers bring bees into the growing area without making companion planting more complicated than it needs to be.
Common Problems When Growing Winter Squash
Most winter squash problems come back to the same few things: cold starts, not enough sun, poor pollination, dry roots, overcrowding, or simply running out of season.
| Problem | Likely cause | Quick fix |
|---|---|---|
| Flowers but no squash | Male flowers first or poor pollination | Wait, attract pollinators, hand pollinate if needed |
| Baby squash dropping | Poor pollination or plant stress | Check water, warmth, light, spacing, and pollination |
| Lots of leaves, little fruit | Too much nitrogen, shade, or a slow variety | Ease off leafy feeds and focus on fruiting |
| Powdery mildew | Dry roots, crowding, poor airflow | Water deeply, mulch, improve spacing |
| Fruit rotting | Damp soil or shaded fruit | Lift fruit onto straw, slate, wood, or a tile |
| Squash not ripening | Late start, cool season, slow variety | Remove tiny late fruits and ripen the best ones |
When and How to Harvest Winter Squash
Winter squash is usually harvested in the UK from September to October, depending on the variety, sowing date, and weather.
The aim is to leave the fruit on the plant long enough to mature, but not so long that it gets caught by a hard frost.
This is where winter squash differs from courgettes. You are not picking it young and tender. You want the fruit to ripen fully so the skin hardens, the flavour develops, and the squash has a better chance of storing well.
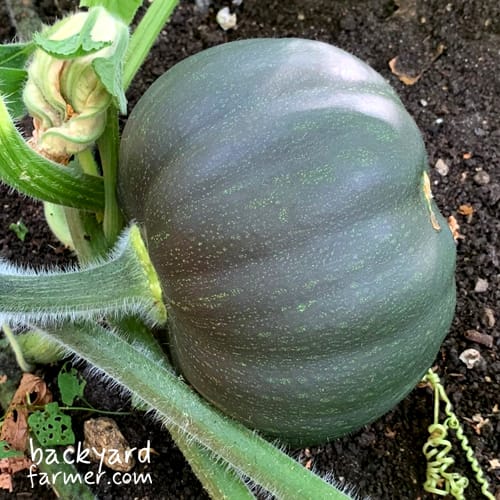
How to Tell When Winter Squash Is Ripe
A winter squash is usually ready when the skin has hardened and the colour has deepened to the mature shade for that variety. The stem often starts to dry, cork, or harden, and the plant may begin to look tired or die back.
A ripe squash should feel firm and heavy. If you press a thumbnail gently against the skin, it should resist rather than mark easily. Some growers also tap the fruit and listen for a hollow sound, but I would use that alongside the other signs rather than relying on it alone.
Good signs of ripeness include:
- hard skin that does not mark easily
- deeper mature colour for the variety
- drying or corking stem
- heavy, firm fruit
- plant starting to die back
- fruit that has stopped noticeably swelling
Do not harvest just because the fruit looks big. A squash can be large but still immature, especially after a dull summer or a late start.
| Winter squash type | Mature colour cue |
|---|---|
| Butternut squash | Tan or beige skin |
| Uchiki Kuri / Red Kuri | Deep red-orange skin |
| Crown Prince | Blue-grey skin |
| Acorn squash | Dark green, sometimes with orange patches |
| Sweet Dumpling | Cream or yellow skin with green stripes |
| Buttercup squash | Dark green skin |
| Pumpkins | Usually orange, but variety-dependent |
Harvesting Before Frost
In the UK, frost is the line to watch. A light chill is one thing, but a hard frost can damage the fruit and shorten its storage life.
If frost is forecast and your squash are close to ripe, harvest them and cure them somewhere warm, dry, and airy. If some fruits are still a bit immature, they may still be usable in the kitchen, but they probably will not store for long.
Check plants regularly from September onwards. You do not want the whole harvest sitting outside when the first proper cold snap arrives.
How to Cut Winter Squash from the Plant
Use clean secateurs or a sharp knife to cut the squash from the vine. Leave a good length of stem attached if you can, as the stem helps protect the fruit in storage.
Do not twist the fruit off, and do not carry squash by the stem. If the stem snaps away, that damaged patch can become a weak point where rot starts later.
Handle the fruit gently, even if it looks tough. Bruises, splits, and broken stems all shorten storage life.
Curing and Storing Winter Squash
Growing the squash is only half the job. Curing is what turns it from an autumn harvest into a proper winter store-cupboard crop.
Curing means leaving harvested squash somewhere warm, dry, and airy so the skin and stem can harden before storage. This helps the fruit keep better and reduces the risk of rot.
In an ideal year, you might leave ripe squash in the sun for a short spell after harvest. In the UK, that is not always realistic, especially if autumn turns wet or cold, so use whatever warm, dry, airy space you have.
Good curing spots include:
- a greenhouse
- a polytunnel
- a conservatory
- a sunny windowsill
- a porch
- a cold frame during settled weather
- a dry shed, if it is not too damp or cold
- an indoor shelf with decent airflow
Leave the squash to cure for around 1–2 weeks if you can. Keep them spaced out rather than piled up, and check them every few days.
If any fruit starts to soften, leak, or grow mould, move it away from the others. Use it quickly if the flesh is still sound.
After curing, store winter squash somewhere cool, dry, frost-free, and well ventilated. Avoid damp shed corners, cold concrete floors, and packed boxes where one rotten fruit can spoil the rest.
A shelf, rack, crate, pantry, spare room, dry garage, or frost-free outbuilding can all work. The main thing is airflow. Try to keep the squash from touching so you can spot problems early and stop rot spreading.
Which Winter Squash Should You Use First?
Not every winter squash stores for the same length of time. Fully ripe, well-cured squash with hard skins and intact stems usually keep the longest. Smaller squash, damaged fruit, and anything harvested slightly underripe are better used first.
Use these first:
- squash with broken or missing stems
- bruised, split, or slug-damaged fruit
- immature or slightly underripe squash
- smaller varieties that do not store as long
- anything with soft spots or a softer feel than the others
Keep your cleanest, hardest, fully ripe squash for later in winter.
How Often Should You Check Stored Squash?
Check stored squash regularly, especially during the first few weeks after curing. A quick look and gentle feel is usually enough.
Watch for:
- soft spots
- mould around the stem
- leaking
- wrinkling or collapse
- a sour or fermented smell
If one squash looks suspect, remove it from storage. You may still be able to cut away a damaged section and use the good flesh, but do not leave questionable fruit beside your best stored squash.
The best storage setup is not fancy. It is simply dry, frost-free, airy, and easy to check. That suits most UK homes better than pretending everyone has a perfect root cellar.
Companion Planting for Winter Squash
Companion planting can help with winter squash, but keep it in perspective. The big wins still come from warmth, space, water, feeding, and getting the fruit ripe before autumn.
That said, pollinator-friendly planting is useful. Winter squash produces separate male and female flowers, so bees and other insects make a real difference to fruit set.
Good companion plants for winter squash include:
- nasturtiums
- calendula
- borage
- beans
- sweetcorn
- pollinator-friendly herbs and flowers
Nasturtiums, calendula, and borage help bring insects into the growing area. They also suit the slightly messy, productive feel of a squash bed or allotment edge.
Beans and sweetcorn can work with squash in a traditional three sisters planting, where corn grows upright, beans climb, and squash trails across the ground. It is a clever system, but it needs space, fertility, and decent timing. In a small UK bed, it can quickly turn into a tangle.
Avoid planting winter squash where it will smother young, low-growing crops such as seedlings, salads, beetroot, onions, or anything that needs light and airflow.
Also avoid cramming several sprawling squash or pumpkins too close together. Poor airflow makes mildew more likely, and fruit sitting in damp shade is more likely to rot.
With winter squash, companion planting is useful, but it will not rescue a cold, cramped, hungry plant. Get the basics right first, then use flowers and smart planting combinations to support pollination.
Plan Your Winter Squash Layout Before Planting
Winter squash is worth planning before you plant it. The roots only take up one spot, but the vines can run much further than expected by late summer. Use the Allotment Planner to map out your beds, paths, spacing, and companion plants before planting, especially if you want to grow squash as an edge crop rather than letting it swamp the middle of a bed.
FAQ
Yes, winter squash grows well in the UK if you give it a warm start, enough space, rich soil, and time to ripen before autumn frost. It is not difficult, but it is less forgiving than courgettes because the fruit needs to mature, cure, and store.
Sow indoors from mid-April to May, then plant outside after the last frost, usually from late May to early June. Wait until the soil and nights feel warm enough for steady growth.
Yes, but use a very large pot and choose compact or smaller-fruited varieties. Big trailing squash are usually better in the ground because they need more space, water, and steady feeding.
You can sow quick varieties in early June, but it becomes more of a gamble. The later you start, the less time the plant has to flower, set fruit, ripen, cure, and store well.
Yes, butternut squash can grow outdoors in the UK, but it is not always the easiest winter squash to ripen. Choose a short-season variety and give it your warmest, sunniest, most sheltered spot.
Good beginner options include Uchiki Kuri, Crown Prince, Sweet Dumpling, small acorn squash, and Buttercup types. For butternut, choose shorter-season varieties rather than saved supermarket seed.
This is normal early on. Squash plants often produce male flowers first, then female flowers later once the plant is bigger and ready to carry fruit.
Baby squash often drop when the flower has not been pollinated properly. It can also happen if the plant is stressed by cold nights, dry roots, poor light, overcrowding, or irregular watering. Hand pollination can help if it keeps happening.
It depends on the variety and season. For larger storage squash, 2–5 good mature fruits can be a decent result. Smaller-fruited varieties may produce more.
Winter squash is usually ripe when the skin has hardened, the colour has deepened, the stem has started to dry or cork, and the fruit feels firm and heavy.
Harvest before a hard frost if the fruit is close to mature. Cure it somewhere warm, dry, and airy, then use immature, damaged, or stemless squash first.
Leave harvested squash somewhere warm, dry, and airy for around 1–2 weeks. A greenhouse, porch, sunny windowsill, conservatory, polytunnel, dry shed, or indoor shelf can all work.
Well-ripened and properly cured winter squash can store for several months. Keep it somewhere cool, dry, frost-free, and airy, and check it regularly for soft spots or mould.