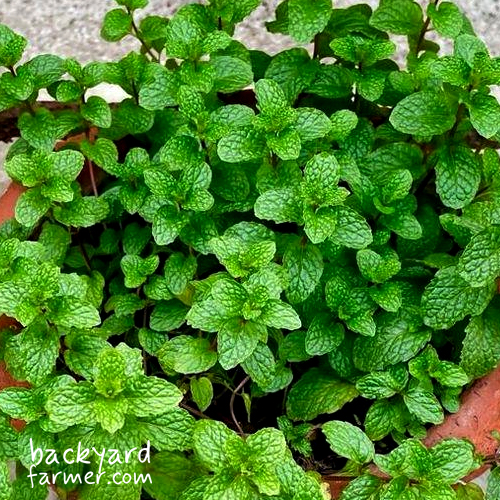
Mint is one of the easiest herbs to grow in the UK, but its spreading roots can quickly take over a garden bed. For most gardeners, a separate pot in sun or partial shade is the best option. With regular harvesting and occasional division, mint can provide fresh leaves year after year.
Where to Plant Mint
Mint grows well in full sun or partial shade, provided the soil stays reasonably moist. The main consideration is controlling its spread.
Unlike many culinary herbs, mint produces underground stems called rhizomes. These travel through the soil and produce new shoots, allowing a single plant to spread into a much larger patch.
Is Mint Better in a Pot or the Ground?
For most UK gardens and allotments, a separate container is the easiest way to grow mint without it spreading into neighbouring plants.
| Growing position | Suitability | What to consider |
|---|---|---|
| Freestanding pot | Best overall | Easy to contain and maintain |
| Partially buried pot | Good with care | Roots may escape through the bottom |
| Open garden bed | Suitable where space allows | Can spread extensively |
| Indoor windowsill | Possible | Needs plenty of natural light |
A freestanding pot works particularly well on a patio or near the kitchen door, where you can easily harvest a few leaves when needed.
Mint can also grow successfully in open ground. If you have a dedicated area where spreading isn’t a problem, it can establish into a productive patch with relatively little attention.
However, planting mint among vegetables or other herbs can create unnecessary work later. Its rhizomes may spread between neighbouring plants, making removal difficult without disturbing their roots.
For more advice on choosing positions for culinary herbs, see our guide to growing a herb garden.
Does Mint Prefer Sun or Shade?
Mint grows in both full sun and partial shade.
A position receiving morning sunshine followed by afternoon shade can be particularly useful for container-grown mint. It provides sufficient light while reducing the risk of compost drying out during hot weather.
Mint tolerates sunnier positions, but exposed containers may need more frequent watering in summer.
Avoid very dark positions where the plant receives little useful light, as growth can become weak and stretched.
How to Stop Mint Spreading
The most reliable approach is to grow mint in a separate container and regularly check for escaping roots or stems.
- Position pots on paving or another surface where roots cannot easily enter the soil.
- Check drainage holes for roots growing through them.
- Trim trailing stems before they root into nearby ground.
- Remove unwanted rhizomes promptly.
- Divide congested plants to maintain healthy growth.
If you prefer mint growing within a border, a partially buried container can help restrict its spread.
Leave the rim above soil level to discourage stems from growing over the edge. However, rhizomes can still escape through drainage holes or openings beneath the pot.
A buried container reduces spreading but doesn’t guarantee complete containment.
How to Plant Mint in Pots
Growing mint in containers is straightforward, although choosing a suitable pot and compost makes a noticeable difference to its long-term performance.
Choosing a Pot and Compost
Mint develops a vigorous root system and can quickly outgrow a small nursery pot.
For an established plant, a container around 25–30cm across is a useful starting point. This provides room for root growth and helps retain moisture without making the container unnecessarily large.
Choose a pot with drainage holes, as mint prefers moist compost but shouldn’t sit in waterlogged conditions.
Fill it with peat-free multipurpose compost or a suitable soil-based potting mix. Mint grows best in fertile compost that retains moisture while allowing excess water to drain.
Unlike Mediterranean herbs such as thyme and rosemary, mint generally prefers more moisture-retentive growing conditions.
Planting Mint Step by Step
- Prepare the pot. Choose a container with drainage holes and partly fill it with fresh compost.
- Remove the plant. Gently lift the mint from its nursery pot, teasing apart tightly circling roots if necessary.
- Position the rootball. Set the plant at approximately the same depth it was growing previously.
- Add compost. Fill around the roots and firm gently to remove large air pockets.
- Water thoroughly. Allow excess water to drain, then position the container in sun or partial shade.
Keep the compost evenly moist while the plant establishes.
Fresh, nutrient-rich compost should provide sufficient feeding initially, so there’s no need to apply fertiliser immediately.
Can You Plant Supermarket Mint Outside?
Yes. Healthy supermarket mint can be established outdoors and grown as a longer-lasting garden plant.
However, supermarket herb pots often contain several closely packed plants, which can become crowded and dry out quickly.
Remove the plant from its original container and gently separate overcrowded sections where possible. Repot into fresh compost and water thoroughly.
Because supermarket herbs may have been grown in protected conditions, introduce them gradually to outdoor temperatures and sunlight.
Protect tender plants from late frosts until they have hardened off and established.
With suitable care, supermarket mint can become just as productive as a plant purchased from a garden centre.
When to Plant Mint in the UK
Spring is generally the easiest time to establish mint outdoors in the UK.
As temperatures rise, plants begin producing fresh shoots and have the growing season ahead to develop their roots.
Established hardy mint can also be planted in autumn, provided the ground isn’t frozen or waterlogged.
Container-grown plants can be planted during summer, although they may need more frequent watering while establishing.
If you’re growing mint from seed, sowing indoors during spring gives seedlings time to develop before moving outside.
Young plants raised indoors should be hardened off gradually and protected from frost until conditions are suitable.
Growing Mint from Seeds, Cuttings and Division
Mint is easy to propagate, so you don’t necessarily need to buy another plant whenever you want more.
Cuttings and division are generally the simplest methods, particularly if you want to reproduce the flavour of an existing mint variety.
| Method | Difficulty | Best for |
|---|---|---|
| Stem cuttings | Easy | Producing plants from healthy shoots |
| Division | Easy | Propagating established mint |
| Seeds | Moderate | Starting plants without a parent plant |
How to Grow Mint from Cuttings
Mint roots readily from healthy stems, making cuttings an inexpensive way to produce new plants.
Spring and early summer are particularly suitable times to take cuttings from fresh growth.
- Select a healthy, non-flowering shoot approximately 8–10cm long.
- Cut just below a leaf joint using clean scissors or secateurs.
- Remove the lower leaves, leaving a few healthy leaves near the tip.
- Place the cutting in water, keeping the remaining leaves above the surface.
- Position it somewhere bright but away from intense direct sunlight.
- Once several healthy roots have developed, transfer it into a small pot of compost.
Replace the water if it becomes cloudy, and avoid leaving cuttings in water long after they’re ready for potting.
Keep newly potted cuttings moist while they establish.
Alternatively, mint cuttings can be rooted directly in moist propagation compost.
How to Divide Mint Plants
Division is another simple way to create additional plants.
In spring or autumn, lift an established mint plant and separate the rootball into smaller sections.
Each division should have healthy roots and shoots or growing buds. Replant the sections in fresh compost and water thoroughly.
Division is also useful for maintaining older container plants, which we’ll cover in more detail below.
Growing Mint from Seed
Mint can be grown from seed, although starting with a cutting or established plant is usually quicker.
Sow indoors in spring using trays or small pots filled with moist, peat-free seed compost.
Scatter the seeds thinly across the compost and press them gently into the surface. The RHS recommends surface sowing without covering the seeds, while some suppliers, including D.T. Brown, recommend a light covering of compost. Follow the instructions for your particular seeds and avoid burying them deeply.
Keep the compost moist and provide a warm, bright position. The RHS suggests a temperature around 20°C, with germination typically taking approximately two weeks under suitable conditions.
Once seedlings are large enough to handle, transplant them into individual pots.
Gradually acclimatise young plants to outdoor conditions before planting outside.
Some named mint varieties and hybrids don’t reproduce true to type from seed. If you want an exact copy of an existing plant, cuttings or division are more reliable.
How to Care for Mint
Established mint generally needs little attention, but container-grown plants depend on regular watering and occasional maintenance.
Watering Mint
Mint prefers consistently moist compost, particularly during active growth.
Check container plants regularly by feeling the compost just below the surface. If it is beginning to dry, water thoroughly until excess moisture drains from the bottom.
During warm weather, smaller containers may need watering frequently, while larger pots usually retain moisture for longer.
Avoid watering automatically every day without checking the compost first.
If a pot dries out completely, the compost can become difficult to rewet. Water slowly and thoroughly, allowing moisture to penetrate the rootball.
Mint that repeatedly wilts despite watering may have congested or damaged roots. If this happens, inspect the rootball rather than continually adding more water.
Does Mint Need Feeding?
Mint grows best in fertile compost but doesn’t generally require heavy feeding.
Plants established in fresh compost should have enough nutrients to support their early growth.
For mint that has been growing in the same container for some time, occasional balanced liquid feeding during active growth can help maintain healthy foliage.
However, fertiliser won’t solve problems caused by overcrowded roots or poor drainage.
If an established plant becomes weak despite suitable watering and light, dividing it and refreshing the compost may be more beneficial than additional feeding.
Should You Let Mint Flower?
Mint produces small summer flowers that attract bees and other pollinating insects.
Allowing some stems to flower can make mint a useful addition to a wildlife-friendly garden.
If you’re growing mint mainly for tender leaves, regular harvesting encourages fresh, leafy growth.
You can also leave part of the plant to flower while continuing to harvest from the remaining stems.
There’s no need to remove every flower unless you specifically want to prioritise leafy growth.
When and How to Harvest Mint
Mint can provide repeated harvests from late spring through autumn, depending on the weather and how established the plant is.
Begin picking once the plant has developed enough healthy foliage to recover easily.
Rather than stripping individual leaves from every stem, use clean scissors to cut shoots immediately above a pair of leaves.
This encourages new side shoots to develop, helping the plant become bushier and more productive.
Harvest regularly, but leave enough foliage for the plant to continue growing strongly.
Young, healthy leaves are particularly useful for mint sauce, new potatoes, drinks and herbal infusions.
For the best quality, harvest fresh leaves as needed. Larger quantities can also be dried or frozen for later use.
If the plant starts producing older, tougher stems, cutting back some of the growth will encourage another flush of tender leaves.
Cutting Back and Rejuvenating Mint Plants
Although mint is a vigorous perennial, container-grown plants can become crowded and less productive over time.
A pot that once produced plenty of healthy leaves may eventually develop thin stems, smaller foliage or patchy growth as its roots become congested.
Regular cutting and periodic division help maintain healthy growth.
When to Cut Back Mint
Light trimming can be carried out throughout the growing season.
Harvesting the tips of healthy stems encourages branching and fresh foliage.
If an established plant becomes untidy after flowering, it can be cut back more firmly to encourage new shoots.
The RHS recommends cutting mint to around 5cm above the base after flowering. Healthy plants can then produce another flush of growth.
Avoid severely cutting back newly planted or badly stressed mint until it has recovered.
In late autumn and winter, hardy mint usually dies back naturally. Dead stems can be removed before fresh growth emerges in spring.
How to Rejuvenate a Rootbound Mint Plant
Mint doesn’t need progressively larger containers indefinitely. Established plants can be divided and replanted in fresh compost, allowing them to remain productive in the same pot for years.
Spring, as new shoots begin to emerge, is a particularly useful time to do this.
- Remove the plant. Lift the mint from its container and examine the roots.
- Inspect the rootball. Look for healthy rhizomes, growing buds and any dead or decaying material.
- Divide the clump. Separate the rootball into several sections, keeping healthy roots and growing points together.
- Remove unwanted growth. Discard old, damaged or unhealthy sections.
- Replant a healthy division. Return one section to the original container with fresh compost.
- Water and recover. Water thoroughly and allow new growth to establish before harvesting heavily.
The remaining healthy divisions can be planted in separate containers or shared with other gardeners.
Check established container plants for congestion every few years, or sooner if growth becomes weak or the compost dries out unusually quickly.
Growing Mint in Winter and Indoors
Mint is a perennial herb, meaning established plants can survive and regrow for several years.
Most common culinary mints are hardy in the UK, although their appearance changes considerably during winter.
Does Mint Survive Winter in the UK?
Most hardy mint varieties naturally die back during autumn and winter.
The leaves and stems may turn brown or disappear, but healthy underground rhizomes generally survive and produce fresh shoots in spring.
This is normal dormancy rather than a sign that the plant has died.
Container-grown mint is more exposed to prolonged cold and wet conditions than plants growing directly in the ground.
Ensure drainage holes remain clear and avoid leaving pots standing in water throughout winter.
In particularly exposed gardens, containers can be moved somewhere sheltered to reduce the effects of persistent winter rain and freezing conditions.
There’s usually no need to bring established hardy mint indoors simply to keep it alive.
If a plant hasn’t produced new shoots by late spring, inspect the roots for signs of drying, decay or damage.
Can You Grow Mint Indoors?
Yes. Mint can grow indoors if it receives enough light.
A bright windowsill is often suitable, particularly during spring and summer.
Keep the compost appropriately moist and turn the pot occasionally if the stems begin leaning towards the window.
During winter, shorter daylight hours can slow growth considerably. A warm room alone won’t compensate for insufficient light.
For more advice on keeping herbs productive indoors, see our guide to growing herbs indoors.
Common Mint Growing Problems
Mint is generally reliable, but plants can develop problems when watering, drainage or root growth becomes unbalanced.
Start by checking the growing conditions rather than assuming damaged leaves indicate disease.
| Symptom | What to check first | Recommended action |
|---|---|---|
| Wilting stems | Compost moisture and root condition | Water if dry; inspect roots if moisture is adequate |
| Yellow leaves | Drainage, ageing foliage and root health | Check watering and remove declining growth |
| Brown, crispy leaves | Dry compost, heat and exposure | Improve watering and consider partial shade |
| Orange or black dusty spots | Possible mint rust | Identify the disease before taking action |
| White powdery coating | Possible powdery mildew | Check airflow and growing conditions |
| Holes in leaves | Leaf-feeding insects or slugs | Inspect plants; tolerate minor damage where possible |
| Mint spreading | Escaping rhizomes or rooting stems | Remove unwanted growth and improve containment |
| Sparse or weak growth | Light levels, congested roots or old compost | Improve conditions and divide if necessary |
Mint Rust
Mint rust is a fungal disease that can produce orange, yellow or black powdery spots on leaves, sometimes accompanied by distorted growth.
The fungus can persist in infected plant material, including rhizomes, so simply cutting away spotted leaves may not eliminate the problem.
Where mint rust is confirmed, remove and dispose of infected plants and rhizomes to reduce the risk of further spread.
Avoid taking cuttings from affected plants or reusing infected roots.
The RHS guide to mint rust provides further identification and management advice.
When Mint Looks Unhealthy but Is Still Growing
Not every damaged leaf indicates a serious problem.
Older mint foliage can become untidy during dry weather or towards the end of the growing season.
Check moisture, drainage and root health, and inspect the leaves for obvious pests or disease.
If the plant is otherwise healthy, removing tired foliage and allowing fresh shoots to develop may be all that’s needed.
Which Mint Variety Should You Grow?
There are several types of culinary mint, each with slightly different flavours and uses.
For most gardeners, the choice depends on whether the leaves will be used mainly for cooking, drinks or herbal teas.
| Mint type | Main characteristics |
|---|---|
| Spearmint | Versatile flavour for cooking, sauces and drinks |
| Peppermint | Strong, cooling flavour; popular for tea |
| Moroccan mint | Sweet, aromatic flavour particularly suited to mint tea |
| Apple mint | Soft leaves with a mild, fruity aroma |
All four can be grown in containers, although their vigour and hardiness may differ.
If growing several types, use separate pots to prevent their roots becoming intertwined and to make each variety easier to identify when harvesting.
Not every plant belonging to the mint genus is suitable for culinary use. Pennyroyal (Mentha pulegium), for example, is considered harmful if eaten. Choose recognised culinary varieties when growing mint for food or drinks.
Recommended Variety: Garden Mint (Mentha spicata)
For an all-round culinary herb, traditional garden mint, or spearmint, is an excellent choice.
Its fresh flavour works particularly well in mint sauce, with new potatoes, in summer drinks and in other sweet and savoury dishes.
It’s a vigorous perennial suited to UK conditions, provided its spreading roots are managed.
D.T. Brown offers Garden Mint (Mentha spicata) seeds for gardeners who prefer starting plants from seed.
If you’d rather begin harvesting sooner, an established spearmint plant or a cutting from a healthy parent plant is usually the quicker option.
Frequently Asked Questions
Yes, mint can survive indoors throughout the year with sufficient light and suitable care. However, growth often slows during the darker UK winter months, making a bright position particularly important.
Yes. Most common culinary mints are hardy perennials. Their foliage usually dies back in winter, but healthy underground rhizomes produce new shoots when conditions improve in spring.
Yes, but separate pots are generally preferable. Growing different varieties close together won’t directly change the flavour of their existing leaves, although vigorous roots and stems may become mixed.
Not necessarily. Mint prefers consistently moist compost, but watering frequency depends on pot size, weather and growing conditions. Check the compost regularly and water thoroughly when it begins drying out, rather than following a fixed daily schedule.