Introduction
Crop rotation gets overcomplicated fast. On a real UK allotment, you do not need a perfect chart to make it useful. The main job is much simpler than that: avoid putting the same problem crop groups back into the same patch year after year.
For most plots, the groups worth prioritising are:
- potatoes and outdoor tomatoes
- brassicas
- alliums
Those are the crops most likely to cause repeat trouble if they keep going back into the same soil. If they are moving around the plot, you are already doing the part that matters most. Everything else can usually be worked around the plan, especially if you keep the soil fed with compost and organic matter.
This guide uses a simple 4-year allotment crop rotation to show what goes where, how the beds move each year, and how to make it work even if your plot is a bit messy. You do not need to treat every lettuce or radish like a major planning decision.
The Simple 4-Year Allotment Crop Rotation Plan
If you want a simple place to start, use four main crop groups and move each one on by a bed each year.
| Bed | Year 1 |
|---|---|
| Bed 1 | Legumes |
| Bed 2 | Brassicas |
| Bed 3 | Potatoes / Tomatoes |
| Bed 4 | Roots & Alliums |
That gives you a clear 4-year allotment crop rotation without turning the whole plot into a puzzle.
What goes in each group
- Legumes: peas, broad beans, climbing beans
- Brassicas: cabbage, kale, broccoli, sprouts, cauliflower
- Potatoes / Tomatoes: potatoes and outdoor tomatoes
- Roots & Alliums: carrots, beetroot, parsnips, onions, garlic, leeks
Why this order makes sense
- Legumes first: an easy starting group and a sensible place to begin the cycle
- Brassicas next: hungry leafy crops that fit well after legumes
- Potatoes / tomatoes after that: worth moving because repeat issues can build quickly
- Roots & alliums last: a practical fourth group before the cycle starts again
Why some crops are grouped together
- Potatoes and tomatoes are treated as one main group because they are close enough in family and disease logic to be worth separating from the rest of the plot.
- Roots and alliums are grouped together here mainly to keep the system simple. It gives you a workable fourth section without making the rotation harder to follow than it needs to be.
If you only remember one bit of the logic, make it this: brassicas usually fit well after legumes.
This is a framework, not a law. Real allotments are messy, beds are odd shapes, and crops spill into gaps. Still, if you keep these main groups in mind, you will already be planning better than most people do from memory.
How The Rotation Moves Each Year
Once Year 1 is set, the rest is not really planning so much as shuffling. Move each main crop group on by one bed each year.
| Year | Bed 1 | Bed 2 | Bed 3 | Bed 4 |
|---|---|---|---|---|
| Year 1 | Legumes | Brassicas | Potatoes / Tomatoes | Roots & Alliums |
| Year 2 | Roots & Alliums | Legumes | Brassicas | Potatoes / Tomatoes |
| Year 3 | Potatoes / Tomatoes | Roots & Alliums | Legumes | Brassicas |
| Year 4 | Brassicas | Potatoes / Tomatoes | Roots & Alliums | Legumes |
The simple rule
- check what was in each bed last year
- move each main group on by one bed
- after Year 4, start the cycle again
What the chart shows
- each bed sees each main crop group once across the full cycle
- no bed keeps taking the same family over and over again
- each bed gets a break from the same crop family
- once the first year is mapped, the rest of the rotation is mostly just moving things along
- next year is quicker to map out
What Crops Need Rotating First?
You do not need to rotate every crop with the same level of care. Start with the groups most likely to bring repeat trouble back into the same patch.
| Priority | Crop Groups | Why |
|---|---|---|
| High | Potatoes / outdoor tomatoes | blight, scab, repeat soil problems |
| High | Brassicas | clubroot and repeat pest pressure |
| High | Alliums | onion white rot risk and long persistence in soil |
| Medium | Squash, courgettes, pumpkins, sweetcorn, peppers | heavier feeders, but more flexible |
| Low | Lettuce, herbs, radish, spinach, quick salads | easy to fit around the main plan |
High-priority crops
- Potatoes and outdoor tomatoes: top of the list on most plots. They are close enough in family and disease logic to treat as one main rotation group.
- Brassicas: worth moving because repeat pressure builds faster than many beginners expect.
- Alliums: easy to forget, but worth rotating because their problems can hang around.
These are the crops to think about first when you are planning next season. If you only have time or space to rotate a few things properly, start here.
Lower-priority crops
- Squash, courgettes, pumpkins, sweetcorn, and peppers: better moved if you have the space, but not the first thing to panic about.
- Lettuce, herbs, radish, spinach, and quick salads: flexible filler crops. Fit them around the main plan.
In practice, this means you do not need to hold the whole plan up because a row of lettuce ended up where beetroot was last year. Keep your attention on the crop groups that are more likely to punish you for repeat planting.
What this looks like on a real plot
- move the potatoes / tomatoes bed first
- decide where the brassicas will go next
- make sure alliums are not going back into the same patch
- then fill the remaining gaps with the more flexible crops
That order makes planning much easier, especially on mixed or awkward plots.
In practice, the rule is simple: rotate the high-risk groups first, keep the rest flexible, and do not build the whole plan around lettuce. That is what makes crop rotation feel manageable on a real allotment.
Why Rotation Matters: Disease, Pests And Soil Pressure
This is the bit that really matters. Crop rotation is not there to make the plan look tidy. It helps stop the same problems building up in the same patch of soil.
What rotation helps with
- disease build-up in the same crop family
- repeat pest pressure on the same bed
- general soil pressure from growing similar crops in the same place too often
The main groups to watch
- Potatoes and outdoor tomatoes: the clearest example. They are close enough in family and disease risk to treat as one main rotation problem on a simple allotment. If a bed has already had potato trouble, or blight is part of the picture, putting one straight after the other is usually not worth the gamble.
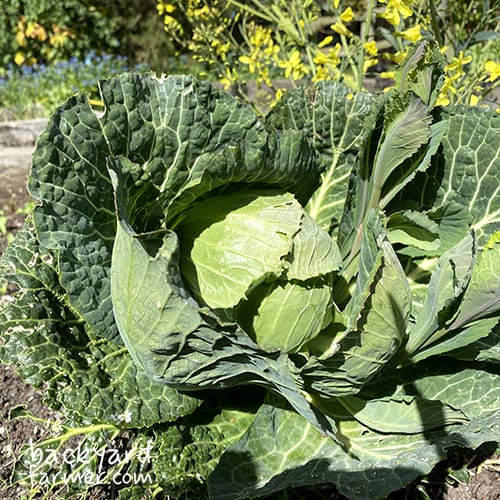
- Brassicas: worth moving because they can quickly become harder work in the same ground. Even when nothing dramatic is happening, repeat pest and soil pressure can make a brassica patch feel less reliable over time.
- Alliums: easy to overlook, but still worth rotating because their problems can linger. They are often the group people forget until they run into trouble and wish they had moved them sooner.
You are not doing this to satisfy a gardening rulebook. You are trying to avoid putting the same crop-family pressure back into the same patch every year.
Keep it simple:
- repeating the same crop family raises the chance of repeat problems
- moving the main crop groups spreads that risk around the plot
- that matters far more than rotating every last crop perfectly
In other words, crop rotation is less about perfection and more about not making the same avoidable mistake in the same bit of soil two years running.
Rotation Vs Feeding The Soil
Crop rotation helps, but it is not the whole story. A lot of what gets blamed on rotation is really a soil-feeding issue.
What good soil care does
- puts nutrients back into the bed
- improves soil structure
- helps the ground hold moisture
- keeps beds easier to work year after year
If you are adding compost, mulch, rotted manure, leaf mould, or other organic matter regularly, you are already doing a big part of what keeps an allotment productive. That is why many growers can be fairly relaxed with lower-risk crops without the whole plot suddenly going downhill.
What rotation will not fix on its own
- hungry soil
- dry, tired beds
- low organic matter
- poor fertility caused by not feeding the ground properly
If a bed is worn out because it has not been fed well, simply moving the crops around will not solve that on its own. Rotation helps spread pressure across the plot, but it does not replace the basic job of looking after the soil.
Where rotation still matters most
- brassicas: worth moving because repeat disease and pest pressure can build
- alliums: worth moving because their problems can linger
- potatoes and outdoor tomatoes: still the main group to watch for repeat issues
This is the key distinction. Compost can help with fertility, moisture, and structure, but it does not magically deal with the kinds of repeat problems that make brassicas, alliums, and potatoes harder in the same patch.
In real life, you need both: feed the soil to keep the whole plot productive, and rotate the main problem crops to stop repeat pressure building up in one place. Good soil care keeps the allotment growing well overall, while crop rotation helps you avoid repeating the same mistake with the crop groups most likely to punish you for it.
How To Make Crop Rotation Work On A Real Allotment
Most allotments are not four neat, matching beds. That is normal. Use rotation as a guide, not a rigid diagram.
What real plots usually look like
- uneven beds or one long mixed bed
- fixed areas such as strawberries, rhubarb, asparagus, herbs, and fruit bushes
- a brassica cage that stays put for practical reasons
- quick crops tucked into gaps around the main planting
A real plot might have a fruit bed that never moves, a netted brassica bed that stays where the frame already is, and one long bed that gets split between onions at one end and beetroot at the other. That is still workable. Crop rotation does not only work on tidy demonstration plots.
What to place first
Start with the groups that matter most:
- potatoes and outdoor tomatoes
- brassicas
- alliums
If those are moving, you are already doing the important part. Once they are placed, it becomes much easier to decide where the rest can go.
Where you can stay flexible
- lettuce, radish, herbs, and quick salads can fill spare spaces
- mixed beds are fine if the main crop group is still clear
- long or awkward beds can be split into zones instead of treated as one block
For example, one half of a long bed might count as the brassica area this year, while the other half takes legumes or roots. Next year, you move the main group along, even if the bed itself stays in the same place.
In practice, that usually means rotating the main crop groups around fixed features, not worrying about every filler crop, and aiming to avoid obvious repeats rather than create a perfect diagram. On most allotments, the job is not to make the plan look neat on paper. It is to stop the main repeat-problem crops landing back in the same patch while still making the plot usable.
That same approach becomes even more useful when space is tight.
Crop Rotation For Small Allotments And Raised Beds
Small plots make rotation tighter, but the same logic still holds: keep the main problem crop groups moving where you can.
If you only have 2 or 3 beds
- do not force a tidy 4-bed system onto a space that will not take it
- prioritise potatoes and outdoor tomatoes, brassicas, and alliums
- fit lower-risk crops around them afterwards
If those high-risk groups are moving, you are already doing the part that matters most.
Use sections, not just whole beds
- split a bed into zones if needed
- move the main crop group to a different section next year
- treat each zone as part of the rotation
That works well for raised beds, awkward plots, and long narrow spaces where a full bed-by-bed plan does not really fit.
A small setup might be two raised beds and a few containers, or three narrow beds with one split in half. In that kind of space, the goal is not to make the plan look perfect. It is to stop the same high-risk crop groups landing back in exactly the same patch.
When a 3-year rotation makes sense
A 3-year rotation is often more realistic on smaller plots. It is not as roomy as a 4-year plan, but it still helps you avoid the obvious repeats with the crops that matter most.
If space is really limited, it is usually better to follow a simple 3-part plan properly than force a 4-year rotation that becomes too awkward to stick to.
Keep the priorities the same
- move the main problem groups first
- use compost and organic matter to support the soil
- do not overthink salads and quick filler crops
The number of beds matters less than avoiding repeat trouble with the crop groups most likely to cause it.
When It Is OK To Break The Plan
No rotation plan survives a real season perfectly. Beds stay occupied longer than expected, one crop takes over more space, or you end up working around something fixed. That does not make the plan useless. It just means you keep the priorities straight.
Common reasons it slips
- you inherit a plot and do not know what was grown there before
- one bed is tied up by a fixed crop or structure
- you need more room for one crop this season
- the layout does not give every group a neat move
Most people hit one of these sooner or later. The point is not to abandon the plan the moment it gets awkward.
What to protect first
If the plan bends, try not to repeat these in the same patch:
- potatoes and outdoor tomatoes
- brassicas
- alliums
If those groups are still moving, even roughly, you are still protecting the plot from the main repeat problems.
How to handle a compromise
- move what you can
- avoid the most obvious repeats
- keep lower-risk crops flexible
- add compost or organic matter if a bed is reused sooner than planned
For example, if you need extra potato space one year, it is better to make one deliberate compromise than throw the whole rotation out and start planting by guesswork.
Make a rough note of what changed. It does not need to be fancy. Even a basic record makes it much easier to get the rotation back on track next year.
A workable plan with a couple of compromises is still far better than planting blind and repeating the same crop families in the same ground year after year.
Using The Allotment Planner To Track Rotation
The theory is the easy bit. The part people trip over is remembering what was where once a new season starts.
Why the planner helps
- gives you a clear record of each bed or zone
- makes the year-to-year movement obvious
- helps you avoid repeating the main crop groups by accident
- saves a lot of guesswork in spring
That matters more than most people expect. A lot of crop rotation mistakes do not happen because the grower never understood the system. They happen because last year’s layout is half-remembered by the time planting starts again.
The simplest way to use it
- map the beds or zones you actually have
- place the main crop groups first
- save that as Year 1
- duplicate the layout for Year 2
- move each main group on by one bed or zone
If you are using odd-shaped beds, a split bed, or fixed fruit areas, the planner still works. You are not trying to create a perfect show-plot. You are just giving yourself a clear visual record of where the main groups went.
What to place first
- legumes
- brassicas
- potatoes and outdoor tomatoes
- roots and alliums
Once those are in place, the rest of the plot is much easier to fill.
Why it works on real plots
- fixed fruit beds do not throw the whole plan off
- awkward beds can still be tracked as zones
- quick salad crops can sit around the main rotation without taking it over
- compromises are easier to spot and fix next year
For example, if one long bed is split between brassicas at one end and roots at the other, you can still map that clearly and move the main sections on next year. That is much easier than trying to remember it all from a vague sketch or from memory alone.
A visual plan makes crop rotation much easier to stick to. You are far less likely to repeat the same mistake when you can see last year and this year side by side.
FAQs
Yes, but keep it simple. Move potatoes and outdoor tomatoes, brassicas, and alliums where you can, then fit the rest around them.
Start with potatoes and outdoor tomatoes, brassicas, and alliums. Those are the groups most likely to cause repeat problems.
Best avoided, especially outdoors. They are close enough in family and disease risk to treat as one rotation group.
Yes. Brassicas after legumes is one of the classic moves in a simple crop rotation.
Yes, if possible. Alliums are worth moving because their problems can linger in the soil.
No. Compost helps fertility and soil health, but it does not replace rotation where disease and pest pressure are concerned.
Avoid obvious repeats with potatoes, brassicas, and alliums, then start keeping a simple record from now on.
A 4-year plan is ideal if you have the space. A 3-year plan is often more realistic on smaller plots.
Usually, yes. They are much more flexible than the main rotation groups.
Conclusion
You do not need a perfect crop rotation plan to make it worthwhile. In practice, a simple plan you can stick to is what pays off.
What matters most is fairly simple:
- move potatoes and outdoor tomatoes, brassicas, and alliums where you can
- keep the soil fed with compost and organic matter
- keep a simple note of what was grown where
That alone avoids a lot of the repeat problems that catch people out, especially once a plot has been in use for a few seasons.
Use the 4-year crop rotation as a guide, not a rulebook. Adapt it to the shape of your plot, work around fixed beds, and do not worry about making every last crop fit a perfect system. If the main problem crop groups are moving and the soil is being looked after, the rotation is doing its job.
A simple rotation you actually use is better than a perfect chart you abandon by June.