

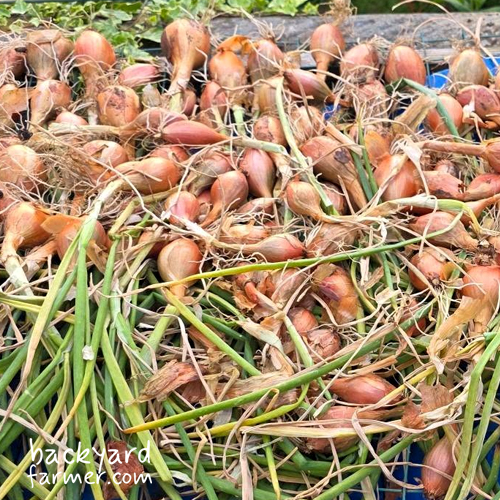
Shallots are probably my favourite onion to grow and eat, and they’re also one of the easiest to grow in the UK. Plant them 15–20cm apart in sunny, free-draining soil with the tip just showing. Spring is the safest planting time, although suitable varieties can also be planted in autumn on well-drained ground.
When to Plant Shallots in the UK
Spring is the safest and easiest time to plant shallot sets across most of the UK.
Most spring sets can go into the ground from around February to April, depending on the weather and your soil. On light, free-draining ground you can usually plant earlier. If your soil is heavy, cold or waterlogged, wait until conditions improve.
Suitable varieties can also be planted in autumn. This works best on free-draining soil where the sets won’t spend winter sitting in saturated ground.
If your allotment tends to stay wet through winter, spring planting is the safer option.
UK Shallot Planting Calendar
| When | What to Do |
|---|---|
| Autumn | Plant suitable overwintering sets on free-draining soil |
| February–April | Main period for spring sets |
| Late winter | Sow shallot seed indoors |
| Mid-spring | Sow seed outdoors |
| Mid- to late summer | Harvest |
Treat these as useful windows rather than fixed dates. Soil condition and weather matter more than planting on a particular day.
Shallot Sets or Seeds?
Most UK gardeners grow shallots from sets. They are quick, easy to plant and each set divides into a cluster of new bulbs.
Shallots can also be grown from seed. Seed is cheaper and less prone to bolting, but takes longer. Each seed produces one bulb, so several seeds are often sown together in modules to form a clump.
For beginners, sets are the simplest option.
Where to Grow Shallots
Choose a sunny position with fertile, free-draining soil.
Drainage is particularly important. Shallots cope well with cold once established, but they don’t like sitting in waterlogged ground.
Work in well-rotted compost or manure before planting if needed, but avoid fresh manure.
Shallots also work well in no-dig beds. Add compost to the surface and plant the sets through it into the soil below.
If your ground is particularly heavy or wet, wait until conditions improve or consider a raised bed or container.
How to Plant Shallot Sets
On prepared, weed-free ground:
- Plant the sets 15–20cm apart.
- Leave around 25–30cm between rows.
- Place each set pointed end upwards with just the tip showing above the soil.
- Firm the soil gently around it.
- Water after planting if conditions are dry.
This gives each developing cluster enough room to expand.
Birds pulling them out? Newly planted sets are sometimes pulled from loose soil before they have rooted. Push them back into position and temporarily cover the bed with fleece or netting until they are established.
Shallots don’t take up much space individually, but each set develops into a cluster, so it’s worth leaving enough room between plants rather than packing them in too tightly. If you’re working out how many will fit into a bed alongside onions, garlic or other crops, you can lay the spacing out first in our free UK Allotment Planner.
Can I Start Shallot Sets in Modules?
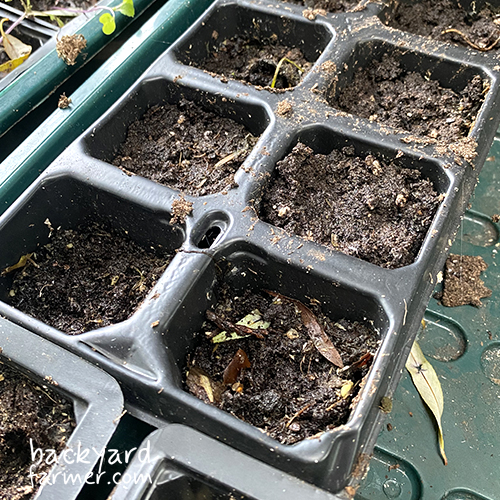
Yes. If your allotment is cold or waterlogged when your sets arrive, start them individually in modules or small pots and plant them out once rooted and conditions improve.
This can also help if birds repeatedly pull freshly planted sets from the ground.
How to Grow Shallots from Seed
For an early start, sow shallot seed indoors in late winter.
Sow around five or six seeds per module. Once they germinate, thin them to a small group of three or four seedlings and plant the whole clump out together in spring without separating the roots.
You can also direct sow outdoors in mid-spring. Sow around 1.5cm deep in rows approximately 25cm apart, then thin the seedlings to around 10cm apart as they develop.
Closer spacing can produce more bulbs, but the individual shallots will generally be smaller.
Caring for Shallots
Once established, shallots are relatively low maintenance.
Watering
Established shallots usually only need watering during prolonged dry weather.
Stop watering once the bulbs have swollen in summer, as late watering can reduce storage quality.
Container-grown shallots need checking more often because pots dry out faster than open ground.
Feeding
Shallots growing in fertile soil enriched with compost before planting rarely need much additional feeding.
Autumn-planted crops on poor soil may benefit from a light feed as growth resumes in late winter or early spring. Avoid excessive nitrogen later in the season.
Weeding
Keep the bed reasonably weed-free, as shallots don’t produce enough foliage to suppress competing weeds.
Weed carefully around developing clusters to avoid damaging the bulbs.
What to Expect as Shallots Grow
A single shallot set gradually divides into several individual bulbs.
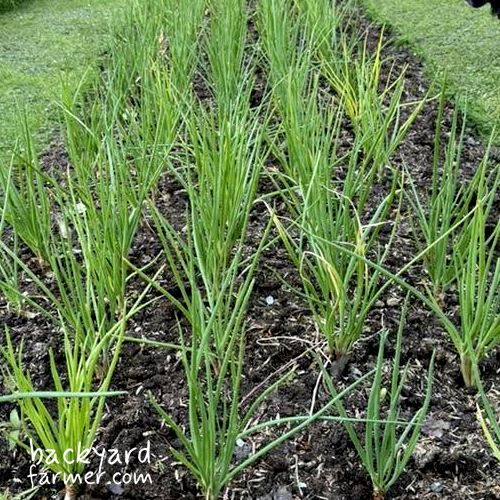
Don’t worry when the bulbs start pushing above the soil. This is normal as the cluster expands. Don’t earth them up or pile soil over the exposed bulbs.
The number and size of shallots in each cluster varies with variety and growing conditions. A cluster producing lots of bulbs may contain smaller individual shallots than one with fewer divisions.
Why Are My Shallots Flowering?
If a shallot sends up a flower stem before harvest, it has bolted.
Cold weather and other stresses can trigger bolting, particularly earlier in the growing season.
Remove the flower stalk as soon as you see it. Bolted shallots may not store as well, so use those bulbs first after harvest.
Heat-treated sets can reduce the risk, while seed-grown shallots are generally less prone to bolting.
When to Harvest Shallots
Harvest shallots when the foliage turns yellow and naturally falls over, usually from mid- to late summer.
Carefully loosen the soil and lift the whole cluster rather than pulling hard on the leaves.
If prolonged wet weather arrives once the bulbs are mature, lifting them slightly early can be better than leaving ripe shallots sitting in saturated ground.
How to Dry and Store Shallots
Spread lifted shallots somewhere dry and well ventilated for around two weeks. If the weather is reliably dry they can cure outside; otherwise move them under cover.
Once the foliage and outer skins are completely dry, gently separate the bulbs and put any damaged, soft or bolted shallots aside to use first.
Store sound bulbs somewhere light, cool, dry and well ventilated. Mesh bags, open trays or crates all work well.
Avoid dark storage, which can encourage sprouting.
Properly cured shallots can keep for six to eight months or longer, although storage life varies between varieties.
Common Shallot Problems
Shallots are generally trouble-free, but a few problems are worth recognising.
Birds Pulling Up Sets
Birds sometimes pull newly planted sets from loose soil.
Push them back into position and temporarily cover the bed with fleece or netting until they have rooted.
Shallots Rotting
Rot is most likely when shallots spend too long in wet conditions.
Poor drainage, waterlogged winter soil, unnecessary watering and leaving mature bulbs sitting in saturated ground can all contribute.
Improve drainage and avoid overwatering, particularly as the bulbs mature.
Allium Leaf Miner
Allium leaf miner attacks onions, leeks, garlic and shallots.
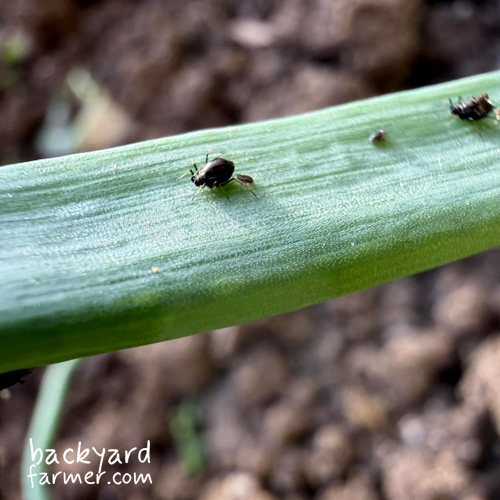
Adult flies have two main activity periods in the UK, during spring and again in autumn. Their larvae tunnel into leaves and bulbs, causing distorted growth and increasing the risk of rotting.
Where it is a regular problem, covering crops with insect-proof mesh during adult activity is the most practical protection.
Onion White Rot
White rot is one of the more serious diseases affecting shallots and other alliums.
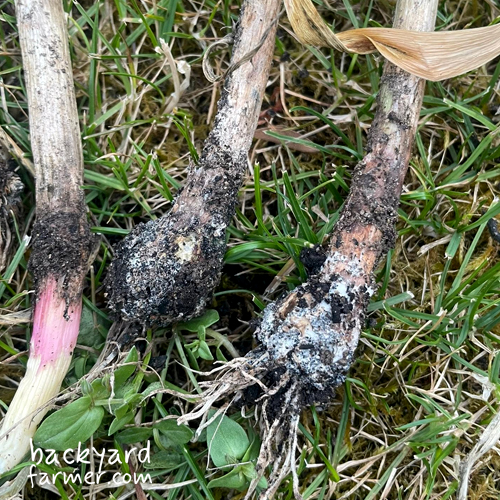
Affected plants may yellow and collapse, with white fungal growth appearing around the roots and base of the bulb.
The disease can survive in contaminated soil for many years, so a normal short crop rotation will not solve an established problem.
Avoid moving contaminated soil around the allotment on tools, boots or plants, and avoid planting susceptible alliums into known infected ground.
Downy Mildew
Downy mildew is more likely during cool, damp and humid weather.
Good spacing, airflow and drainage help reduce the risk. Avoid repeatedly wetting the foliage and remove badly affected material.
Best Shallot Varieties for UK Growing
The best shallot depends partly on when you want to plant and whether you prefer traditional round bulbs or longer French-style shallots.
These three cover the main options for UK growers:
| Variety | Best For | Planting | Why Choose It |
|---|---|---|---|
| Golden Gourmet AGM | General spring growing | Spring | Reliable, good yield and a traditional round shallot |
| Jermor | Autumn planting | September–November | Long French type with good flavour and storage |
| Zebrune AGM | Growing from seed | Sow late winter–spring | Productive long bulbs with good bolting resistance |
Golden Gourmet AGM
Golden Gourmet is a strong choice if you simply want a reliable spring-planted shallot.
It produces traditional round bulbs and can form clusters of up to around seven shallots from each set. It’s a good general-purpose option for allotment beds and vegetable plots.
Jermor
Jermor is a long, copper-skinned French shallot suited to autumn planting.
It can be planted from September to November and produces clusters of elongated bulbs with good flavour and storage qualities.
If you want to overwinter shallots, this is the most suitable of the three.
Zebrune AGM
BYF Pick: Zebrune AGM
A productive, long shallot with excellent flavour and good resistance to bolting. It takes a little more effort because it’s grown from seed, but it’s a strong choice if you want reliable plants and a good eating crop.
Frequently Asked Questions
One shallot set normally divides to produce several new bulbs.
The exact number depends on the variety and growing conditions, although some varieties can produce clusters of six or seven or more.
No.
Spring-planted shallot sets divide normally without needing a period of frost. Some varieties can be overwintered, but cold weather isn’t required simply to make the bulb split.
Yes.
Use a container at least around 30cm wide and deep with good drainage and a peat-free soil-based compost.
Pots dry out faster than open ground, so check them more regularly during warm weather.
They may grow, but purpose-sold sets are the safer choice because you know the variety, planting season and quality of the stock.
For a reliable crop, use sets or seed sold specifically for growing.