Allotment Planning UK: A Beginner’s Guide

This post may contain affiliate links, which means I earn a small commission at no extra cost to you.

Table of Contents (Quick Nav)

Introduction

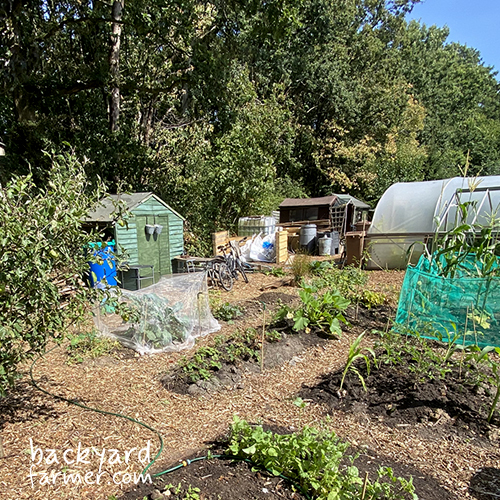
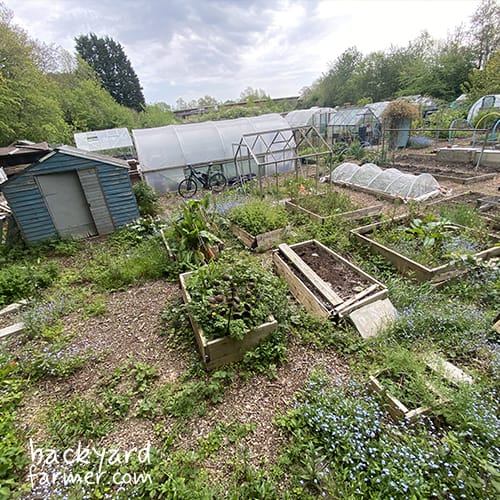
Planning your first allotment can feel overwhelming at first. When you’re standing on a bare plot, it can be hard to picture where the beds, paths, crops, compost, water storage, and sheds should go. Let alone if you have inherited an overgrown plot!

The good news is that you don’t need a perfect allotment plan on day one. You just need a simple layout you can manage, improve, and adapt as you learn the plot.

In this guide, you’ll learn how to:

square foot gardening
  • Check your allotment rules before adding permanent features
  • Assess your plot for sun, shade, wind, drainage, and access
  • Choose a beginner-friendly allotment layout
  • Plan beds, paths, compost, water, and crops in the right order
  • Avoid the most common allotment planning mistakes
  • Turn your ideas into a practical growing plan

Want to plan as you read? Open the free Allotment Planner and sketch your plot alongside this guide. You can test different layouts, add beds and paths, then export your finished allotment plan as a PDF or PNG to take with you to the plot.

Let’s start with the basics and build your allotment from the ground up.


What Is Allotment Planning?

Allotment planning is the process of deciding how your plot will work before you start planting. Instead of putting crops wherever there’s a gap, you map out the main parts of the plot first: beds, paths, crops, compost, water, storage, permanent features, and seasonal growing space.

A good allotment plan helps you use the space better, avoid awkward access problems, and keep the plot manageable through the year. It also helps you think beyond spring, so you have room for summer crops, autumn clearing, winter jobs, and next year’s rotation.

For most beginners, the best allotment layout is not the most impressive one. It’s the one you can actually maintain. Start simple, leave room to adapt, and build the plot up as you learn how the space behaves.


How to Plan an Allotment Step by Step

Learning how to plan an allotment becomes much easier when you work through it in the right order. Instead of starting with seed packets, start with the plot itself. Once you understand the space, the rules, the fixed features, and the access routes, the crops are much easier to place.

A good beginner allotment plan does not need to be perfect. It just needs to be practical, realistic, and easy enough to maintain while you learn the plot.


1. Assess Your Plot

Before sketching an allotment layout or choosing crops, take a proper look at the space in front of you. Every plot has its own quirks, and noticing them early saves a lot of frustration later.

Key things to look for:

  • Sun and shade: Watch which areas get full sun and which stay shaded by trees, fences, sheds, or nearby plots.
  • Soil type: Clay, loam, sandy, or mixed soil will all behave differently when it comes to drainage and plant growth.
  • Drainage: Look for areas that stay wet after rain or dry out quickly in warm weather.
  • Wind exposure: Open, windy plots may need simple windbreaks or sturdier plant supports.
  • Water access: Check where the nearest tap is, and think about where water butts or storage containers could go.
  • Existing plants and structures: Note any trees, fruit bushes, old beds, sheds, paths, or perennial crops already in place.

A relaxed 10–15 minute walk around your plot gives you enough information to start planning sensibly.


2. Check Your Allotment Rules First

Before adding sheds, greenhouses, polytunnels, ponds, fruit trees, fencing, bonfires, livestock areas, or large water storage, check your allotment tenancy agreement and site rules.

Every allotment site is slightly different. Some sites allow sheds and greenhouses, while others restrict their size, position, materials, or height. You may also find rules around bonfires, water use, composting, waste, pesticides, paths, boundaries, livestock, bees, fruit trees, and how much of the plot must be actively cultivated.

Common allotment rules to check before planning your layout include:

  • How much of the plot must be actively cultivated
  • Whether paths beside your plot are your responsibility
  • Whether sheds, greenhouses, polytunnels, fences, ponds, or fruit trees need approval
  • Maximum sizes, positions, or materials for structures
  • Rules around compost bins, manure, green waste, and non-compostable rubbish
  • Whether bonfires are allowed, and at what times of year
  • Water use, hosepipe rules, and whether water is guaranteed year-round
  • Whether livestock, bees, dogs, or other animals are allowed
  • Restrictions on carpets, hard landscaping, chemicals, weedkillers, or stored materials
  • Rules around shared access, boundaries, gates, and neighbouring plots

Good places to check include:

This might sound like the boring bit, but it can save you a lot of hassle. It is much easier to check first than to build something you later have to move.


3. Choose Your Growing Style

Your growing style affects your whole allotment layout, including bed shape, path width, maintenance, crop choices, and how much time the plot needs each week.

Popular beginner-friendly options include:

  • No-dig beds: A low-disturbance approach that can reduce weeding and improve soil structure over time.
  • Traditional rows: Simple, familiar, and useful for larger areas or crops such as potatoes, onions, and brassicas.
  • Raised beds: Tidy, easy to organise, and helpful on poor or heavy soil.
  • Mixed beds: Useful if you want a more organic, wildlife-friendly, companion-style layout.

If you’re unsure, keep the first version simple. You can always adapt your allotment plan later as you learn what works.


4. Plan Fixed Features First

Fixed features should go into your allotment plan before annual crops. Crops can move each year, but sheds, compost bays, fruit bushes, greenhouses, main paths, and water storage are much harder to shift once the plot is in use.

Start by placing:

  • Shed, tool store, or lockable storage box
  • Compost bays or green waste area
  • Water butts, barrels, or IBC tanks
  • Greenhouse, mini greenhouse, or polytunnel
  • Fruit bushes, rhubarb, asparagus, or other perennial crops
  • Main paths and access routes
  • Wildlife area, pond, or pollinator strip if allowed

As a simple rule, plan in this order:

fixed features → paths → beds → perennials → annual crops

This keeps the layout practical and stops permanent features from blocking access, shading crops, or getting in the way of future rotation.


5. Plan Your Paths and Access

Strong access is one of the most important parts of a good allotment layout. Without clear paths, simple jobs like watering, harvesting, weeding, and moving compost become much harder than they need to be.

General path guidelines:

  • 60–70 cm wide: Comfortable for most day-to-day jobs.
  • Wider main paths: Useful if you use a wheelbarrow, trolley, or mobility aid.
  • Straight or curved: Choose what suits the plot, but keep routes simple.
  • Woodchip, mulch, slabs, or grass: Pick a surface you can maintain easily.

Try to avoid creating beds you can only reach by stepping on the soil. If you can reach your crops from the path, your beds stay healthier and the plot is easier to work.


6. Choose What to Grow

Once the structure is clear, you can start choosing crops. This is the exciting part, but it is also where beginners often try to grow too much, too soon.

The simplest rule is this: grow what you actually eat, and start with reliable crops. There’s no point filling half the plot with vegetables you rarely cook with, especially in your first year.

Good beginner crops include:

You don’t need to grow everything on that list. Choose a handful of crops you know you’ll use, then build from there once you understand the plot better.

A simple crop rotation principle is to avoid planting the same crop family in the same spot every year. This helps reduce pest and disease problems over time. However, don’t worry about creating a perfect rotation system straight away. In your first year, focus on getting a few beds productive, learning how the plot behaves, and growing food you’ll genuinely enjoy harvesting.

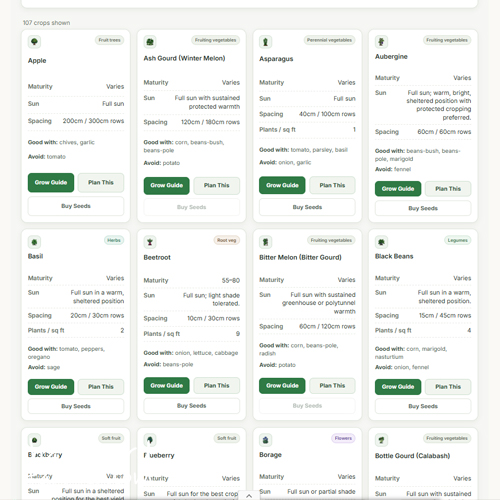
For more detailed crop choices, use the Allotment Planner, your plant library, and individual growing guides to check spacing, timing, and what works well together.


7. Turn Your Plan Into a Layout

This is where everything comes together into a clear allotment layout. By this stage, your plan should include:

place crops on grid
  • Any site rules or restrictions you need to follow
  • Fixed features such as compost, water, storage, fruit, or structures
  • Main paths and access points
  • Beds, whether no-dig, raised, or traditional
  • Perennial crops and fruit areas
  • Annual vegetable growing space
  • Optional wildlife-friendly zones

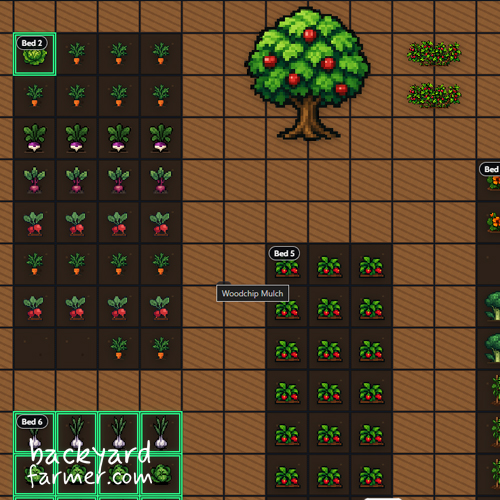
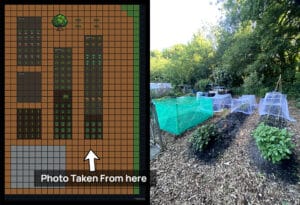
You can sketch this on paper, but a visual tool makes the process easier. With The Allotment Planner, you can set up your plot size, add beds and paths, place key features, test different layouts, and export your finished plan as a PDF or PNG to use at the allotment.

The aim is not to create a flawless design. The aim is to build a simple, realistic plan that gives you a clear starting point and leaves room to adapt as your allotment develops.


Simple Allotment Layout Ideas for Beginners

Choosing the right allotment layout is one of the most important steps in creating a productive, easy-to-manage plot. You don’t need anything complicated at the start. A simple layout with clear beds, sensible paths, water access, compost space, and room to move is usually far better than an ambitious design that becomes hard to maintain.

Use these ideas as starting points. You can copy one directly, adapt it to suit your plot, or mix a few together inside The Allotment Planner.

Layout ideaBest forWhy it works
Four-bed rotation layoutBeginners and mixed veg growersSimple crop rotation and clear structure
No-dig grid layoutLow-maintenance growersFewer weeds and better soil structure
Half-plot layoutNew growers and busy peopleManageable and not overwhelming
Raised bed gridTidy or accessible plotsClear beds, easy paths and defined growing areas
Wildlife-friendly layoutOrganic growers and pollinator-friendly plotsSupports pollinators and natural pest control
Perimeter bed layoutNarrow or awkward plotsKeeps the middle open for access, storage or seating

If you’re completely new, start with the layout that feels easiest to maintain, not the one that looks most impressive. A four-bed or half-plot layout is often the safest starting point because it gives you structure without too much pressure.

If your soil is poor, heavy, or weedy, a no-dig grid or raised bed layout may make the first year easier. If you want a more relaxed organic plot, build in wildlife-friendly areas from the start, such as a pollinator strip, small pond, log pile, or flower border.

You can copy any of these layouts into The Allotment Planner, adjust the bed sizes, add your paths, place compost and water storage, then export the finished version as a PDF or PNG to take with you to the plot.


Optional Features to Add to Your Allotment Plan

Once the basic layout is in place, you can start thinking about the extra features that make the plot easier, more productive, or more enjoyable to use. You don’t need all of these in year one. In fact, it’s usually better to add them gradually as you learn how the allotment works.

Useful features to consider include:

  • Compost bay: Keeps green waste organised and gives you free compost for future beds.
  • Water butt or IBC: Helps you store rainwater and makes summer watering easier.
  • Small shed or lockable storage box: Gives you somewhere to keep tools, gloves, netting, canes, and other essentials.
  • Greenhouse or polytunnel: Extends the growing season and gives you more options for tomatoes, cucumbers, chillies, seedlings, and tender crops.
  • Perennial fruit area: Creates a long-term home for rhubarb, strawberries, raspberries, currants, gooseberries, or other fruit crops.
  • Wildlife strip: Adds flowers, shelter, and habitat for pollinators and beneficial insects.
  • Small seating or work area: Gives you somewhere to sort harvests, fill seed trays, make notes, or simply enjoy the plot.
  • Woodchip paths: Help suppress weeds, improve access, and make the plot easier to use in wet weather.
  • Herb bed: Keeps useful herbs close to hand and adds flowers for pollinators.
  • Tool hooks, crates, or shelves: Make a small shed or storage box much more useful.

Before adding permanent features, check your site rules again. Some allotments restrict sheds, greenhouses, ponds, fencing, trees, livestock, bonfires, or the materials you can use.

The easiest approach is to plan the full plot now, then build it in stages. Start with the essentials — paths, beds, compost, and water — then add extras once you know what you actually need.

You don’t need to build the dream plot straight away. On most beginner allotments, compost, water, paths, and a few reliable beds matter far more than fancy extras. Add the rest when the plot starts telling you what it needs.


Common Allotment Planning Mistakes to Avoid

Most beginner allotment problems come from doing too much too quickly, planting before planning, or forgetting the practical things that make a plot easy to work. The good news is that these mistakes are easy to avoid once you know what to look for.

Trying to Do the Whole Plot at Once

A full allotment can feel exciting at first, but it can also become overwhelming fast. If you try to clear, dig, plant, edge, path, and crop the whole plot in one go, it is easy to burn out before the season gets going.

Fix: Plan the whole plot, but only fully develop part of it in year one. Cover or mulch the rest, then expand once you have a rhythm.

Overcrowding the Plot

It’s tempting to squeeze in every crop you fancy, but overcrowding leads to poor airflow, harder harvesting, more pest and disease pressure, and smaller crops.

Fix: Start with fewer crops and give them proper spacing. A slightly emptier layout is much easier to manage than one where every bed is crammed from edge to edge.

Ignoring Pathways

Paths might seem like wasted growing space, but they are what make the plot usable. Without clear access, you end up stepping on beds, compacting soil, stretching awkwardly, and making simple jobs harder.

Fix: Build paths into the plan from the start. Aim for around 60–70 cm for regular paths, and make main routes wider if you use a wheelbarrow, trolley, or mobility aid.

Planting Without a Plan

Planting on the fly can work for a few crops, but it quickly causes problems on a full plot. You may end up with awkward shading, poor crop rotation, blocked access, or permanent crops in the wrong place.

Fix: Sketch a quick allotment plan before planting. It does not need to be perfect, but it should show your beds, paths, compost, water, storage, permanent crops, and main growing areas.

Forgetting Perennials

Perennial crops like rhubarb, asparagus, herbs, strawberries, raspberries, currants, and fruit bushes stay in place for years. If you plant them randomly, they can get in the way of future beds, paths, or crop rotation.

Fix: Give perennial crops a dedicated area from the start. Borders, corners, and edges often work well because they keep long-term plants out of the annual veg rotation.

Poor Water Management

Water becomes a much bigger issue once crops are established and the weather warms up. Beds placed far from the tap, no water storage, or relying only on communal taps can make summer care much harder.

Fix: Plan water early. Add water butts, barrels, or IBCs where allowed, and keep thirsty crops reasonably close to your water source.

Neglecting Compost and Waste Areas

An allotment produces a lot of green waste. Without a compost bay or waste area, weeds, trimmings, old crops, and spent plants quickly pile up and make the plot feel messy.

Fix: Add a compost area near the start of your layout. Even a simple bay or heap helps keep the plot organised and gives you useful compost for future beds.

Ignoring Site Rules

It is frustrating to plan a shed, greenhouse, pond, fruit tree, fence, or bonfire area only to discover it is not allowed on your site. Every allotment has its own rules, and they can affect your layout more than you expect.

Fix: Check your tenancy agreement, local council guidance, allotment association rules, or site secretary before adding permanent features. It is much easier to adjust the plan early than to move something later.

Avoiding these mistakes will make your first year much smoother. Keep the layout simple, build in stages, and give yourself room to learn the plot before trying to do everything at once.


Plan Your Allotment Around the Seasons

A good allotment layout should work beyond the first rush of spring planting. Before you fill every bed, think about how the plot will change through the year. This helps you leave enough space for sowing, planting, harvesting, clearing, composting, watering, and preparing for the next season.

Spring

Spring is when most allotments start moving quickly again. Prepare beds, top up compost, sow hardy crops, plant potatoes, set up supports, and get water storage ready before the weather warms up.

This is also a good time to check whether your paths, compost area, and main beds are working properly. If the plot feels awkward in spring, it will usually feel even harder to manage in summer.

Summer

Summer is when access, watering, and spacing really matter. Water deeply, harvest regularly, support climbing crops, mulch beds, and succession sow quick crops where space opens up.

Keep thirsty crops reasonably close to your water source where possible. Crops like courgettes, beans, tomatoes, cucumbers, squash, and leafy greens can need regular attention during dry spells, so a practical layout saves a lot of effort.

Autumn

Autumn is the time to clear spent crops, add compost, plant garlic and overwintering onions, and protect bare soil. It is also a useful moment to look back at the year and notice what worked.

Ask yourself which beds were easy to manage, which areas became awkward, and whether your compost, water, and paths were in the right places. These notes can shape next year’s allotment plan.

Winter

Winter is quieter, but it is still useful for planning. Repair paths, prune fruit, clean tools, tidy structures, plan crop rotation, order seeds, and update your layout before the next growing season begins.

A winter review does not need to be complicated. Even a few notes about what grew well, what failed, and what you want to move next year can make your next allotment plan much stronger.

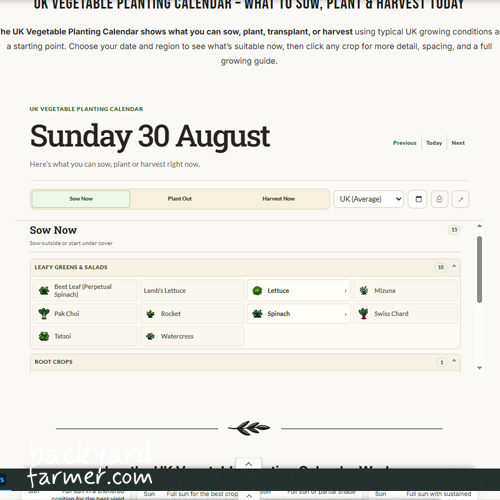
For detailed crop timing, use your UK planting calendar and UK harvest calendar alongside your allotment layout. This guide gives you the structure, while the calendars help you decide what to sow, plant, and harvest each month.


Use the Free Allotment Planner

Once you’ve assessed your plot, checked the rules, chosen a simple layout, and thought about crops, the next step is to turn those ideas into a plan you can actually use.

The free Allotment Planner helps you map your plot visually, test different bed and path layouts, place key features, and work out where crops might go before you start digging. This is especially useful for beginners because it removes a lot of guesswork and lets you adjust the layout before you commit to it on the ground.

You can use it to plan the basics first, then refine the details as your allotment develops.

A simple workflow looks like this:

  1. Open the free Allotment Planner.
  2. Set your plot size.
  3. Add fixed features first, such as compost, water storage, a shed, greenhouse, fruit area, or wildlife strip.
  4. Add your paths and beds.
  5. Place your crops where they make sense.
  6. Save or export your finished allotment layout as a PNG or PDF.

This gives you a clear plan to take to the plot, whether you’re marking out beds, checking path widths, planning crop rotation, or simply trying to visualise how everything fits together.

Your first version does not need to be perfect. Treat it as a working plan. Build the essentials first, learn how the plot behaves, then update your layout as the allotment grows with you.


Final Allotment Planning Checklist

Before you start building beds or planting crops, run through this quick checklist. It gives you a simple final check and helps make sure your allotment plan is practical, realistic, and ready to use.

  • Have you checked your tenancy agreement and site rules?
  • Have you noted the main areas of sun, shade, wind, and drainage?
  • Have you planned fixed features before annual crops?
  • Are your paths wide enough to work comfortably?
  • Have you included compost and water storage?
  • Have you chosen crops you actually eat?
  • Have you left room for perennials or fruit?
  • Have you kept year one manageable?
  • Have you planned around the seasons?
  • Have you saved or exported your allotment plan?

If you can answer yes to most of these, you’ve got a solid starting point. The plan will still change as you learn the plot, but that’s normal. The important thing is having a clear layout you can build from.


Final Thoughts

Your first allotment plan does not need to be perfect. It just needs to give you a clear, realistic starting point that helps you avoid the biggest mistakes and begin the plot with confidence.

Start simple, build the essentials first, and let the allotment improve year by year. As you learn where the sun falls, where water collects, which crops thrive, and how much time you can realistically give the plot, your layout will naturally change.

When you’re ready, open the free Allotment Planner, turn your ideas into a real layout, and export your plan as a PNG or PDF to take with you to the plot.

Facebook
X
Pinterest
Reddit

Related Articles

Scroll to Top